Measuring the plasma
Step 3
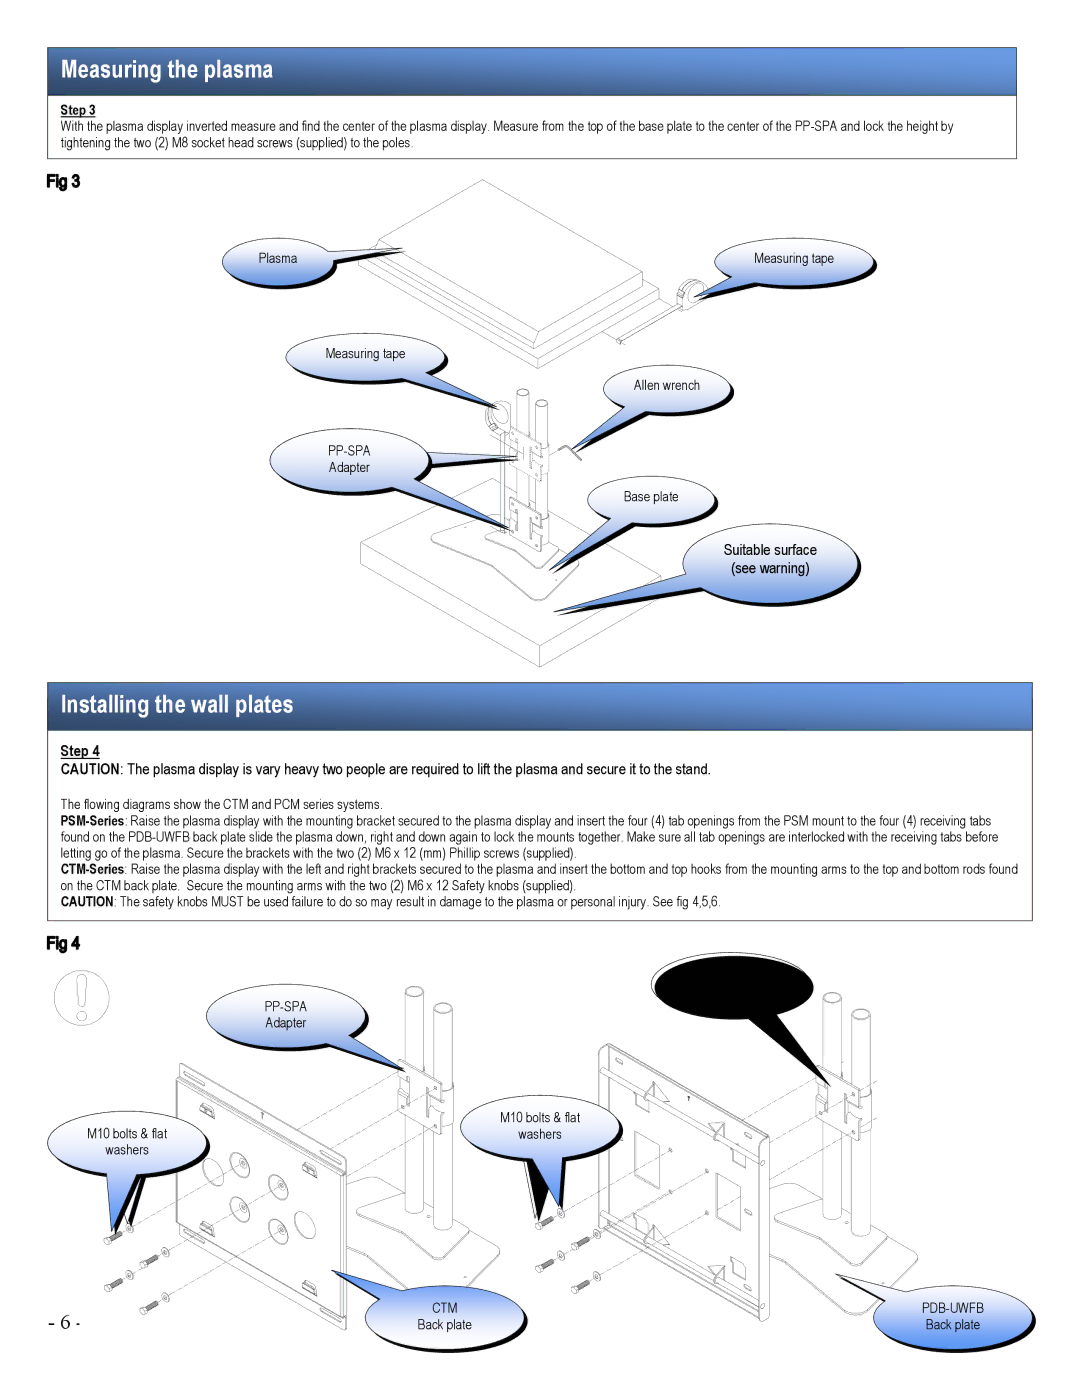
With the plasma display inverted measure and find the center of the plasma display. Measure from the top of the base plate to the center of the PP-SPA and lock the height by tightening the two (2) M8 socket head screws (supplied) to the poles.
Measuring tape
Allen wrench
PP-SPA
Adapter
Base plate
Suitable surface
(see warning)
Installing the wall plates
Step 4
CAUTION: The plasma display is vary heavy two people are required to lift the plasma and secure it to the stand.
The flowing diagrams show the CTM and PCM series systems.
PSM-Series: Raise the plasma display with the mounting bracket secured to the plasma display and insert the four (4) tab openings from the PSM mount to the four (4) receiving tabs found on the PDB-UWFB back plate slide the plasma down, right and down again to lock the mounts together. Make sure all tab openings are interlocked with the receiving tabs before letting go of the plasma. Secure the brackets with the two (2) M6 x 12 (mm) Phillip screws (supplied).
CTM-Series: Raise the plasma display with the left and right brackets secured to the plasma and insert the bottom and top hooks from the mounting arms to the top and bottom rods found on the CTM back plate. Secure the mounting arms with the two (2) M6 x 12 Safety knobs (supplied).
CAUTION: The safety knobs MUST be used failure to do so may result in damage to the plasma or personal injury. See fig 4,5,6.
PP-SPA
Adapter
PP-SPA
Adapter
M10 bolts & flat
M10 bolts & flatwashers washers
- 6 - | CTM | PDB-UWFB |
Back plate | Back plate |