| V I I . C A R E A N D M A I N T E N A N C E | ||
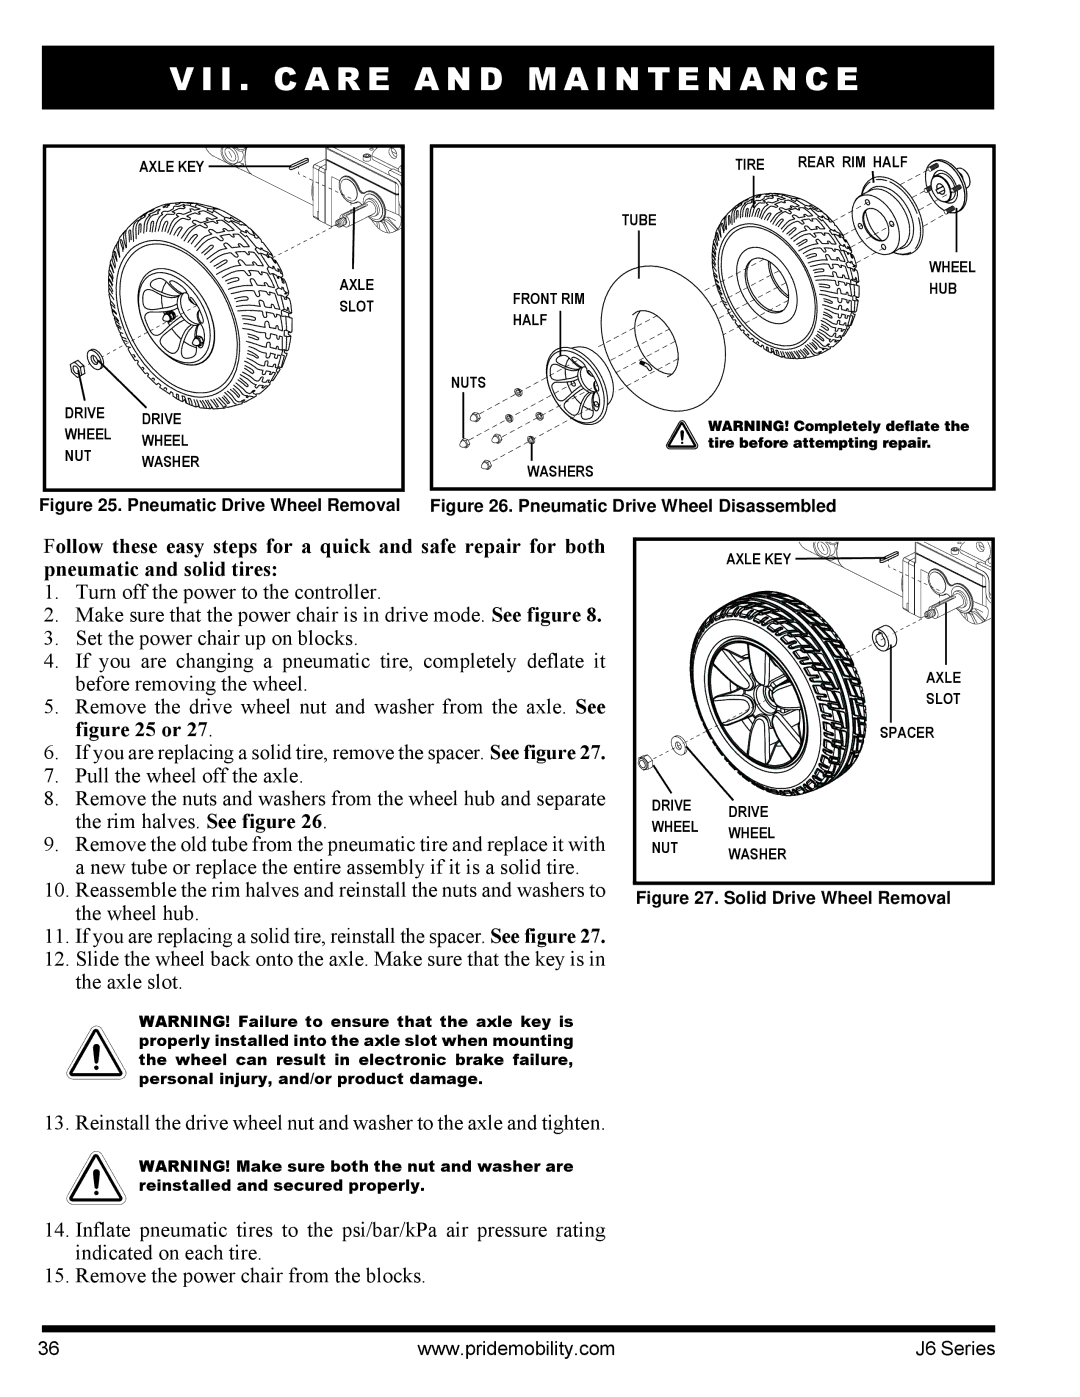
| AXLE KEY | TIRE | REAR RIM HALF |
|
| TUBE |
|
| AXLE |
| WHEEL |
| FRONT RIM | HUB | |
| SLOT |
| |
| HALF |
| |
|
|
| |
|
| NUTS |
|
DRIVE | DRIVE |
|
|
WHEEL |
|
| |
WHEEL |
|
| |
NUT |
|
| |
WASHER | WASHERS |
| |
|
| ||
|
|
| |
Figure 25. Pneumatic Drive Wheel Removal Figure 26. Pneumatic Drive Wheel Disassembled
Follow these easy steps for a quick and safe repair for both pneumatic and solid tires:
1.Turn off the power to the controller.
2.Make sure that the power chair is in drive mode. See figure 8.
3.Set the power chair up on blocks.
4.If you are changing a pneumatic tire, completely deflate it before removing the wheel.
5.Remove the drive wheel nut and washer from the axle. See figure 25 or 27.
6.If you are replacing a solid tire, remove the spacer. See figure 27.
7.Pull the wheel off the axle.
8.Remove the nuts and washers from the wheel hub and separate the rim halves. See figure 26.
9.Remove the old tube from the pneumatic tire and replace it with a new tube or replace the entire assembly if it is a solid tire.
10.Reassemble the rim halves and reinstall the nuts and washers to the wheel hub.
11.If you are replacing a solid tire, reinstall the spacer. See figure 27.
12.Slide the wheel back onto the axle. Make sure that the key is in the axle slot.
| AXLE KEY | |
| AXLE | |
| SLOT | |
| SPACER | |
DRIVE | DRIVE | |
WHEEL | ||
WHEEL | ||
NUT | ||
WASHER | ||
|
Figure 27. Solid Drive Wheel Removal
WARNING! Failure to ensure that the axle key is properly installed into the axle slot when mounting the wheel can result in electronic brake failure, personal injury, and/or product damage.
13. Reinstall the drive wheel nut and washer to the axle and tighten.
WARNING! Make sure both the nut and washer are reinstalled and secured properly.
14.Inflate pneumatic tires to the psi/bar/kPa air pressure rating indicated on each tire.
15.Remove the power chair from the blocks.
36 | www.pridemobility.com | J6 Series |