
BravoTM specifications
Primera Technology BravoTM is a cutting-edge disc publishing solution designed to cater to a wide range of users, from small businesses to large organizations. It stands out in the market due to its advanced features, high-quality output, and user-friendly design.One of the key features of the BravoTM system is its ability to print directly onto various disc types, including CDs, DVDs, and Blu-ray discs. This flexibility allows users to create professional-grade media that can be utilized for everything from presentations and promotional materials to personal projects. The system supports both inkjet and thermal printing, providing options that suit different needs and preferences.
The BravoTM incorporates Primera's innovative technology, such as its patented Autoribbon system. This feature automatically detects and changes ink cartridges, minimizing downtime during printing operations. Additionally, the integrated robotic arm selects and retrieves empty discs, making the process seamless and automated. This level of automation is especially advantageous for businesses that require high-volume production, as it boosts efficiency and reduces manual labor.
Another characteristic that sets the BravoTM apart is its high-resolution printing capability. With the ability to produce images at up to 4800 DPI, users can achieve stunning graphics and vibrant colors. The printer's precision ensures that labels and designs are sharp and visually appealing, elevating the professionalism of the final product.
Durability is also an essential aspect of the BravoTM. The printed discs are resistant to scratching and fading, ensuring that media remains intact and presentable over time. This durability is crucial for businesses that rely on their products for branding and marketing purposes.
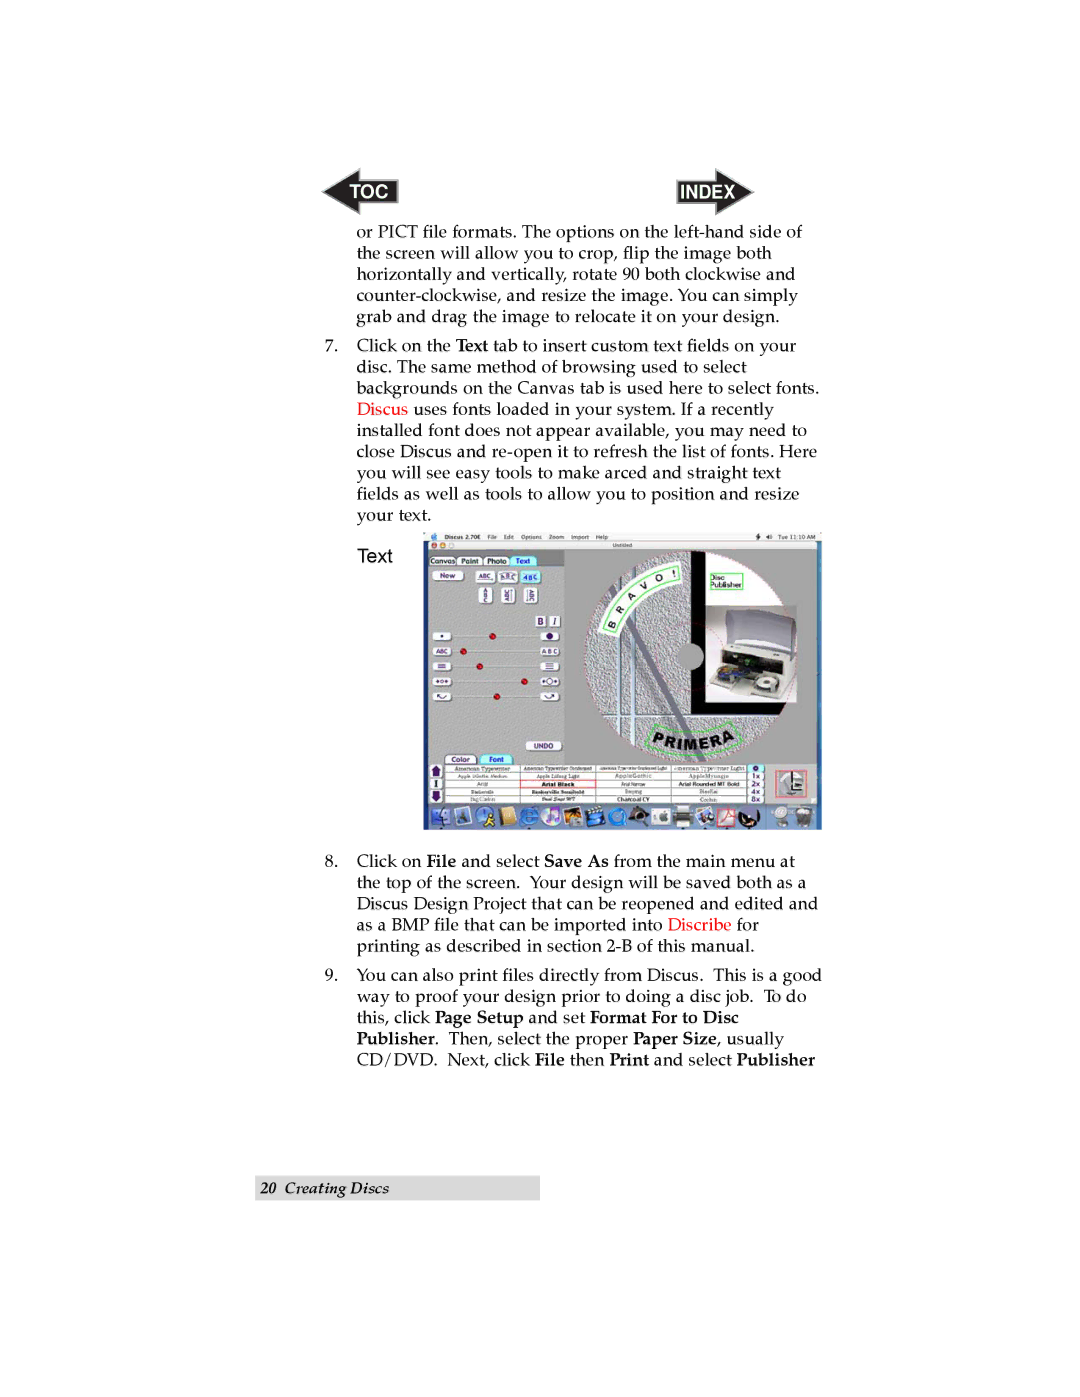
Furthermore, the BravoTM is equipped with an intuitive software suite that simplifies the design and printing process. Users can create custom labels and designs with ease, utilizing templates or designing from scratch. The software supports a variety of graphic formats, making it versatile for different design needs.
In conclusion, Primera Technology BravoTM is a powerful disc publishing solution that combines advanced printing technology, automation, and user-friendly software to deliver exceptional results. Whether for small-scale projects or large production demands, the BravoTM system meets the diverse needs of users while ensuring high-quality output and reliability. It stands as a top choice for anyone looking to produce professional-grade discs efficiently and effectively.