This sheet describes the installation and use of the
NOTE: The Business Card Adapter Kit is designed to work with the Publisher. This will not work with other CD Printers or Duplicators.
SECTION I: INSTALLATION
1.Make sure that in this box you have the following items:
•CD Business Card/ Mini CD 80mm Input Bin
•“Hockey Rink” Card Input Bin
•Output Ring
•CD Business Card Tray Template Assembly
•Mini Disc 80mm and “Hockey Rink” Tray Template Assembly
•9 Sample Discs
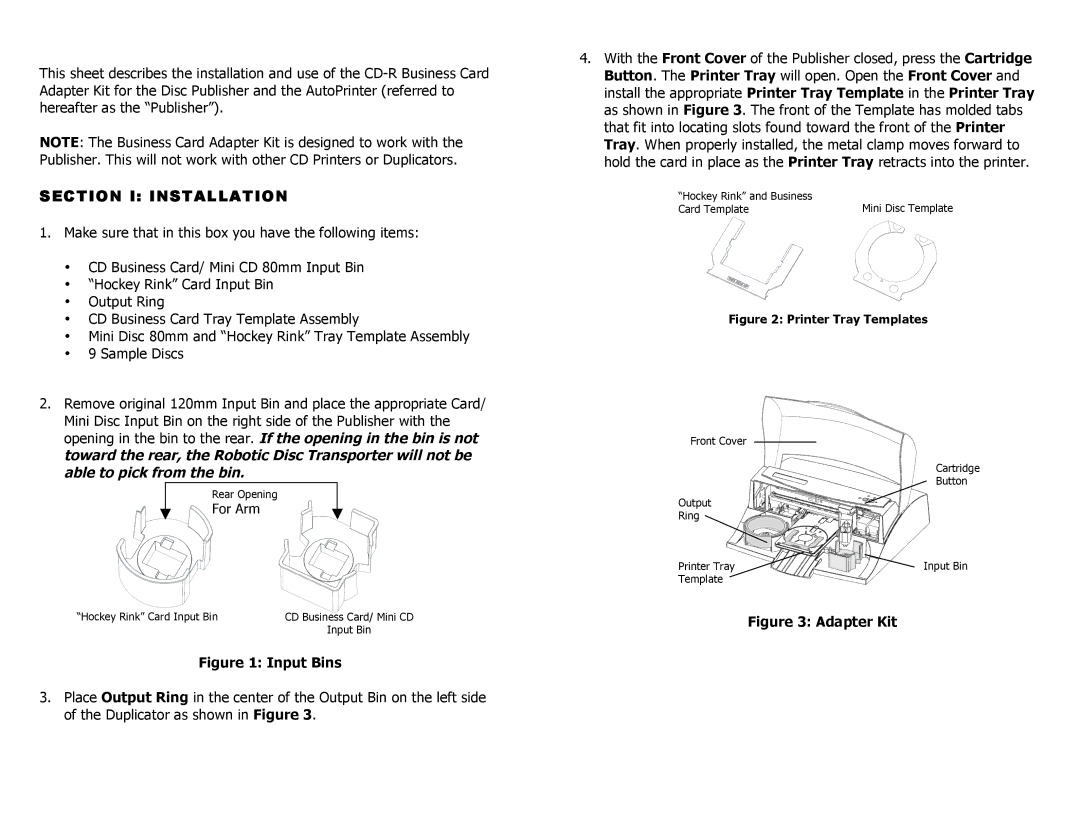
2.Remove original 120mm Input Bin and place the appropriate Card/ Mini Disc Input Bin on the right side of the Publisher with the opening in the bin to the rear. If the opening in the bin is not toward the rear, the Robotic Disc Transporter will not be able to pick from the bin.
Rear Opening
For Arm
“Hockey Rink” Card Input Bin | CD Business Card/ Mini CD |
| Input Bin |
Figure 1: Input Bins
3.Place Output Ring in the center of the Output Bin on the left side of the Duplicator as shown in Figure 3.
4.With the Front Cover of the Publisher closed, press the Cartridge Button. The Printer Tray will open. Open the Front Cover and install the appropriate Printer Tray Template in the Printer Tray as shown in Figure 3. The front of the Template has molded tabs that fit into locating slots found toward the front of the Printer Tray. When properly installed, the metal clamp moves forward to hold the card in place as the Printer Tray retracts into the printer.
“Hockey Rink” and Business | Mini Disc Template |
Card Template |
Figure 2: Printer Tray Templates
Front Cover
Cartridge
Button
Output
Ring
Printer Tray | Input Bin |
Template |
|
