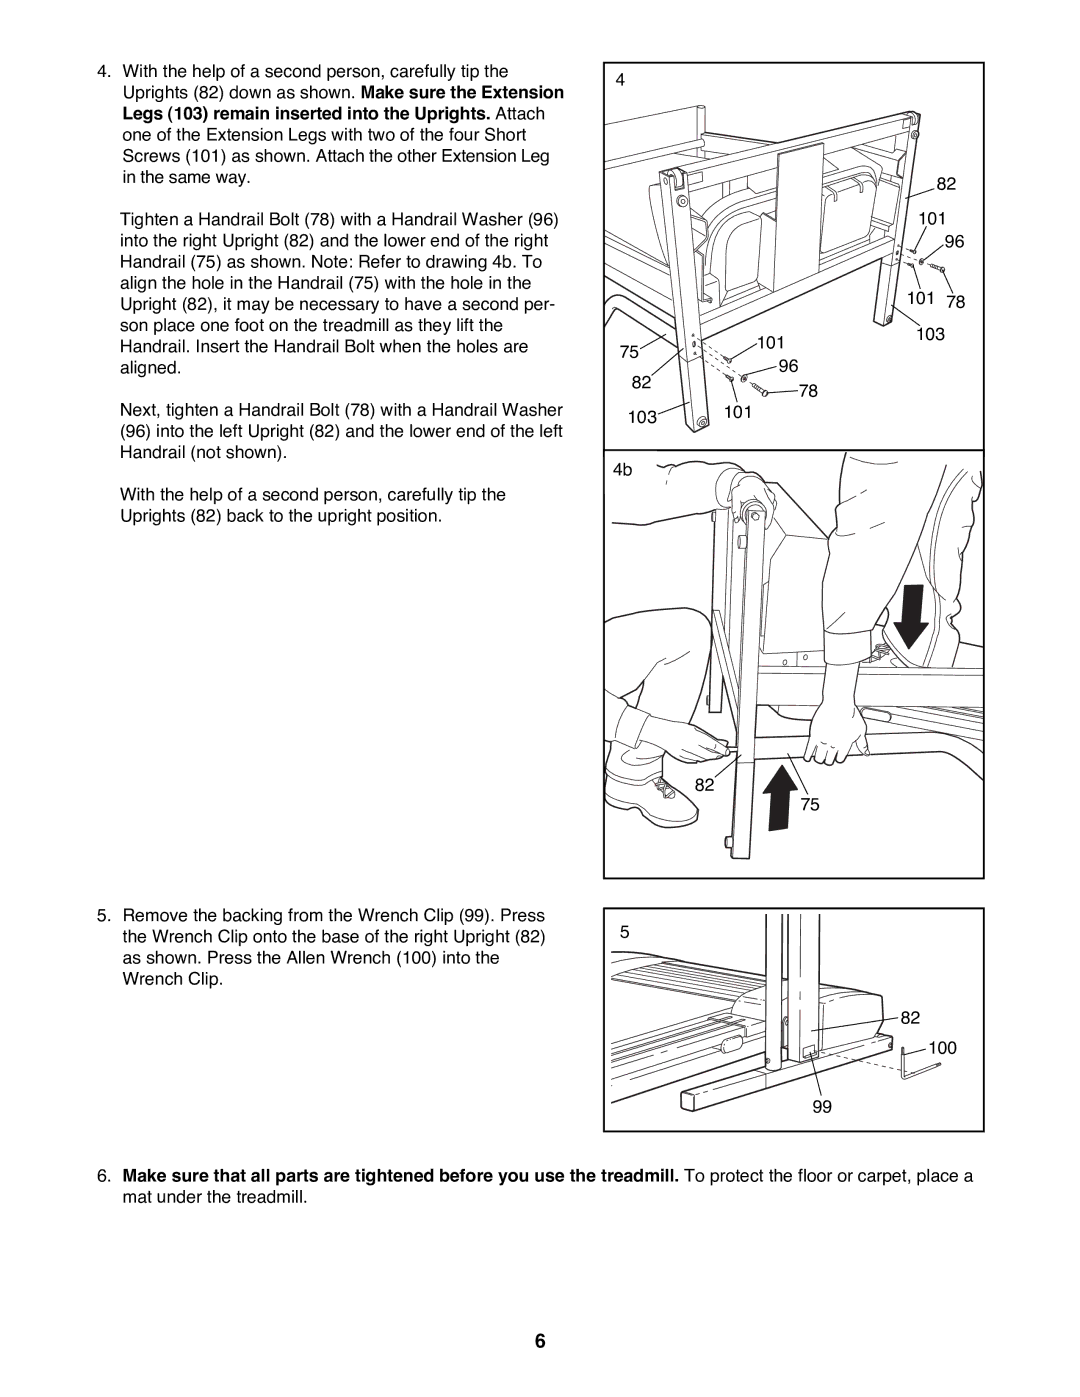
4.With the help of a second person, carefully tip the Uprights (82) down as shown. Make sure the Extension Legs (103) remain inserted into the Uprights. Attach one of the Extension Legs with two of the four Short Screws (101) as shown. Attach the other Extension Leg in the same way.
Tighten a Handrail Bolt (78) with a Handrail Washer (96) into the right Upright (82) and the lower end of the right Handrail (75) as shown. Note: Refer to drawing 4b. To align the hole in the Handrail (75) with the hole in the Upright (82), it may be necessary to have a second per- son place one foot on the treadmill as they lift the Handrail. Insert the Handrail Bolt when the holes are aligned.
Next, tighten a Handrail Bolt (78) with a Handrail Washer
(96)into the left Upright (82) and the lower end of the left Handrail (not shown).
With the help of a second person, carefully tip the Uprights (82) back to the upright position.
5.Remove the backing from the Wrench Clip (99). Press the Wrench Clip onto the base of the right Upright (82) as shown. Press the Allen Wrench (100) into the Wrench Clip.
4 |
|
|
|
|
|
| 82 |
|
| 101 | |
|
|
| 96 |
|
| 101 | 78 |
75 | 101 | 103 | |
|
| ||
96 |
|
| |
82 |
|
| |
| 78 |
| |
|
|
| |
103 | 101 |
|
|
4b |
|
|
|
| 82 | 75 |
|
|
|
| |
5 |
82 |
100 |
99 |
6.Make sure that all parts are tightened before you use the treadmill. To protect the floor or carpet, place a mat under the treadmill.
6
