ASSEMBLY
Assembly requires two people. Set the treadmill in a cleared area and remove all packing materials. Do not
dispose of the packing materials until assembly is completed. A phillips screwdriver ![]()
![]() (not included) may be needed for assembly.
(not included) may be needed for assembly.
Note: The underside of the treadmill walking belt is coated with
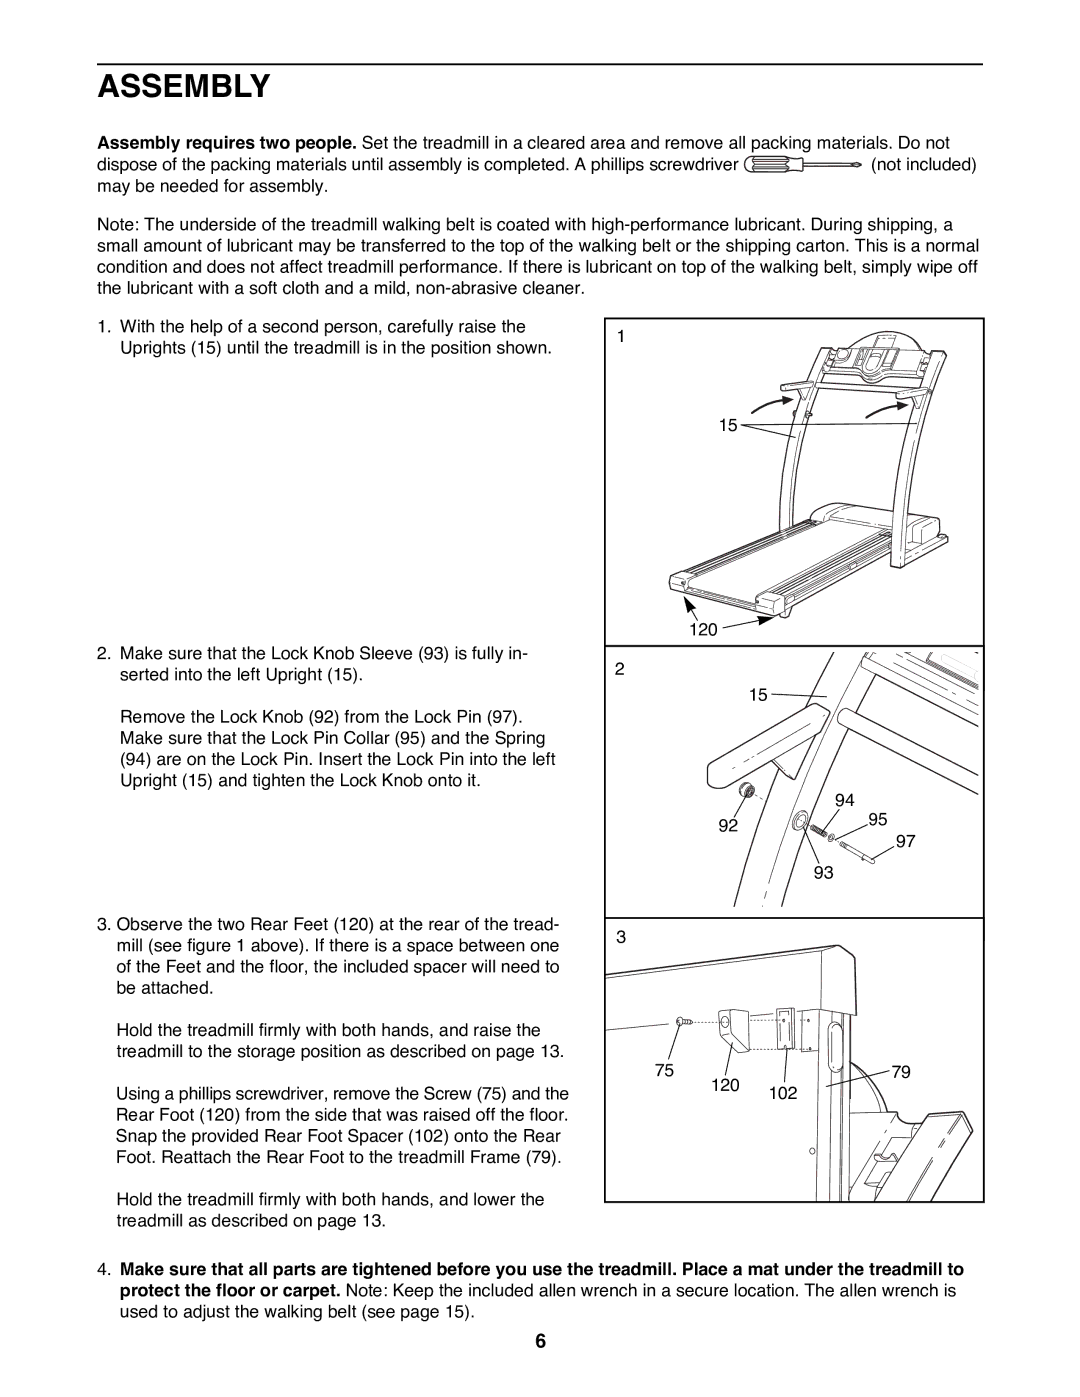
1.With the help of a second person, carefully raise the Uprights (15) until the treadmill is in the position shown.
2.Make sure that the Lock Knob Sleeve (93) is fully in- serted into the left Upright (15).
Remove the Lock Knob (92) from the Lock Pin (97). Make sure that the Lock Pin Collar (95) and the Spring (94) are on the Lock Pin. Insert the Lock Pin into the left Upright (15) and tighten the Lock Knob onto it.
3.Observe the two Rear Feet (120) at the rear of the tread- mill (see figure 1 above). If there is a space between one of the Feet and the floor, the included spacer will need to be attached.
Hold the treadmill firmly with both hands, and raise the treadmill to the storage position as described on page 13.
Using a phillips screwdriver, remove the Screw (75) and the Rear Foot (120) from the side that was raised off the floor. Snap the provided Rear Foot Spacer (102) onto the Rear Foot. Reattach the Rear Foot to the treadmill Frame (79).
Hold the treadmill firmly with both hands, and lower the treadmill as described on page 13.
1 |
|
|
| 15 |
|
| 120 |
|
2 |
|
|
|
| 15 |
|
| 94 |
| 92 | 95 |
| 97 | |
|
| |
|
| 93 |
3 |
|
|
75 | 120 | 79 |
| 102 | |
|
|
4.Make sure that all parts are tightened before you use the treadmill. Place a mat under the treadmill to protect the floor or carpet. Note: Keep the included allen wrench in a secure location. The allen wrench is used to adjust the walking belt (see page 15).
6