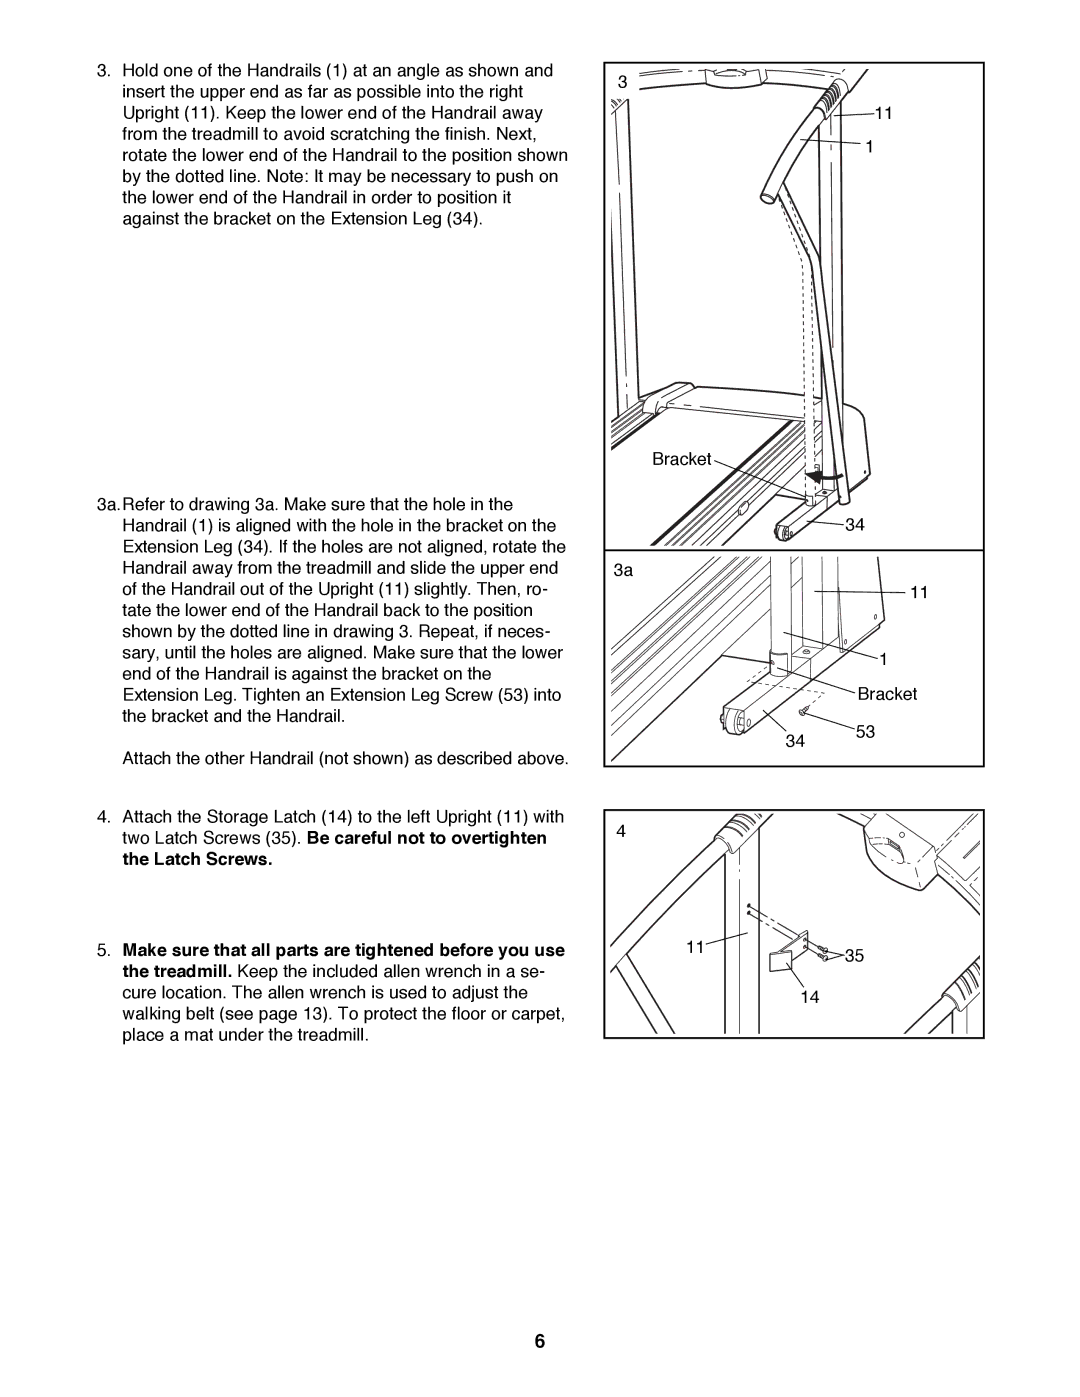
3. Hold one of the Handrails (1) at an angle as shown and | 3 |
|
| |
| insert the upper end as far as possible into the right |
|
| |
|
|
|
| |
| Upright (11). Keep the lower end of the Handrail away |
|
| 11 |
| from the treadmill to avoid scratching the finish. Next, |
|
| 1 |
| rotate the lower end of the Handrail to the position shown |
|
| |
|
|
|
| |
| by the dotted line. Note: It may be necessary to push on |
|
|
|
| the lower end of the Handrail in order to position it |
|
|
|
| against the bracket on the Extension Leg (34). |
|
|
|
|
| Bracket |
|
|
3a.Refer to drawing 3a. Make sure that the hole in the |
|
| 34 | |
| Handrail (1) is aligned with the hole in the bracket on the |
|
| |
| Extension Leg (34). If the holes are not aligned, rotate the |
|
|
|
| Handrail away from the treadmill and slide the upper end | 3a |
|
|
| of the Handrail out of the Upright (11) slightly. Then, ro- |
|
| 11 |
| tate the lower end of the Handrail back to the position |
|
|
|
| shown by the dotted line in drawing 3. Repeat, if neces- |
|
|
|
| sary, until the holes are aligned. Make sure that the lower |
|
| 1 |
| end of the Handrail is against the bracket on the |
|
| |
|
|
|
| |
| Extension Leg. Tighten an Extension Leg Screw (53) into |
|
| Bracket |
| the bracket and the Handrail. |
|
| 53 |
|
|
| 34 | |
| Attach the other Handrail (not shown) as described above. |
|
| |
|
|
|
| |
4. Attach the Storage Latch (14) to the left Upright (11) with | 4 |
|
| |
| two Latch Screws (35). Be careful not to overtighten |
|
| |
|
|
|
| |
| the Latch Screws. |
|
|
|
5. | Make sure that all parts are tightened before you use | 11 |
| 35 |
| the treadmill. Keep the included allen wrench in a se- |
|
| |
|
|
|
| |
| cure location. The allen wrench is used to adjust the |
| 14 |
|
| walking belt (see page 13). To protect the floor or carpet, |
|
|
|
| place a mat under the treadmill. |
|
|
|
6