Installing SOC-920(P)
SOC-920(P) - Pin Configuration
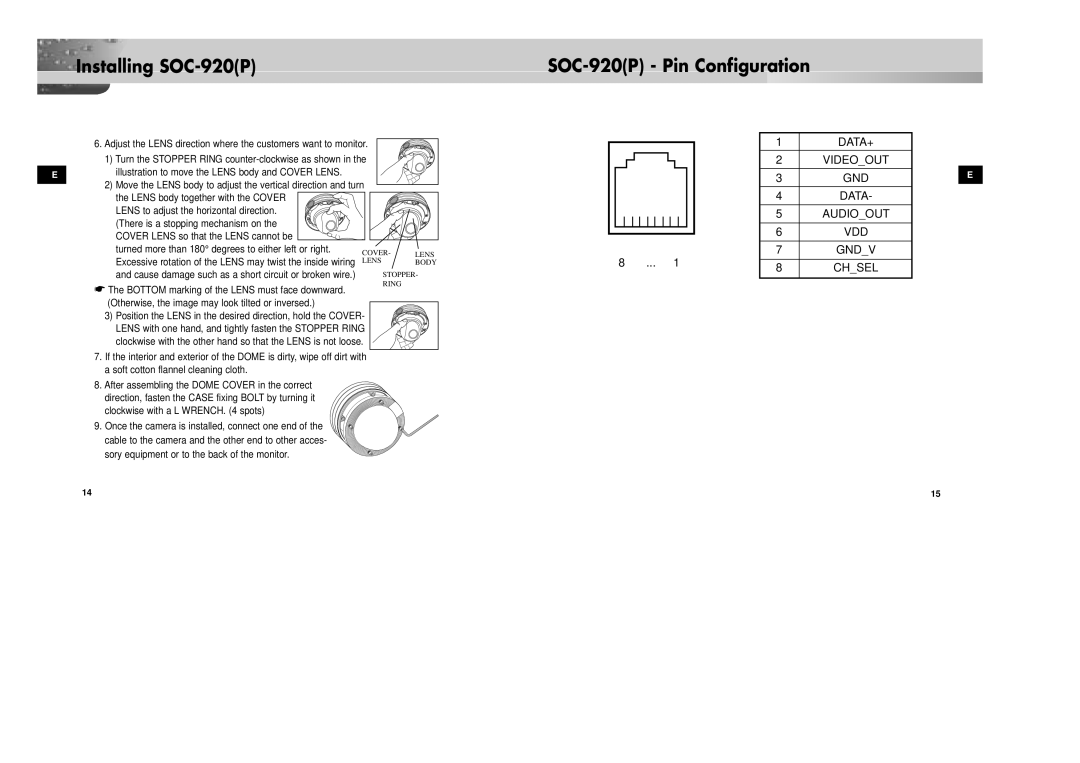
6. Adjust the LENS direction where the customers want to monitor. 1) Turn the STOPPER RING
Eillustration to move the LENS body and COVER LENS.
2)Move the LENS body to adjust the vertical direction and turn the LENS body together with the COVER
LENS to adjust the horizontal direction. (There is a stopping mechanism on the COVER LENS so that the LENS cannot be
turned more than 180° degrees to either left or right. Excessive rotation of the LENS may twist the inside wiring and cause damage such as a short circuit or broken wire.)
☛The BOTTOM marking of the LENS must face downward. (Otherwise, the image may look tilted or inversed.)
3)Position the LENS in the desired direction, hold the COVER- LENS with one hand, and tightly fasten the STOPPER RING clockwise with the other hand so that the LENS is not loose.
7.If the interior and exterior of the DOME is dirty, wipe off dirt with a soft cotton flannel cleaning cloth.
8.After assembling the DOME COVER in the correct
direction, fasten the CASE fixing BOLT by turning it clockwise with a L WRENCH. (4 spots)
9. Once the camera is installed, connect one end of the cable to the camera and the other end to other acces- sory equipment or to the back of the monitor.
LENS
BODY
STOPPER-
RING
8 ... 1
1DATA+
2VIDEO_OUT
3GND
4DATA-
5AUDIO_OUT
6VDD
7GND_V
8CH_SEL
E
14 | 15 |
