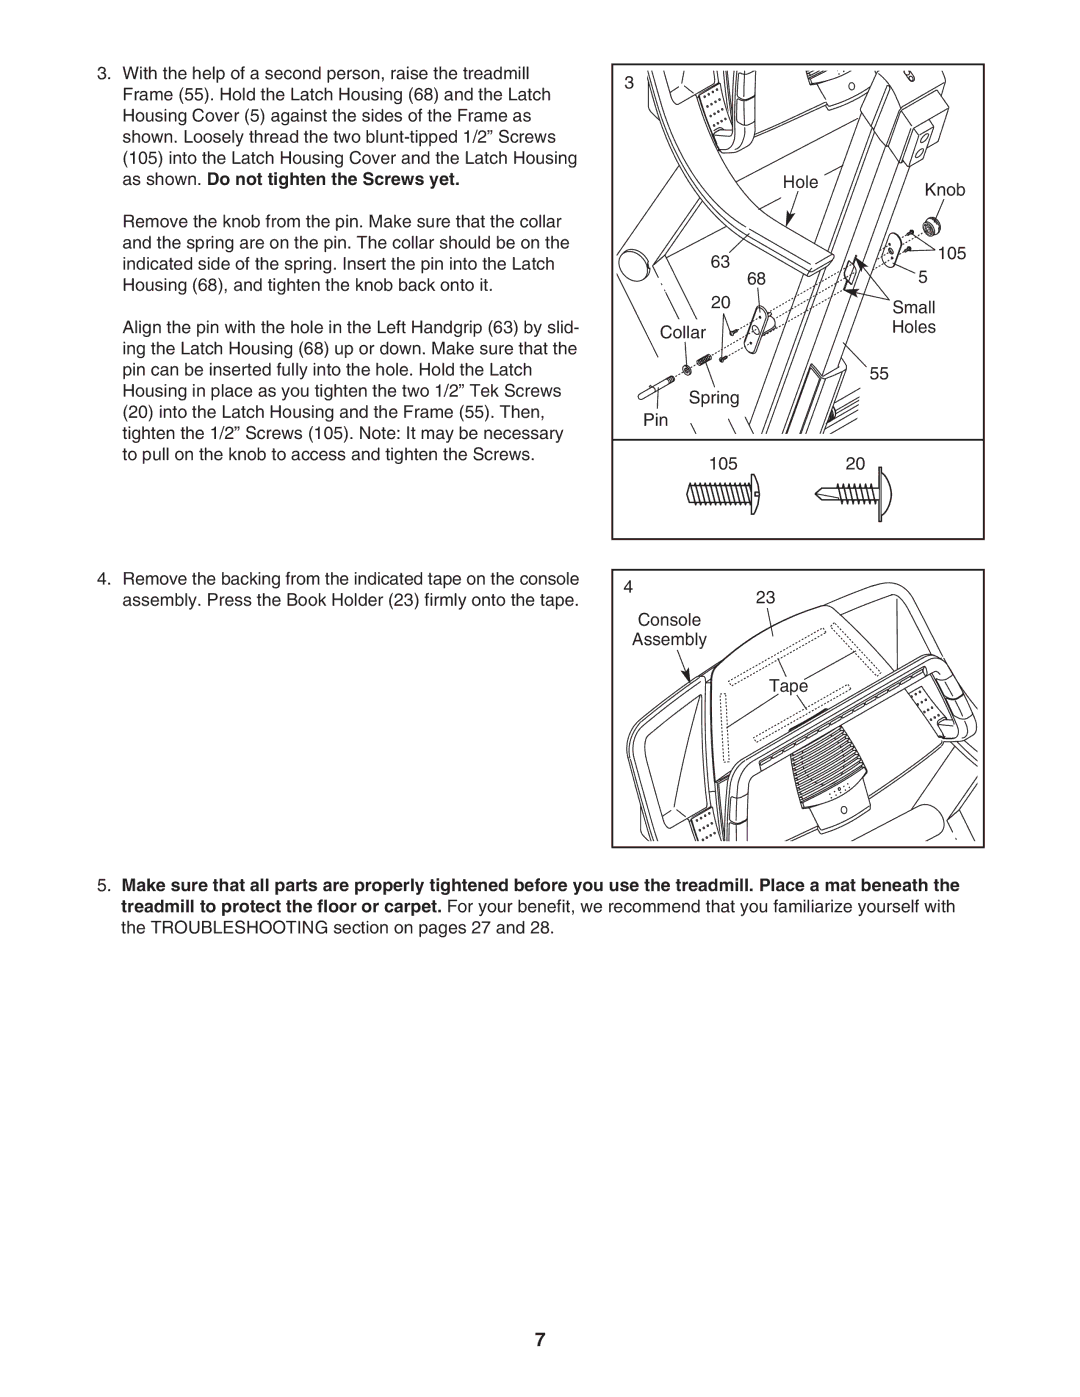
3. With the help of a second person, raise the treadmill | 3 |
|
| |
Frame (55). Hold the Latch Housing (68) and the Latch |
|
| ||
|
|
| ||
Housing Cover (5) against the sides of the Frame as |
|
|
| |
shown. Loosely thread the two |
|
|
| |
(105) into the Latch Housing Cover and the Latch Housing |
|
|
| |
as shown. Do not tighten the Screws yet. |
| Hole | Knob | |
|
|
| ||
Remove the knob from the pin. Make sure that the collar |
|
|
| |
and the spring are on the pin. The collar should be on the | 63 |
| 105 | |
indicated side of the spring. Insert the pin into the Latch |
| |||
68 | 5 | |||
Housing (68), and tighten the knob back onto it. |
| |||
20 |
|
| ||
|
| Small | ||
Align the pin with the hole in the Left Handgrip (63) by slid- | Collar |
| Holes | |
ing the Latch Housing (68) up or down. Make sure that the |
|
| ||
|
|
| ||
pin can be inserted fully into the hole. Hold the Latch |
|
| 55 | |
Housing in place as you tighten the two 1/2” Tek Screws | Spring |
|
| |
(20) into the Latch Housing and the Frame (55). Then, |
|
| ||
Pin |
|
| ||
tighten the 1/2” Screws (105). Note: It may be necessary |
|
| ||
|
|
| ||
to pull on the knob to access and tighten the Screws. | 105 |
| 20 | |
|
| |||
4. Remove the backing from the indicated tape on the console | 4 | 23 |
| |
assembly. Press the Book Holder (23) firmly onto the tape. |
| |||
Console |
| |||
|
|
| ||
| Assembly |
|
| |
|
| Tape |
|
5.Make sure that all parts are properly tightened before you use the treadmill. Place a mat beneath the treadmill to protect the floor or carpet. For your benefit, we recommend that you familiarize yourself with the TROUBLESHOOTING section on pages 27 and 28.
7
