DESCRIPTION OF THE CONSOLE
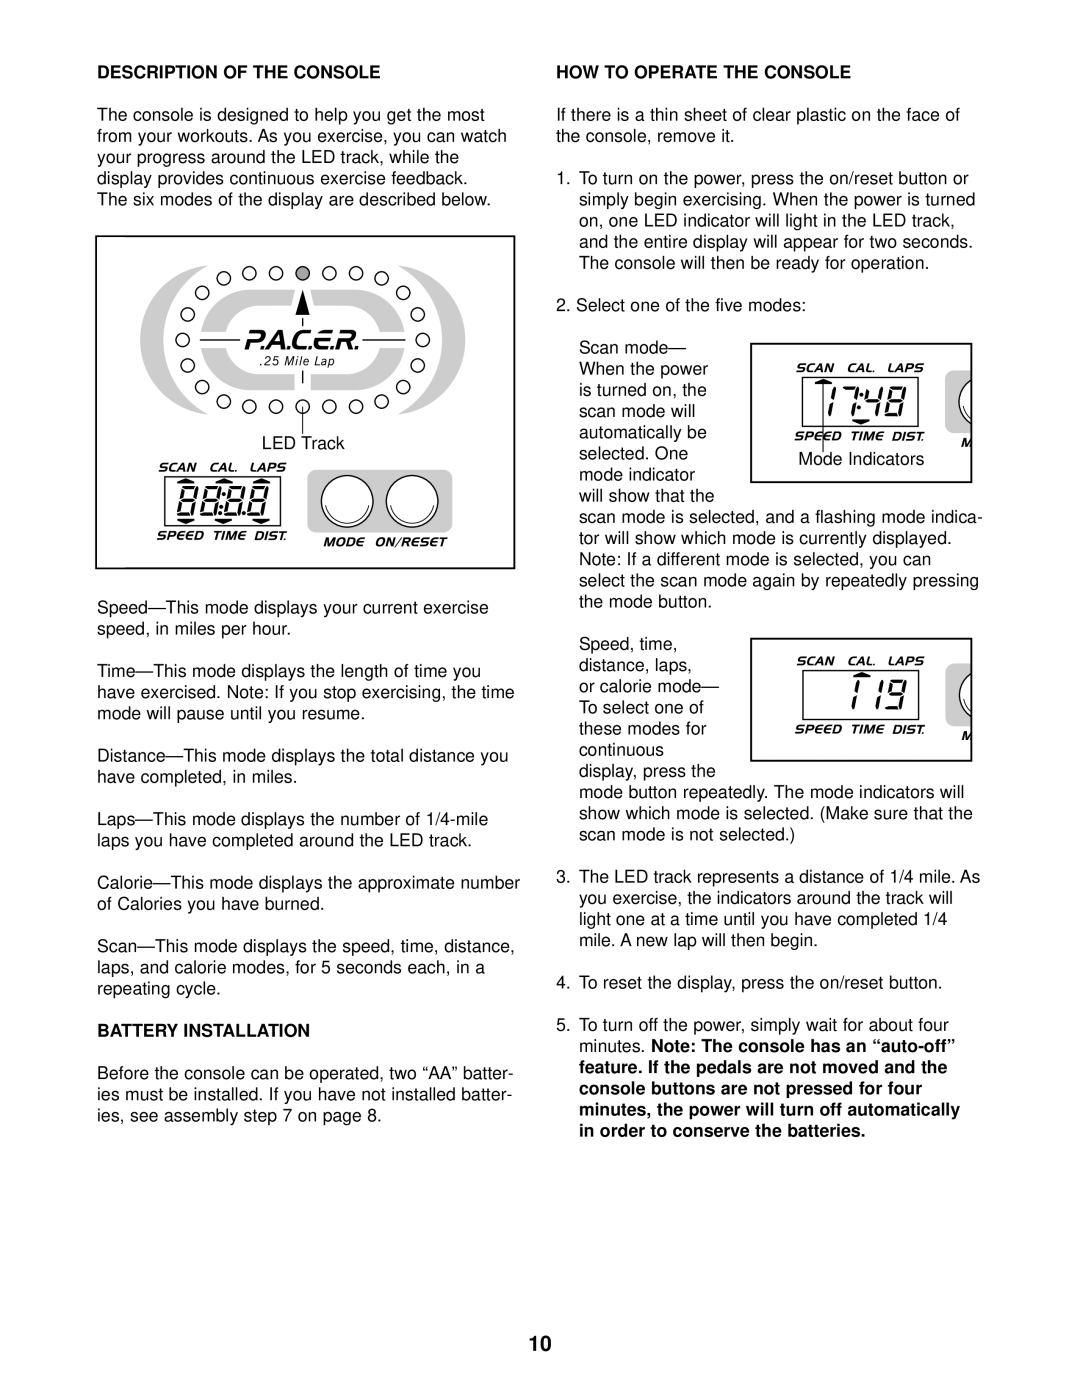
The console is designed to help you get the most from your workouts. As you exercise, you can watch your progress around the LED track, while the display provides continuous exercise feedback. The six modes of the display are described below.
LED Track
have exercised. Note: If you stop exercising, the time mode will pause until you resume.
BATTERY INSTALLATION
Before the console can be operated, two “AA” batter- ies must be installed. If you have not installed batter- ies, see assembly step 7 on page 8.
HOW TO OPERATE THE CONSOLE
If there is a thin sheet of clear plastic on the face of the console, remove it.
1.To turn on the power, press the on/reset button or simply begin exercising. When the power is turned on, one LED indicator will light in the LED track,
and the entire display will appear for two seconds. The console will then be ready for operation.
2.Select one of the five modes:
Scan mode—
When the power is turned on, the scan mode will automatically be selected. One
mode indicator will show that the
scan mode is selected, and a flashing mode indica- tor will show which mode is currently displayed. Note: If a different mode is selected, you can select the scan mode again by repeatedly pressing the mode button.
Speed, time,
distance, laps, or calorie mode— To select one of these modes for continuous
display, press the
mode button repeatedly. The mode indicators will show which mode is selected. (Make sure that the scan mode is not selected.)
3.The LED track represents a distance of 1/4 mile. As you exercise, the indicators around the track will light one at a time until you have completed 1/4 mile. A new lap will then begin.
4.To reset the display, press the on/reset button.
5.To turn off the power, simply wait for about four minutes. Note: The console has an
console buttons are not pressed for four minutes, the power will turn off automatically in order to conserve the batteries.
10
