ASSEMBLY
The help of a second person is needed. Set the treadmill in a cleared area and remove all packing materials. Do not dispose of the packing materials until assembly is completed. TOOLS REQUIRED FOR ASSEMBLY: The
7/32" allen wrench ==.,==,==j :included and your own adjustable wrench
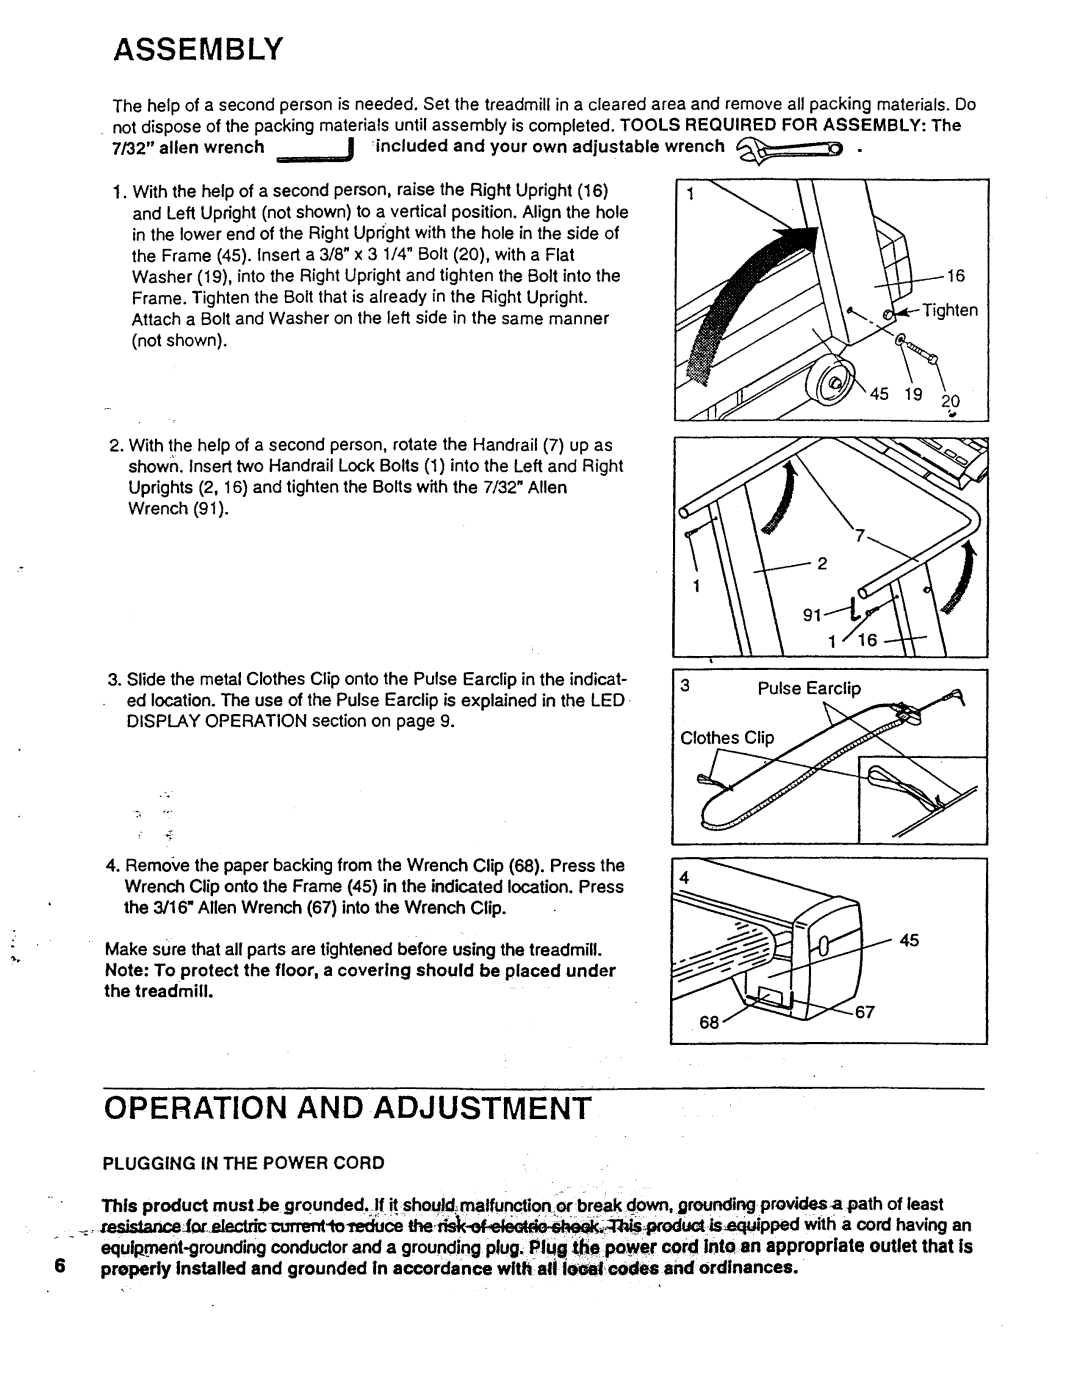
1.With the help of a second person, raise the Right Upright (16) and Left Upright (not shown) to a vertical position. Align the hole in the lower end of the Right Upright with the hole in the side of the Frame (45). Insert a 3/8" x 3 1/4" Bolt (20), with a Flat Washer (19), into the Right Upright and tighten the Bolt into the Frame. Tighten the Bolt that is already in the Right Upright. Attach a Bolt and Washer on the left side in the same manner (not shown).
19 )
2.With the help of a second person, rotate the Handrail (7) up as shown. Insert two Handrail Lock Bolts (1) into the Left and Right Uprights (2, 16) and tighten the Bolts with the 7/32" Allen Wrench (91).
3.Slide the metal Clothes Clip onto the Pulse Earclip in the indicat- ed location. The use of the Pulse Earclip is explained in the LED DISPLAY OPERATION section on page 9.
4.Remo_,e the paper backing from the Wrench Clip (68). Press the Wrench Clip onto the Frame (45) in the indicated location. Press the 3/16" Allen Wrench (67) into the Wrench Clip.
Make sure that all parts are tightened before using the treadmill.
Note: To protect the floor, a covering should be placed under the treadmill.
91
1
45
OPERATION AND ADJUSTMENT
PLUGGING IN THE POWER CORD
•" This product must be grounded. !f. it shou!d_malfunctionor •break down, grounding provides a path of least
6 properly Installed and grounded in accordance withal Jeeiai _les and ordinances.