FastTrak SX4000 Lite
6.Press the arrow keys to move to the next option. Option choices depend on the RAID Level you selected.
•Initialize Array, zero the disk drives. RAID 5 only.
•Stripe Block Size, the default 64KB is best for most applications.
•Gigabyte Boundary, allows use of slightly smaller replacement drives.
7.Press the arrow keys to move to Disk Assignments. Press the spacebar to toggle between N and Y for each available drive.
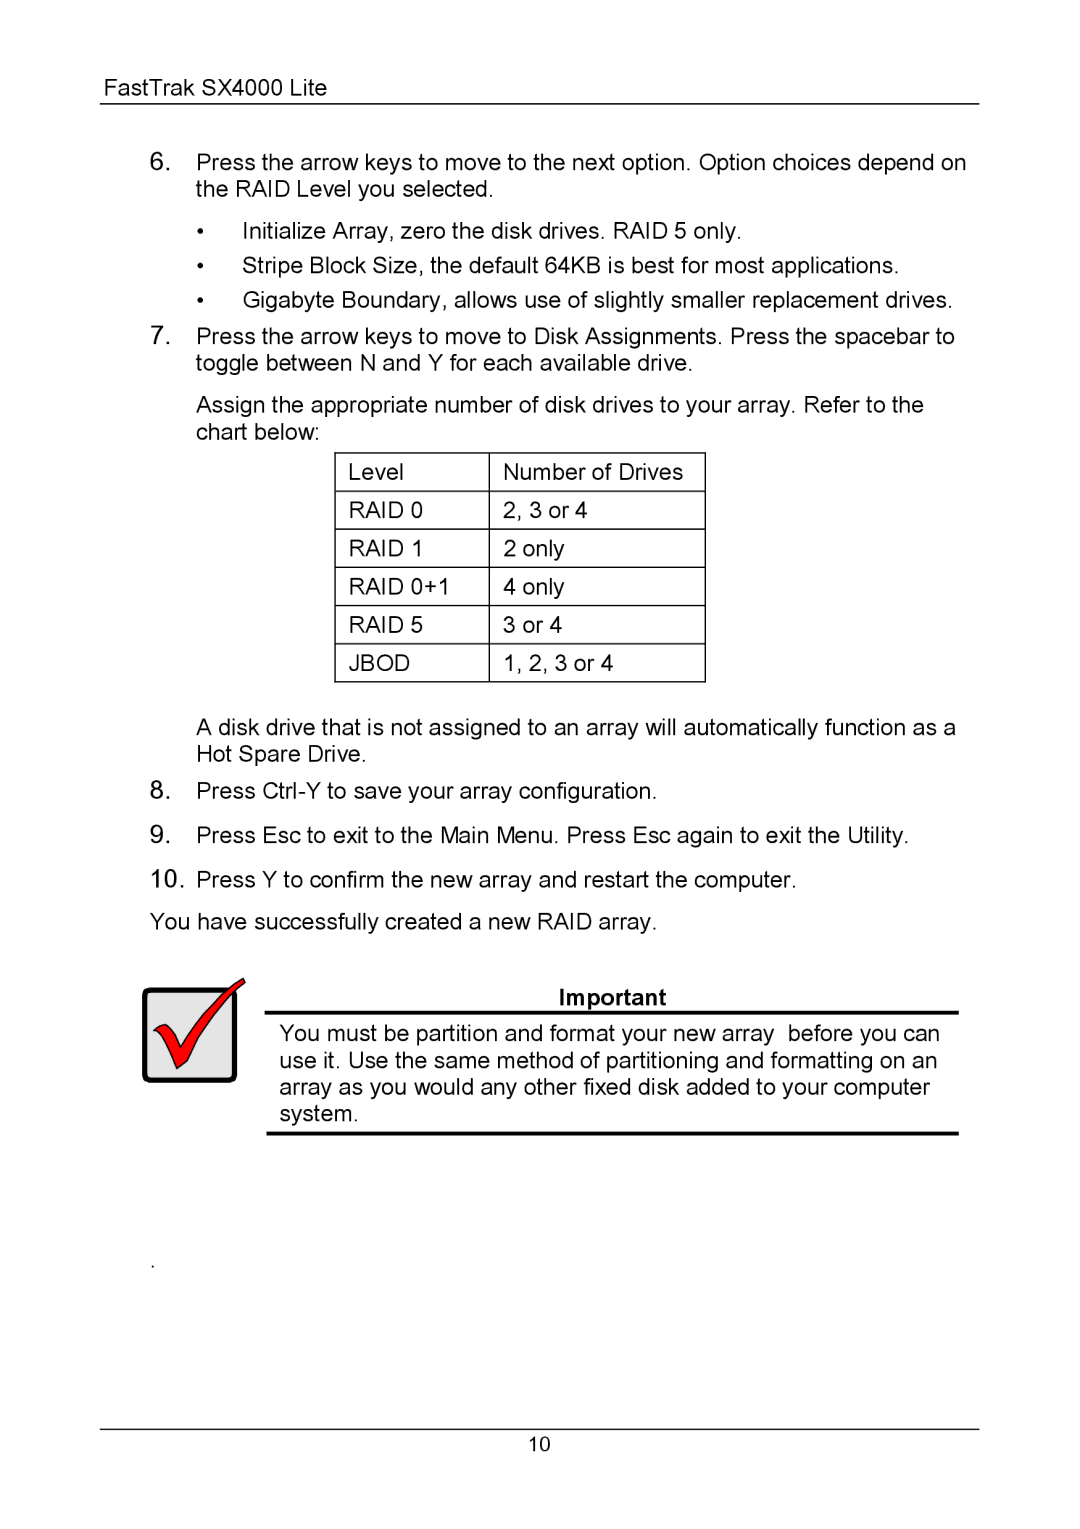
Assign the appropriate number of disk drives to your array. Refer to the chart below:
Level | Number of Drives |
|
|
RAID 0 | 2, 3 or 4 |
|
|
RAID 1 | 2 only |
|
|
RAID 0+1 | 4 only |
|
|
RAID 5 | 3 or 4 |
|
|
JBOD | 1, 2, 3 or 4 |
|
|
A disk drive that is not assigned to an array will automatically function as a Hot Spare Drive.
8.Press
9.Press Esc to exit to the Main Menu. Press Esc again to exit the Utility.
10.Press Y to confirm the new array and restart the computer.
You have successfully created a new RAID array.
Important
You must be partition and format your new array before you can use it. Use the same method of partitioning and formatting on an array as you would any other fixed disk added to your computer system.
.
10