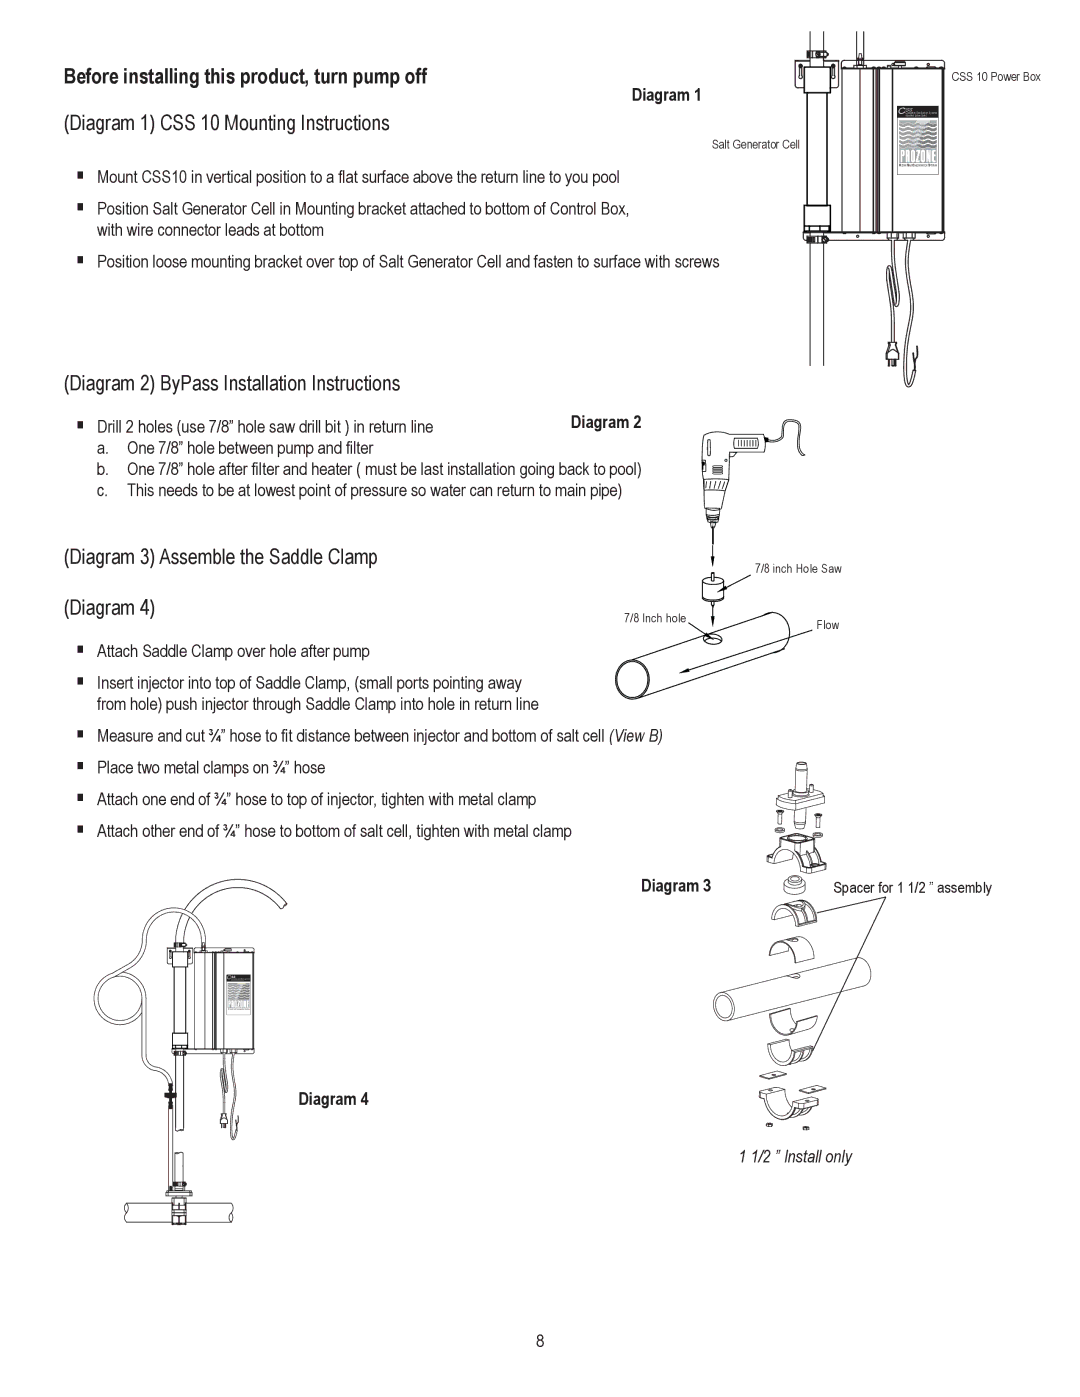
CSS10 specifications
Prozone Pool Products has established itself as a prominent player in the pool maintenance industry, and their CSS10 model is a testament to their commitment to quality and innovation. The CSS10 is designed to deliver efficient and effective pool cleaning, utilizing advanced technology to ensure that your swimming pool remains crystal clear and inviting.One of the standout features of the CSS10 is its automated cleaning capability. The system is equipped with state-of-the-art programming that allows it to navigate the pool's surface with minimal user intervention. This means pool owners can enjoy more leisure time while the CSS10 takes care of the laborious task of cleaning. It features a user-friendly interface that allows for easy programming, ensuring that you can set it up to clean according to your schedule.
Another key characteristic of the CSS10 is its powerful suction capability. The model is equipped with a high-performance motor that allows it to remove dirt, debris, and leaves from both the floor and walls of the pool. This ensures that your pool remains free from unwanted pollutants, providing a healthy environment for swimmers.
The CSS10 also utilizes advanced filtration technology. It is equipped with high-quality filters that capture even the smallest particles, ensuring that your pool water remains sparkling clean. The filters are easy to access and clean, making maintenance hassle-free and straightforward.
Durability is a crucial factor in pool products, and the CSS10 does not disappoint. Constructed with high-grade materials, this model is designed to withstand harsh pool chemicals as well as varying weather conditions, ensuring longevity and reliability over time.
Energy efficiency is another significant aspect of the CSS10, making it an environmentally conscious choice for pool owners. Its energy-saving technology not only reduces operational costs but also minimizes the carbon footprint associated with pool maintenance.
Finally, Prozone’s CSS10 is compatible with a range of pool types, accommodating both above-ground and in-ground pools. This versatility, combined with its robust features, makes it an excellent choice for anyone looking to invest in a reliable and effective pool cleaning solution. In summary, the CSS10 offers an automated cleaning experience, powerful suction, advanced filtration, durability, energy efficiency, and compatibility, making it an essential addition to your pool care routine.

