
PLCD52, PLCG53 specifications
PYLE Audio has long been synonymous with quality and innovation in the realm of automotive audio systems. The PYLE PLCG53 and PLCD52 models are exemplary products that showcase the company's commitment to delivering superior sound experiences for vehicle owners.The PLCG53 is a top-tier 5.25-inch casing that features a high-performance 4-way speaker system, making it ideal for those who demand ultimate audio performance. This model incorporates a powerful 220-watt peak power handling capability and a remarkable 110-watt RMS, which means that it can deliver a clear and dynamic sound, even at higher volumes. One of the standout technologies of the PLCG53 is its poly-injection cone, which ensures durability and excellent sound reproduction. The butyl rubber surround enhances its reliability and contributes to a balanced frequency response, providing a richer listening experience across all genres of music.
In terms of design, the PLCG53 has a sleek black finish that seamlessly integrates with any vehicle interior. It is equipped with a 1-inch neodymium dome tweeter and a midrange speaker, allowing users to enjoy crisp highs and robust midrange frequencies. Additionally, the humidity-resistant design ensures that these speakers can withstand changes in temperature and moisture, making them suitable for outdoor applications as well.
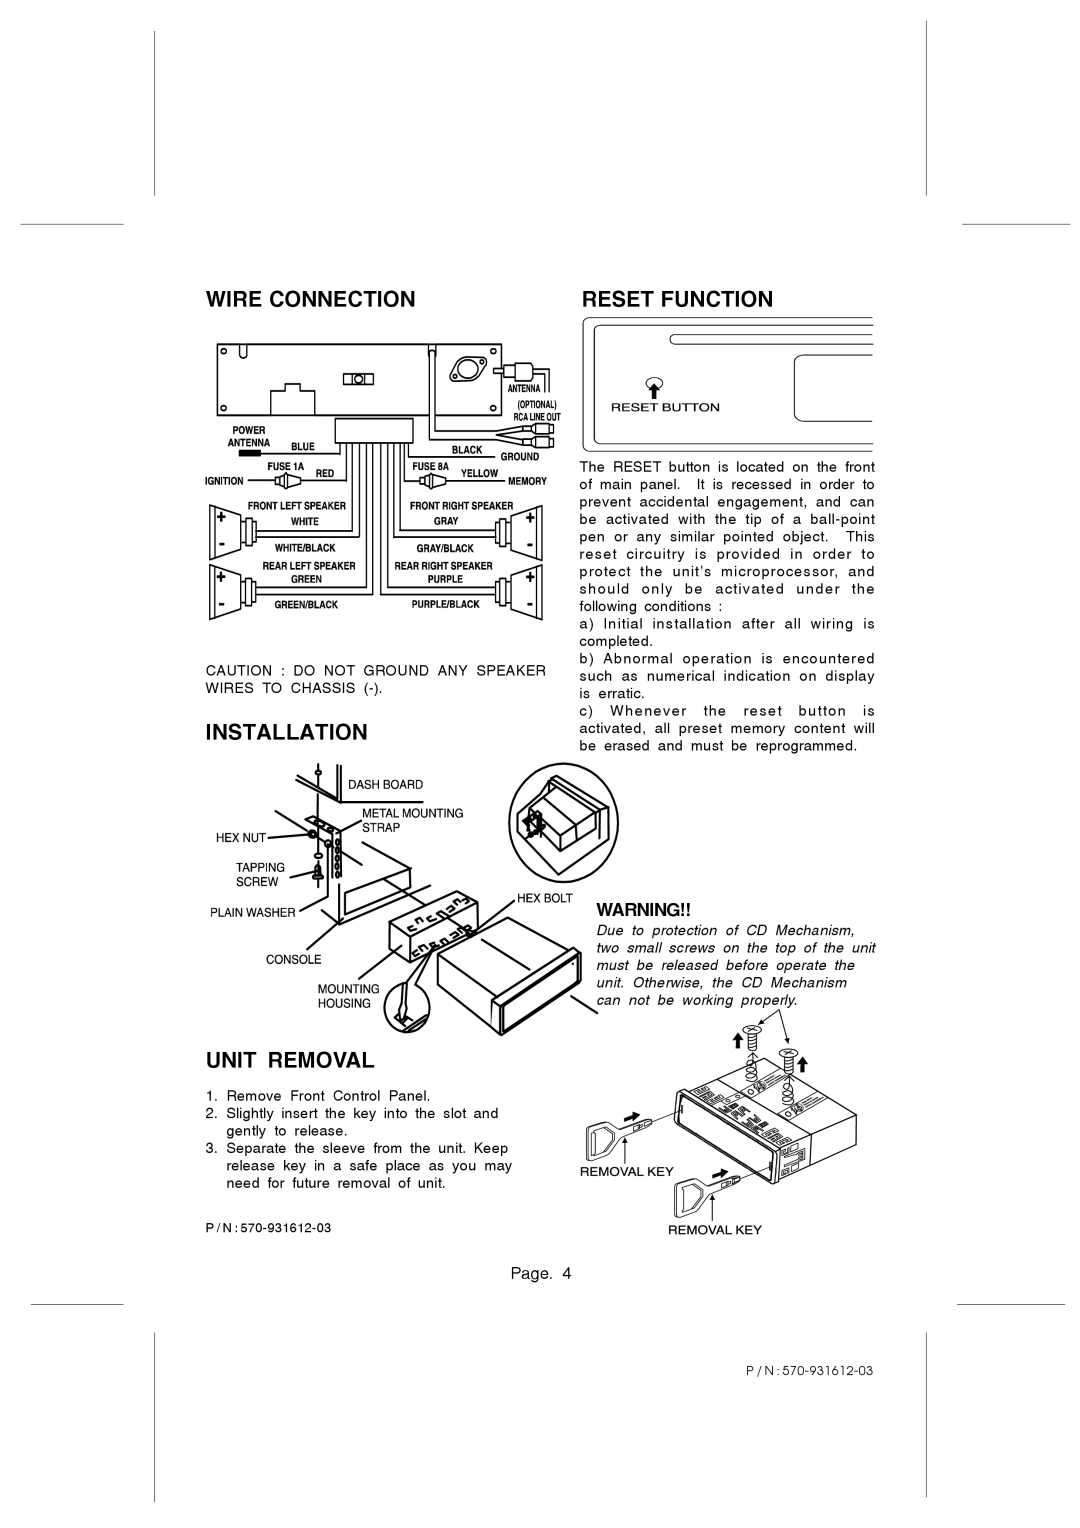
Similarly, the PLCD52 model is a robust stereo receiver that comes packed with features designed for the modern driver. This model supports Bluetooth connectivity, allowing for hassle-free music streaming from smartphones and other devices. It also includes a USB port and an AUX input, providing versatile options for playback. The PLCD52 comes with a built-in microphone for hands-free calling, adhering to safety standards by allowing drivers to maintain focus on the road while enjoying their favorite tunes.
Furthermore, the user interface of the PLCD52 is designed with ease of use in mind; it offers an intuitive digital display and simple controls that facilitate seamless navigation through media sources. For those interested in tuning their audio experience, this model also features customizable EQ settings, enabling users to adjust sound characteristics according to their preferences.
In conclusion, the PYLE PLCG53 and PLCD52 represent a perfect fusion of cutting-edge technology and user-friendly design, making them ideal choices for anyone looking to upgrade their automotive audio experience. With their high-performance capabilities and thoughtful features, these models continue to uphold PYLE's reputation for excellence in audio engineering.