Step 1. Verify the Package Contents
The QLogic HBA is shipped with the following items:
❑QLogic SANblade HBA
❑
❑Quick Start Guide (this document)
❑SANsurfer® for SANblade iSCSI HBAs CD(s)
Step 2. Install the HBA Hardware
NOTE: When installing the QLogic HBA and driver in a Solaris system that does not already have QLogic HBAs or drivers installed, please install the QLogic Solaris driver before you install the QLogic HBA hardware. This allows Solaris to correctly bind the QLogic Solaris driver to the QLogic HBA. Failure to do so will require an additional system reboot after the driver is loaded.
To install the HBA hardware, you need to open the computer and locate the appropriate bus slot. If necessary, consult your computer system manual for instructions to remove the computer cover.
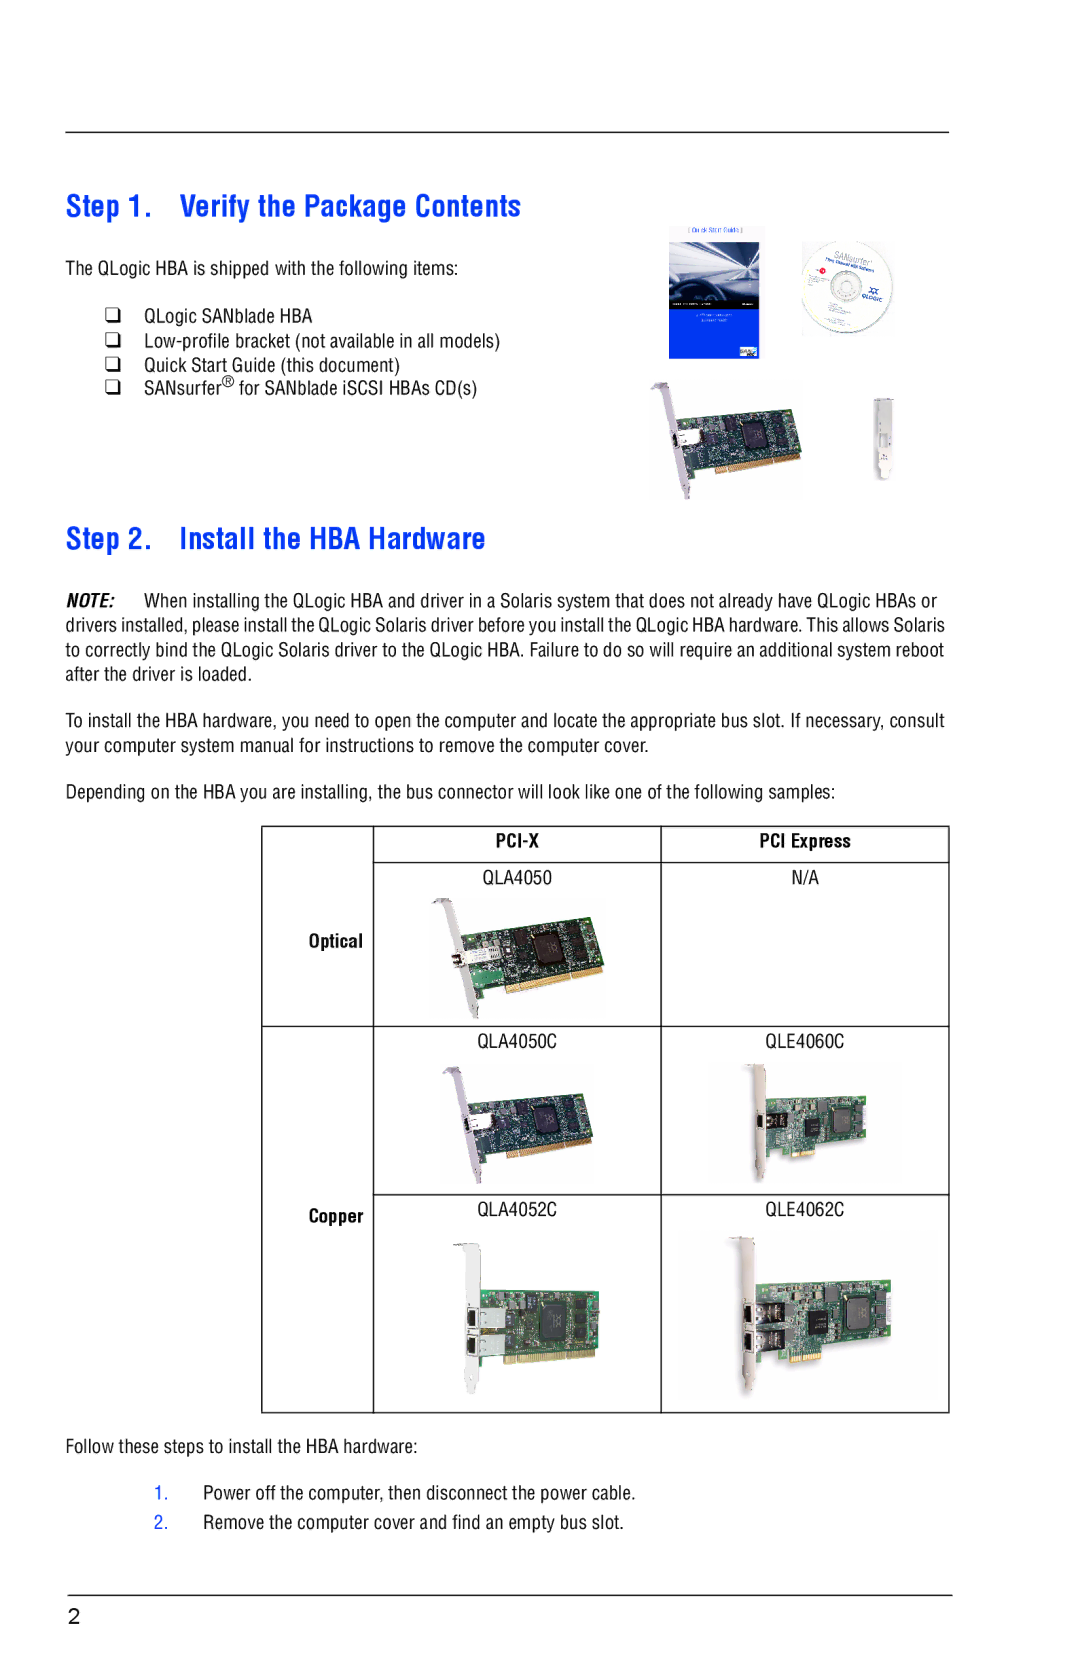
Depending on the HBA you are installing, the bus connector will look like one of the following samples:
|
|
| PCI Express | |
|
|
|
|
|
|
|
| QLA4050 | N/A |
| Optical |
|
|
|
|
|
|
|
|
|
|
| QLA4050C | QLE4060C |
|
|
|
|
|
| Copper |
| QLA4052C | QLE4062C |
|
|
|
| |
|
|
|
|
|
Follow these steps to install the HBA hardware: |
|
| ||
1.Power off the computer, then disconnect the power cable.
2.Remove the computer cover and find an empty bus slot.
2