Q-SEE QUICK INSTALLATION GUIDE
MODEL NUMBER QC40198-814
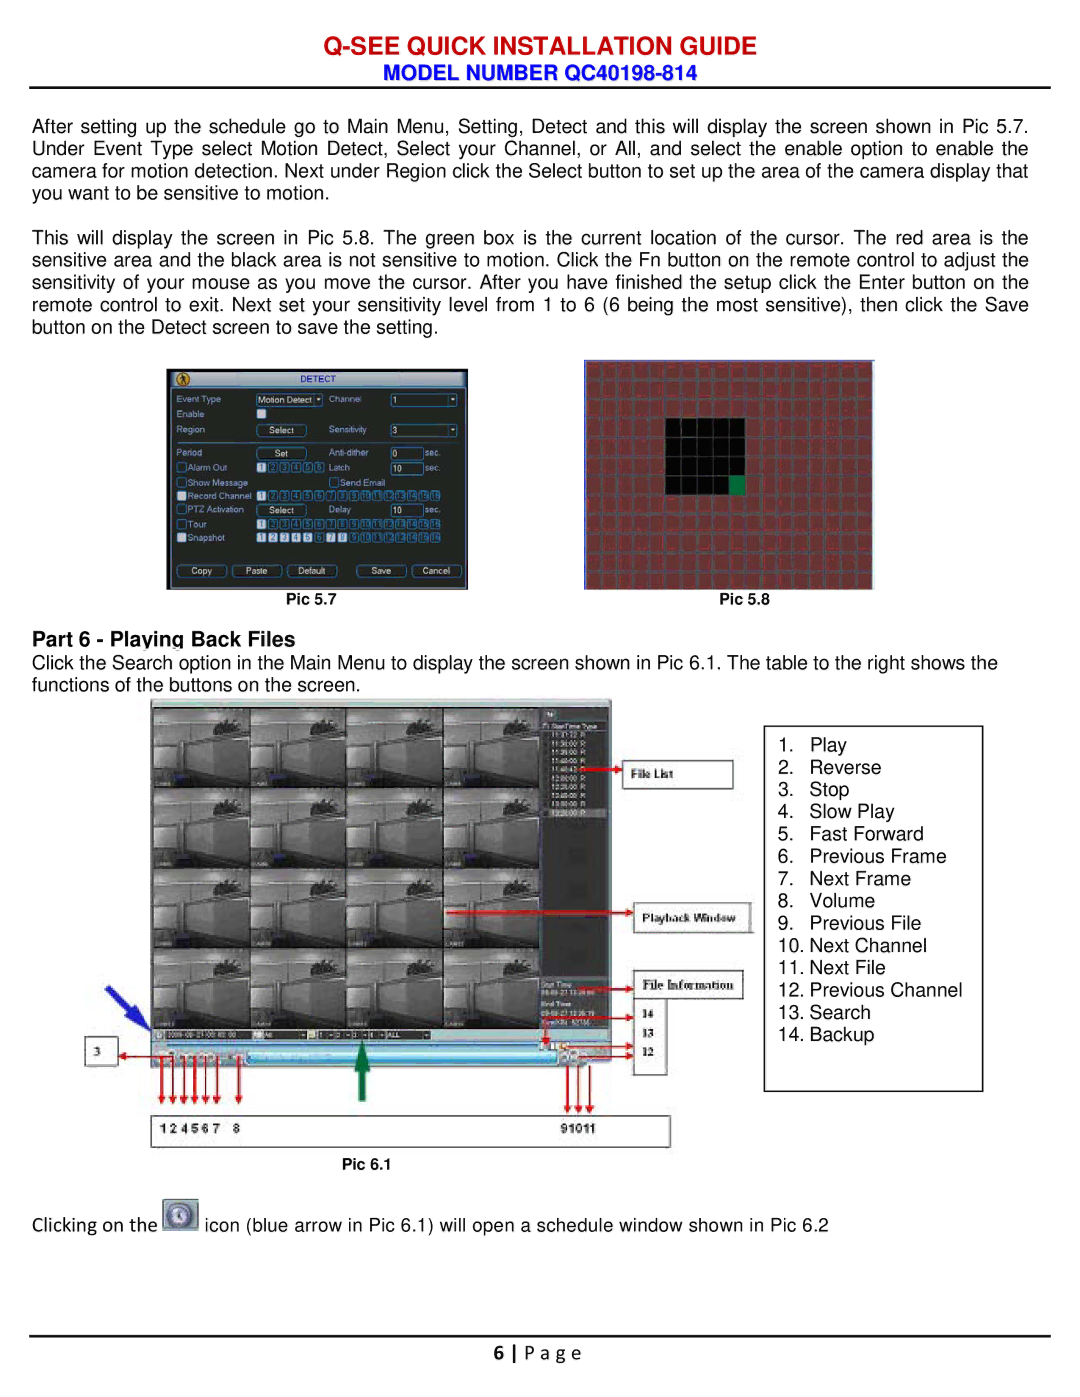
After setting up the schedule go to Main Menu, Setting, Detect and this will display the screen shown in Pic 5.7. Under Event Type select Motion Detect, Select your Channel, or All, and select the enable option to enable the camera for motion detection. Next under Region click the Select button to set up the area of the camera display that you want to be sensitive to motion.
This will display the screen in Pic 5.8. The green box is the current location of the cursor. The red area is the sensitive area and the black area is not sensitive to motion. Click the Fn button on the remote control to adjust the sensitivity of your mouse as you move the cursor. After you have finished the setup click the Enter button on the remote control to exit. Next set your sensitivity level from 1 to 6 (6 being the most sensitive), then click the Save button on the Detect screen to save the setting.
Pic 5.7 | Pic 5.8 |
Part 6 - Playing Back Files
Click the Search option in the Main Menu to display the screen shown in Pic 6.1. The table to the right shows the functions of the buttons on the screen.
1. | Play |
2. | Reverse |
3. | Stop |
4. | Slow Play |
5. | Fast Forward |
6. | Previous Frame |
7. | Next Frame |
8. | Volume |
9. | Previous File |
10. Next Channel | |
11. | Next File |
12. Previous Channel
13. Search
14. Backup
Pic 6.1
Clicking on the ![]() icon (blue arrow in Pic 6.1) will open a schedule window shown in Pic 6.2
icon (blue arrow in Pic 6.1) will open a schedule window shown in Pic 6.2
6 P a g e
