![]() 1675 MacArthur Blvd., Costa Mesa, CA, 92626 USA
1675 MacArthur Blvd., Costa Mesa, CA, 92626 USA
Main Number (714)
Customer Service(714)
HPRi Loudspeaker Accessory User Manual
HPR YOKE 122 Yoke Bracket
Introduction
This yoke mount is specifically for mounting the QSC HPR 122i loudspeaker to a structural support element (light- ing or soundstage truss or other load bearing truss, etc.). Additionally, it may be used vertically oriented atop a 35mm loudspeaker pole mount allowing up- or
Contents
•Steel Yoke Bracket (1)
•M10
•Rubber Flat Washers (2)
•Steel Flat Washers (2)
•Steel Lock Washers (2)
•This User Manual
Important Safety Information
Do not use this yoke bracket to attach the HPR 122i to a wall or other architectural element!
Attach the base of this yoke bracket to the
WARNING! Before placing, installing, rigging, or suspending any speaker product, inspect all hard- ware, suspension, cabinets, transducers, brackets and associated equipment for damage. Any missing, corroded, deformed or
Consult a licensed, professional engineer when any doubt or questions arise regarding a physical equipment installation. Ensure all local, state, and national regulations regarding the installation, operation, and safety of this equipment are understood and adhered to.
Attaching the Yoke to the Loudspeaker
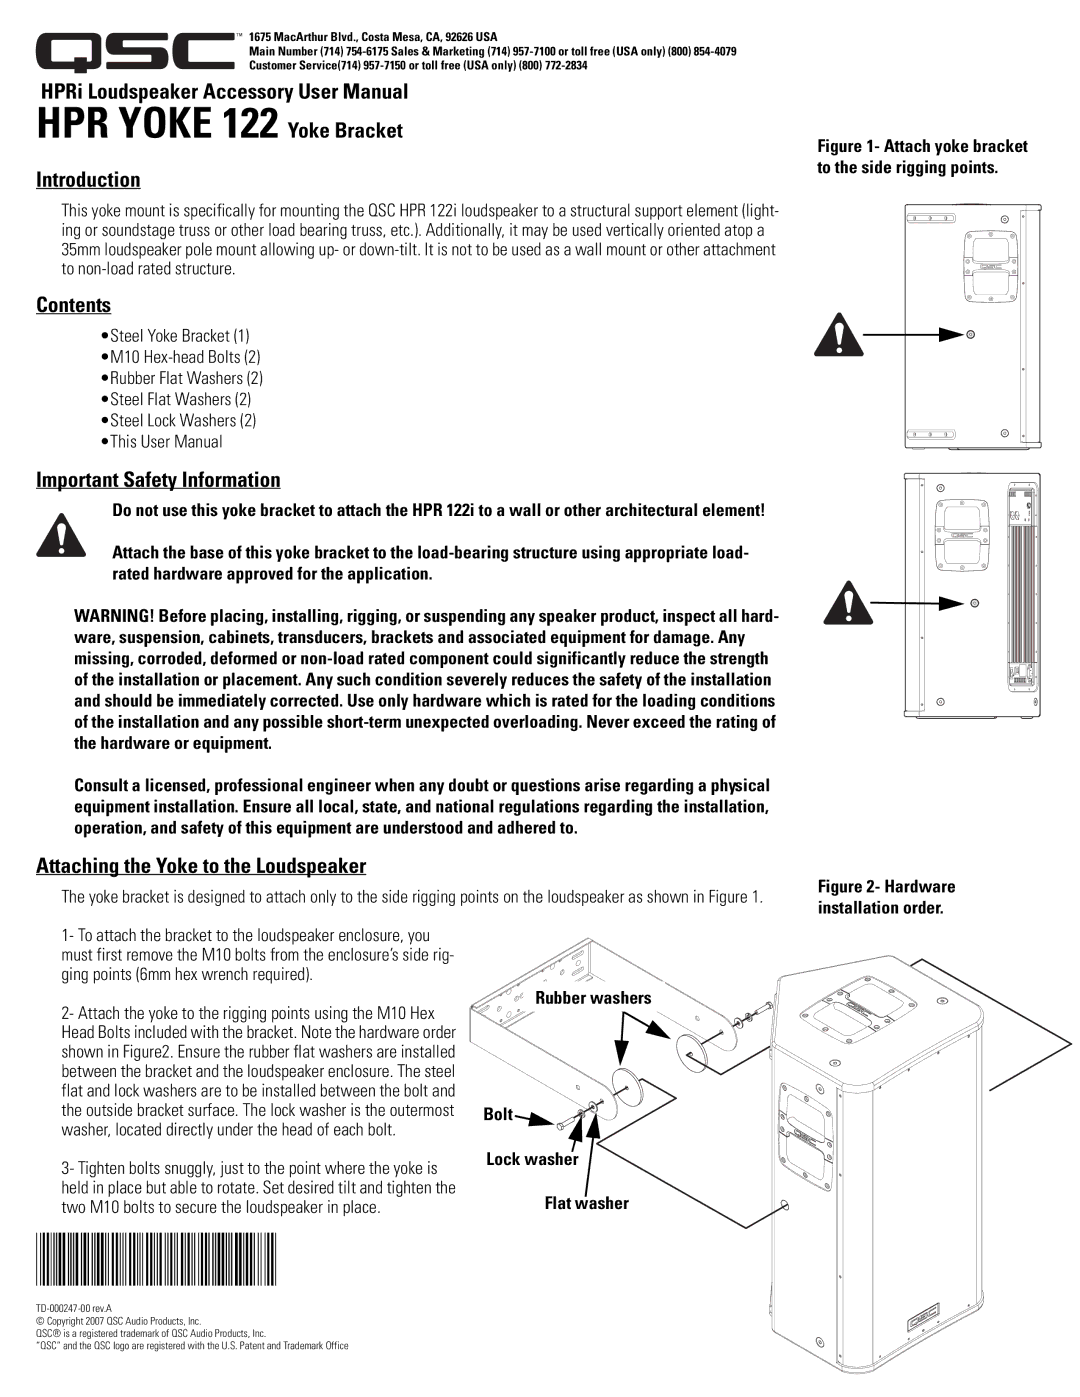
The yoke bracket is designed to attach only to the side rigging points on the loudspeaker as shown in Figure 1.
Figure 1- Attach yoke bracket to the side rigging points.
Figure 2- Hardware installation order.
1- To attach the bracket to the loudspeaker enclosure, you must first remove the M10 bolts from the enclosure’s side rig- ging points (6mm hex wrench required).
2- Attach the yoke to the rigging points using the M10 Hex Head Bolts included with the bracket. Note the hardware order shown in Figure2. Ensure the rubber flat washers are installed between the bracket and the loudspeaker enclosure. The steel flat and lock washers are to be installed between the bolt and the outside bracket surface. The lock washer is the outermost washer, located directly under the head of each bolt.
3- Tighten bolts snuggly, just to the point where the yoke is held in place but able to rotate. Set desired tilt and tighten the two M10 bolts to secure the loudspeaker in place.
Rubber washers
Bolt ![]()
![]()
Lock washer
Flat washer
*TD-000247-GP*
© Copyright 2007 QSC Audio Products, Inc.
QSC® is a registered trademark of QSC Audio Products, Inc.
“QSC” and the QSC logo are registered with the U.S. Patent and Trademark Office