Mounting
Attaching to Low Frequency Enclosure
The mid-high loudspeaker assembly attaches to the top of the QSC low frequency cabinet with three 5/16-18 bolts, 0.75” long, with lock washers. This hardware ships installed on the low frequency cabinet. We recommend the use of serviceable thread locking com- pound when installing the bolts to prevent loosening due to vibration. Do not fully tighten the mounting hardware before aiming (see below).
Aiming
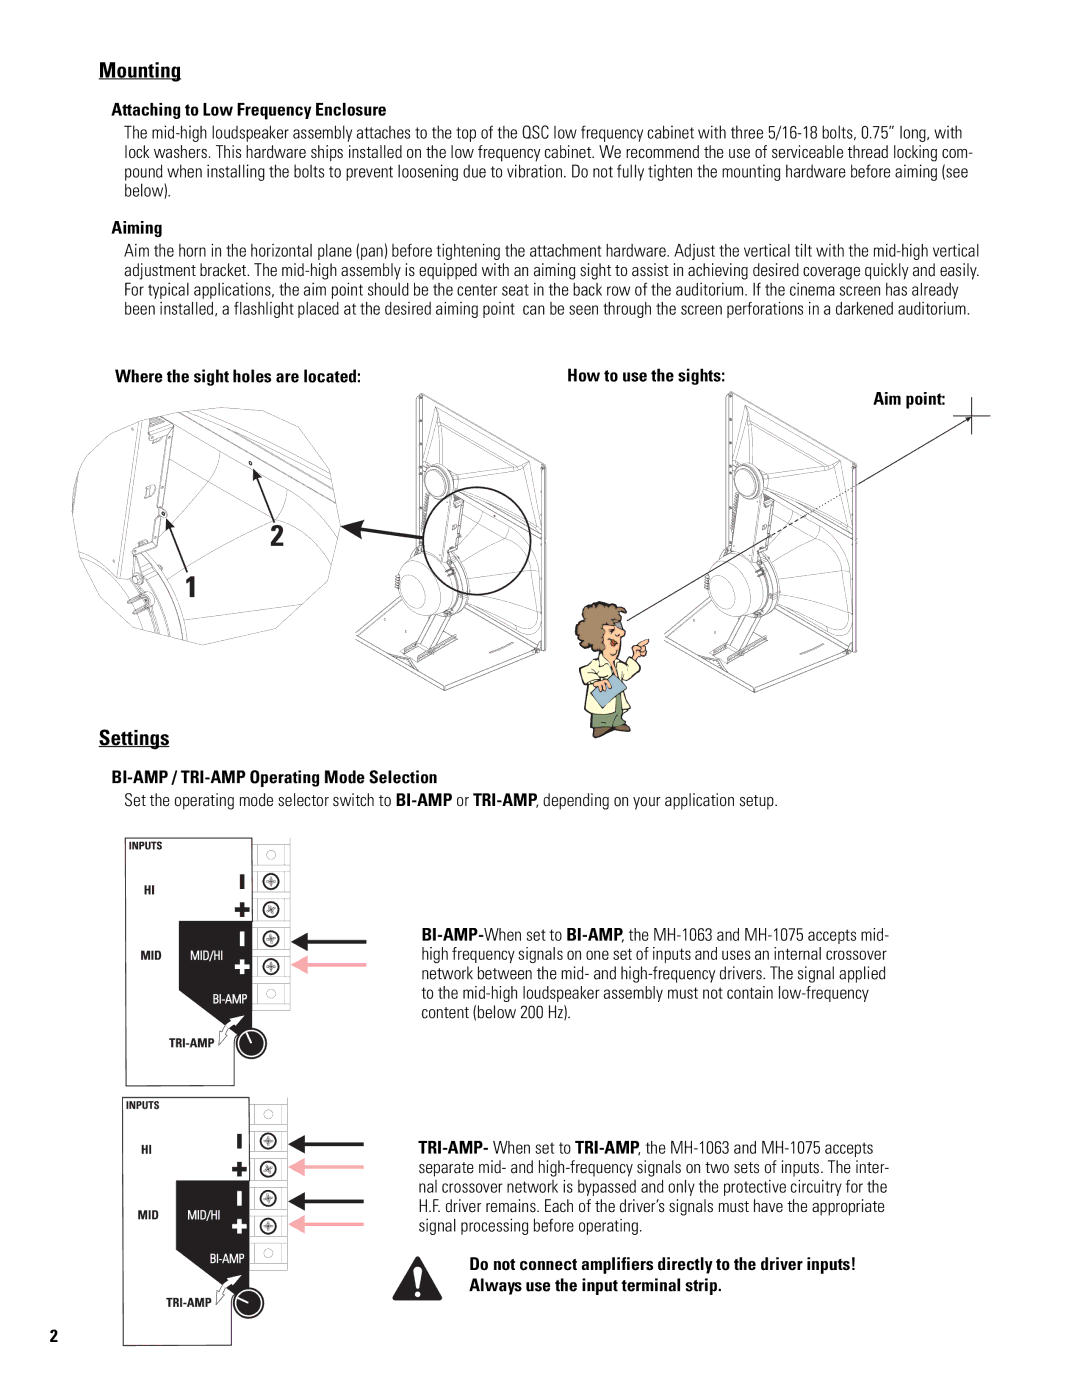
Aim the horn in the horizontal plane (pan) before tightening the attachment hardware. Adjust the vertical tilt with the mid-high vertical adjustment bracket. The mid-high assembly is equipped with an aiming sight to assist in achieving desired coverage quickly and easily. For typical applications, the aim point should be the center seat in the back row of the auditorium. If the cinema screen has already been installed, a flashlight placed at the desired aiming point can be seen through the screen perforations in a darkened auditorium.
Where the sight holes are located: | How to use the sights: |
Aim point:
Settings
BI-AMP / TRI-AMP Operating Mode Selection
Set the operating mode selector switch to BI-AMPor TRI-AMP, depending on your application setup.
BI-AMP-When set to BI-AMP, the MH-1063 and MH-1075 accepts mid- high frequency signals on one set of inputs and uses an internal crossover network between the mid- and high-frequency drivers. The signal applied to the mid-high loudspeaker assembly must not contain low-frequency content (below 200 Hz).
TRI-AMP-When set to TRI-AMP, the MH-1063 and MH-1075 accepts separate mid- and high-frequency signals on two sets of inputs. The inter- nal crossover network is bypassed and only the protective circuitry for the H.F. driver remains. Each of the driver’s signals must have the appropriate signal processing before operating.
Do not connect amplifiers directly to the driver inputs!
Always use the input terminal strip.