
EB2082-I, GS115-SW, FB2082-I, WL115-SW, PB2082-I specifications
QSC Audio is renowned for its high-performance audio solutions, and the FB2082-I, PB2082-I, EB2082-I, WL115-SW, and GS115-SW models showcase this commitment to excellence. Each of these products offers unique features and characteristics, making them ideal for various professional audio applications.The FB2082-I is a full-range loudspeaker designed for permanent installation in venues such as theaters, auditoriums, and houses of worship. It features a dual 8-inch low-frequency driver and a 1-inch compression driver, providing robust sound reproduction with exceptional clarity. Its weather-resistant enclosure allows for outdoor use, making it a versatile choice for any setting. Integrated mounting points simplify installation while ensuring optimal performance.
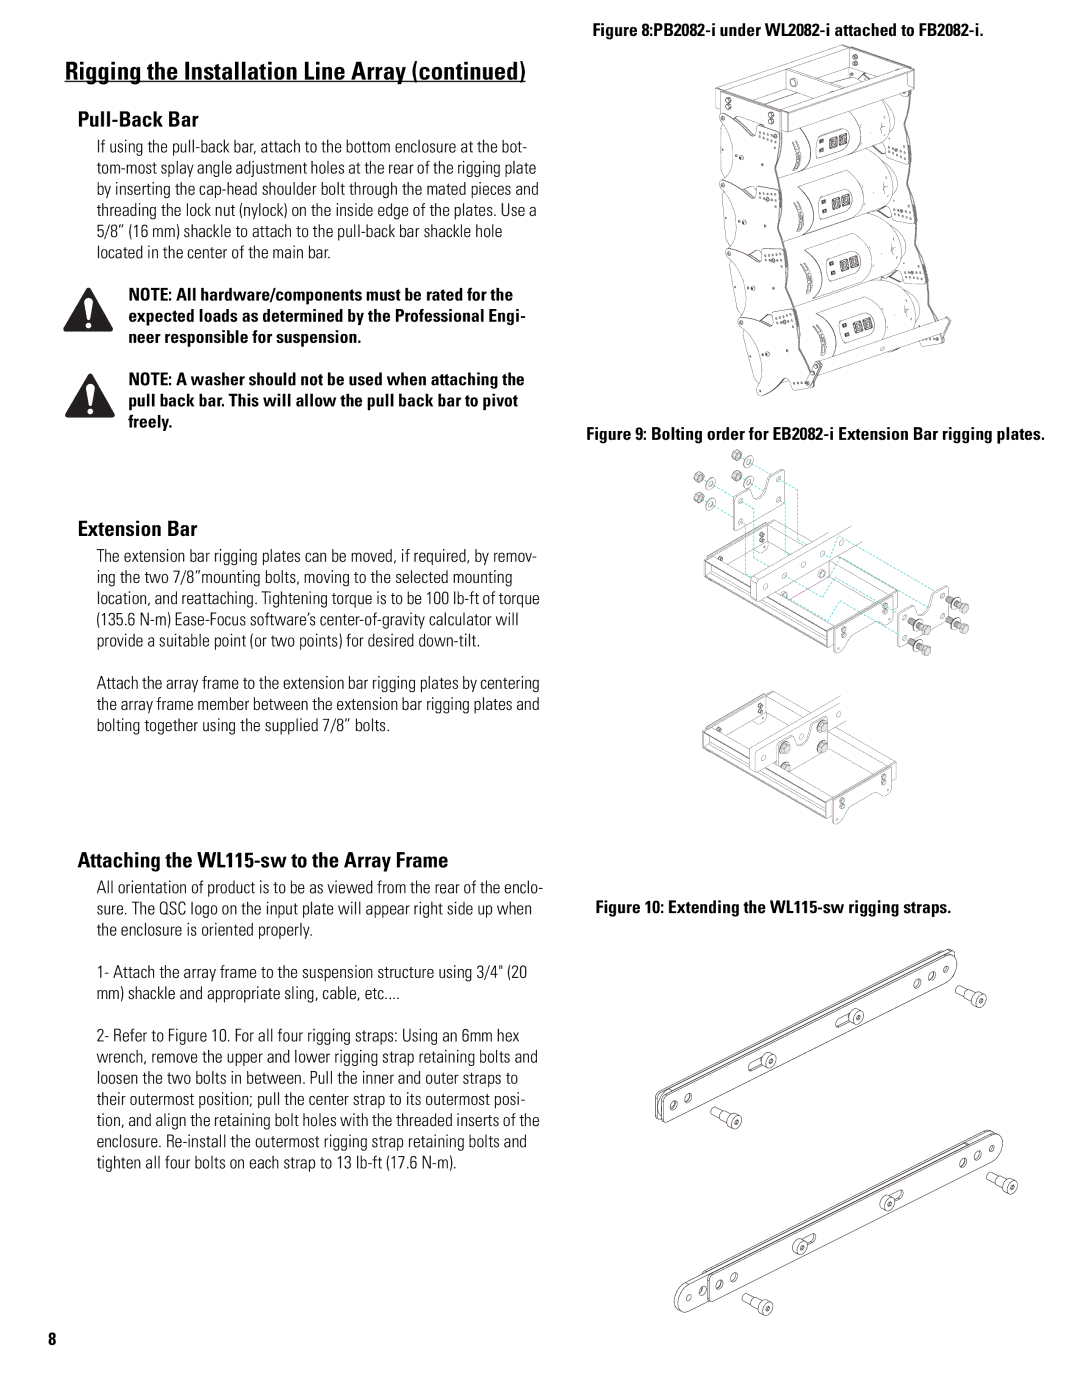
The PB2082-I takes versatility a step further, offering a similar dual-8 configuration but with the added benefit of pole-mounting capability. This feature makes it suitable for mobile applications such as concerts or corporate events. The robust design and high-frequency response make the PB2082-I an outstanding choice for those needing flexibility without compromising quality.
For outdoor environments, the EB2082-I stands out with its enhanced weatherproofing. This model is specifically engineered to withstand harsh conditions while delivering high-quality audio. Its passive crossover network optimizes frequency distribution, ensuring that sound remains consistent, even over long distances.
The WL115-SW subwoofer completes the setup, delivering powerful low-end frequencies with its 15-inch driver. Ideal for both touring and fixed installations, it offers exceptional sound pressure levels and deep bass response. The included integrated rigging hardware allows for efficient deployment in various configurations.
Finally, the GS115-SW is designed for installed applications where space is at a premium. This compact yet powerful subwoofer also features a 15-inch driver but is optimized for tight spaces without sacrificing performance. The GS115-SW is perfect for smaller venues or rooms that demand a full-bodied sound while maintaining aesthetic appeal.
In summary, the QSC Audio FB2082-I, PB2082-I, EB2082-I, WL115-SW, and GS115-SW represent a sophisticated blend of technology, design, and performance. These models cater to diverse applications, ensuring that sound professionals have the tools they need to deliver outstanding audio experiences, whether in fixed installations or mobile setups. Each speaker is designed with durability, performance, and versatility in mind, making them essential components for any audio system.