
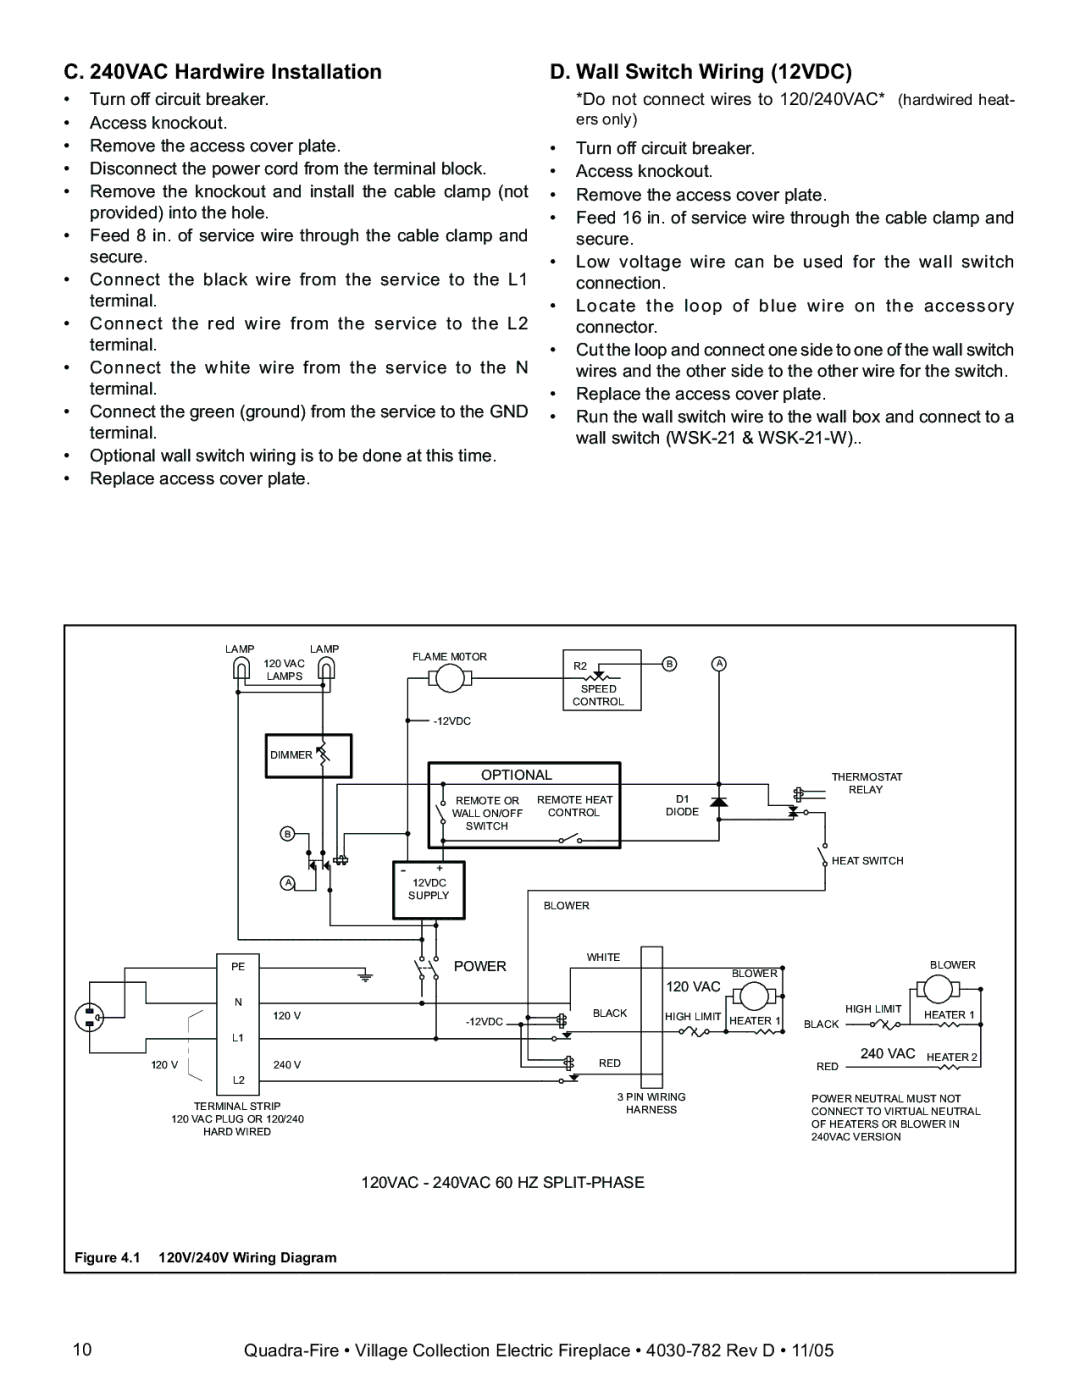
QV32E-B, QV32EV-B specifications
The Quadra-Fire QV32EV-B and QV32E-B are high-efficiency gas stoves that combine modern aesthetics with cutting-edge technology. Designed for homeowners seeking warmth and style, these models stand out for their superb heat output and reliable performance.One of the main features of the Quadra-Fire QV32EV-B and QV32E-B is their advanced heating capability. The stoves are capable of producing up to 32,000 BTUs, efficiently heating spaces while maintaining a clean, environmentally conscious burn. This energy-efficient performance makes them ideal for residential heating, offering consistent warmth during colder months.
Both models employ a unique, patented Easy Clean system, which simplifies maintenance by making it easier to access the stove's components. This feature ensures that the stove remains in optimal condition, allowing homeowners more time to enjoy the warm ambiance it creates rather than worrying about upkeep.
The QV32EV-B and QV32E-B are characterized by their sleek, contemporary design, featuring a large viewing window that provides an unobstructed view of the flickering flames, enhancing any room's atmosphere. Additionally, they can be customized with a variety of finishes and decorative choices, allowing users to perfectly match their decor.
These models come equipped with the Quadra-Fire Ember-Fire technology, which maximizes the visual appeal of the flames, creating a realistic, captivating fire experience. This technology not only enhances aesthetic pleasure but also improves the efficiency of the gas burn, contributing to the overall effectiveness of the unit.
The stoves feature a state-of-the-art electronic ignition system for ease of use. This enables users to ignite their stove with the push of a button, eliminating the need for fire starters or matches. The adjustable thermostat allows for precise temperature control, providing comfort tailored to individual preferences.
Safety is paramount in the design of the QV32EV-B and QV32E-B, as they incorporate features like a safety shut-off system that automatically turns off the stove in case of malfunction. The sturdy construction and high-quality materials ensure long-lasting durability, making these stoves a worthwhile investment.
In summary, the Quadra-Fire QV32EV-B and QV32E-B offer a blend of efficiency, style, and user-friendly technology, making them an exceptional choice for anyone looking to enhance their home's heating system. With their combination of modern design and reliable performance, they are sure to be a centerpiece in any living space.