Manuals
/
Rackmount Solutions
/
Computer Equipment
/
Power Supply
Rackmount Solutions
PRO500E, PRO700iE, PRO1500E, PRO500iE, PRO1100E, PRO700E
manual
English
Models:
PRO700E
PRO500E
PRO1100E
PRO500iE
PRO1500E
PRO700iE
1
16
23
23
Download
23 pages
60.7 Kb
13
14
15
16
17
18
19
20
Specs
Install
Alarms On Battery
Checking The Site Wiring Fault
Warranty
Replacing The Battery
Default
If The Ups Requires Service
Dip Switch Settings
Page 16
Image 16
Page 15
Page 17
Page 16
Image 16
Page 15
Page 17
Contents
Page
PRO-E Series Users Manual
IMPORTANT SAFETY INSTRUCTIONS SAVE THESE INSTRUCTIONS
This symbol indicates ATTENTION
This symbol indicates Risk of Electrical Shock
This symbol indicates Direct Current Supply
AUTHORIZED SERVICE PERSONNEL ONLY
Receiving Inspection
Para Systems Life Support Policy
On-Line/On-Battery/Boost/Buck LED Fault LED Overload LED
REAR PANEL
120V Models
WARNING The 230V models are NETWORK PROTECTION ONLY
230V Models
INSTALLATION
INSTALLATION PLACEMENT
CONNECTING YOUR EQUIPMENT
CONNECTING THE UPS TO AN AC SOURCE
CHECKING THE SITE WIRING FAULT
CHARGING THE BATTERY
COMMUNICATIONS PORT CONNECTION OPTIONAL
DIP SWITCH SETTINGS
TURNING THE UNIT ON/OFF
ON / OFF / Test Button
SELF TEST
ALARMS ON BATTERY
LOW BATTERY WARNING
WEAK/BAD BATTERY
UPS FAULT
COMMUNICATIONS PORTS RS232 and USB
Check the specifications see
English
Press and release the On/Off
even though there is
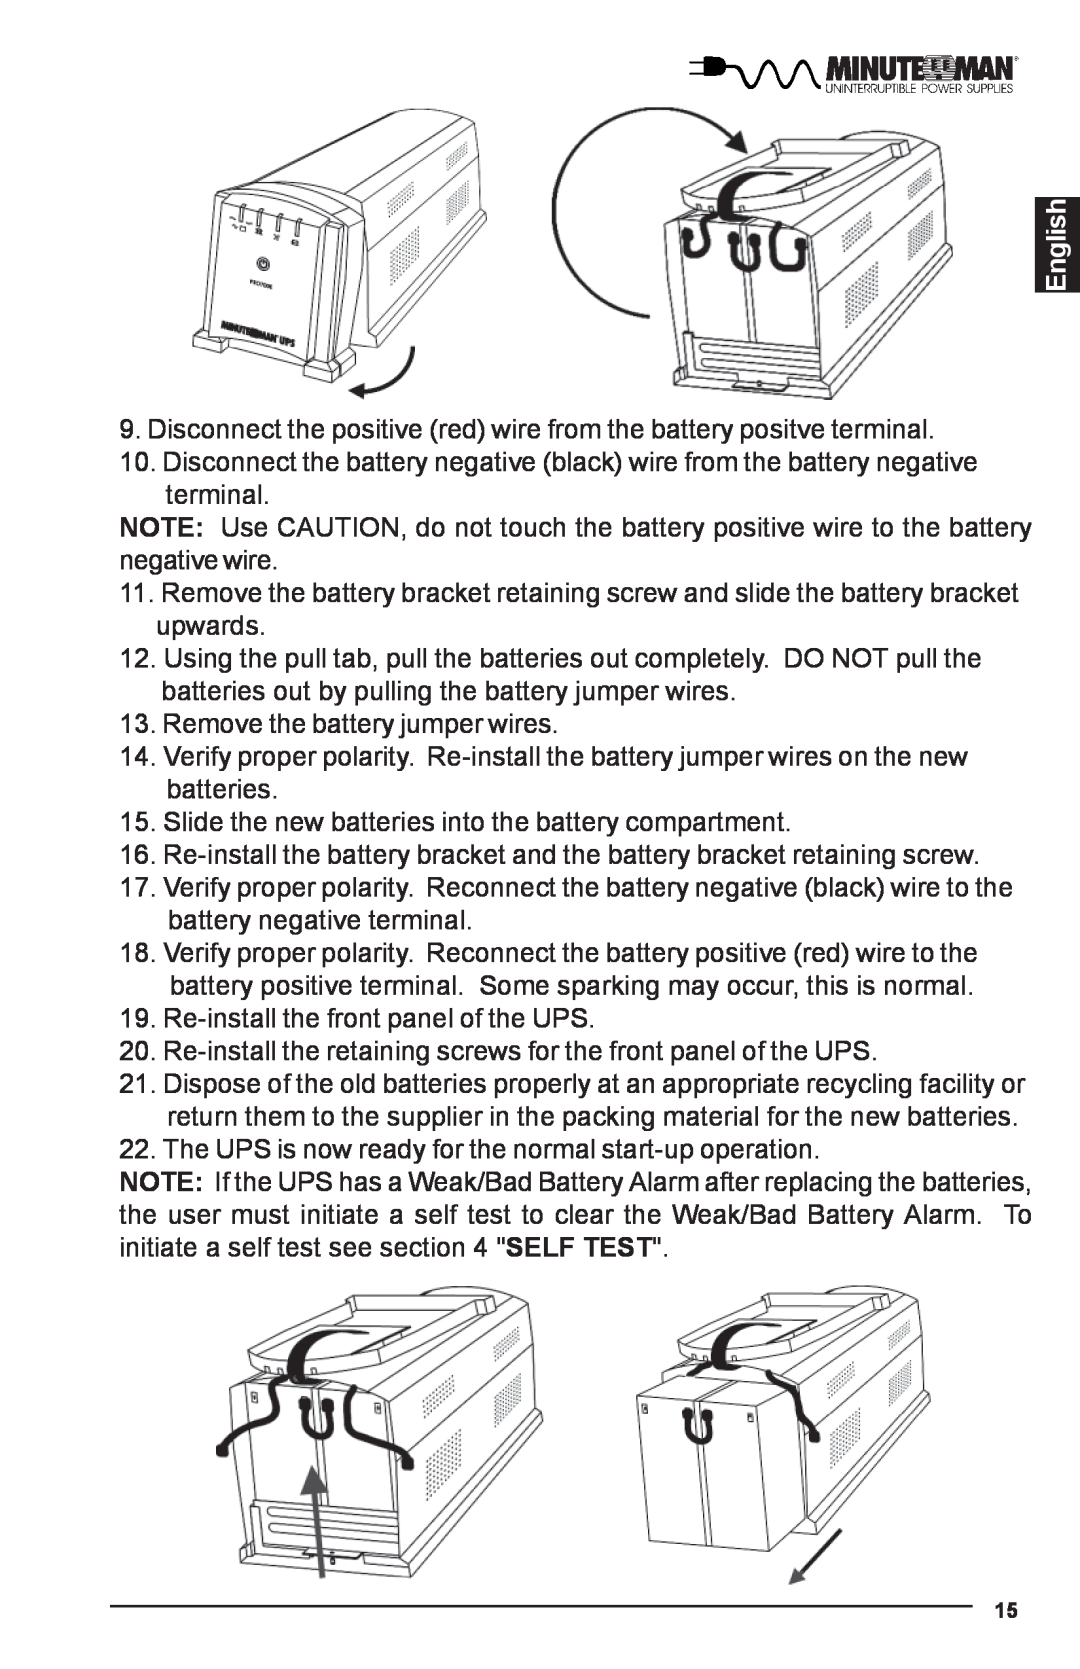
REPLACING THE BATTERY
BATTERY REPLACEMENT PROCEDURE
Yuasa
9. Disconnect the positive red wire from the battery positve terminal
IF THE UPS REQUIRES SERVICE
MODEL NUMBER
PRO500E
PRO700E
PRO1100E
Default
These items may require optional software or hardware
Function
Factory
Para Systems Inc. Para Systems warrants this equipment, when properly applied and operated within specified conditions, against faulty materials or workmanship for a period of three years from the date of purchase. For equip- ment sites within the United States and Canada, this warranty covers repair or replacement of defective equipment at the discretion of Para Systems. Repair will be from the nearest authorized service center. Replacement parts and warranty labor will be borne by Para Systems. For equipment located outside of the United States and Canada, Para Systems only covers faulty parts. Para Systems products repaired or replaced pursuant to this warranty shall be war- ranted for the unexpired portion of the warranty applying to the original product. This warranty applies only to the original purchaser who must have properly registered the product within 10 days of purchase
LIMITED PRODUCT WARRANTY
Continued
Robert Calhoun
DECLARATION OF CONFORMITY
English
Top
Page
Image
Contents