Note: If you prepare your own coaxial cable, be sure to slide the supplied matching transformer’s weather boot onto the ca- ble before you attach the
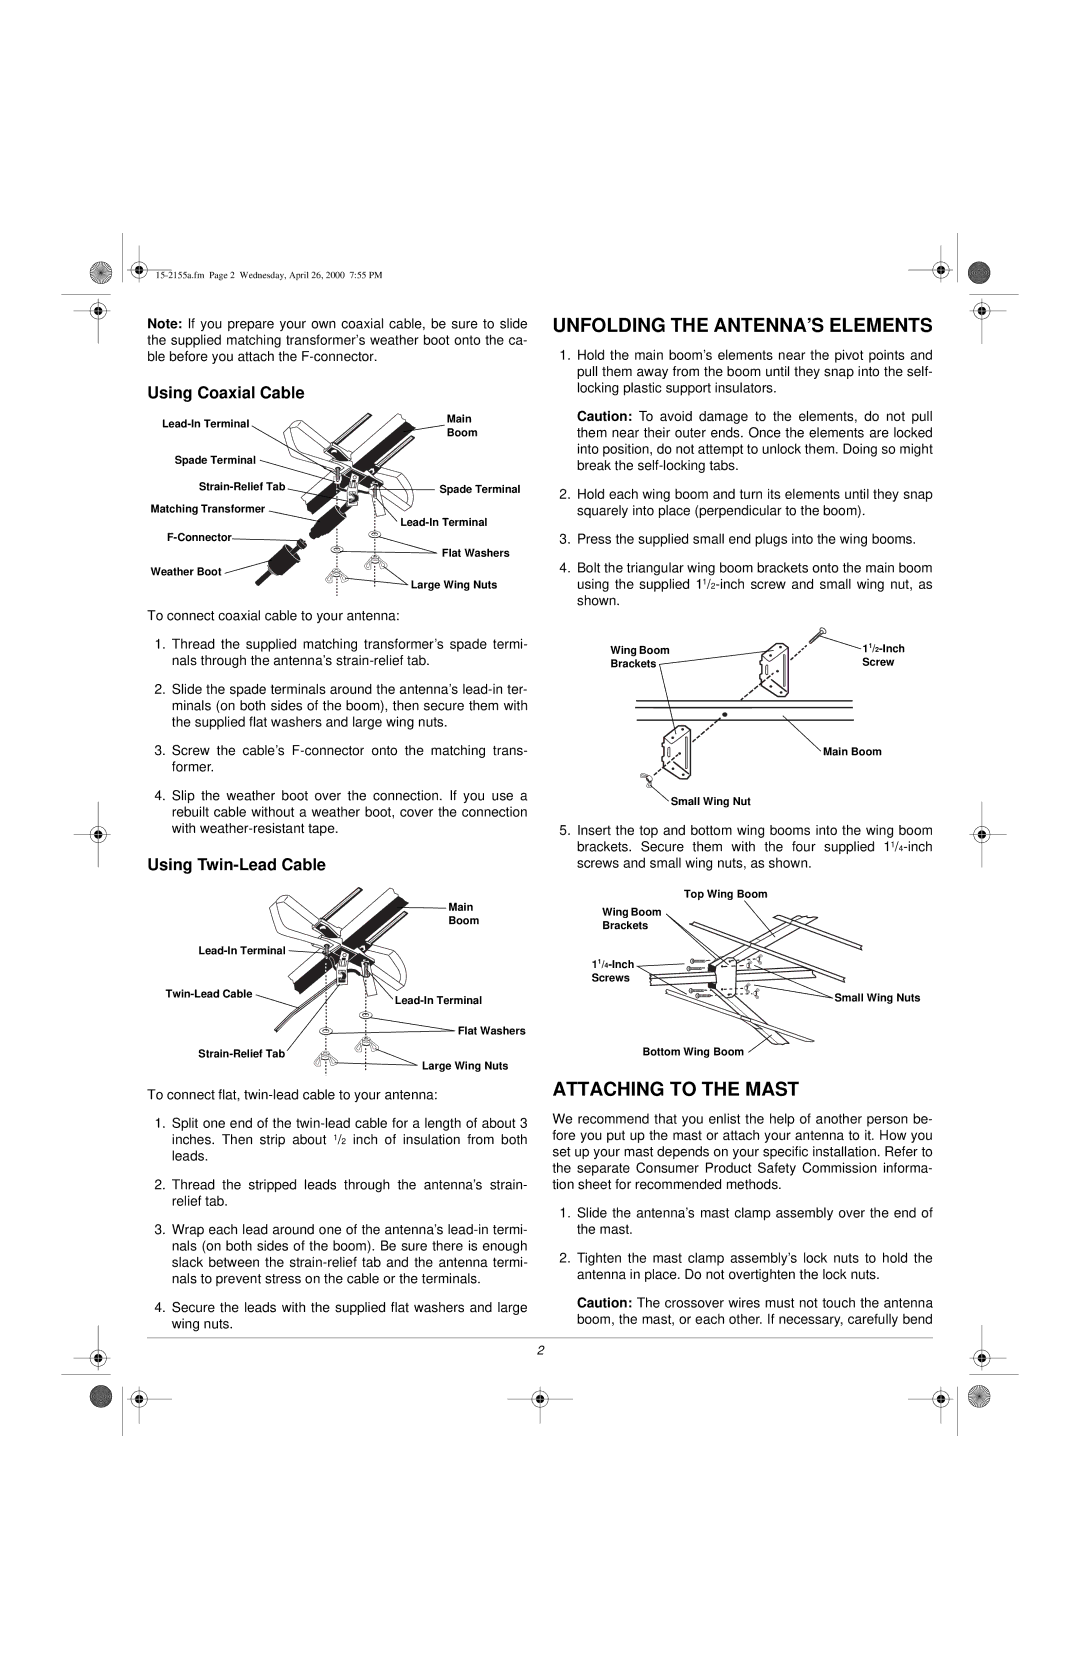
Using Coaxial Cable
Main | ||
Boom | ||
| ||
Spade Terminal |
| |
Spade Terminal | ||
Matching Transformer |
|
![]()
![]() Flat Washers
Flat Washers
Weather Boot ![]()
![]() Large Wing Nuts
Large Wing Nuts
To connect coaxial cable to your antenna:
1.Thread the supplied matching transformer’s spade termi- nals through the antenna’s
2.Slide the spade terminals around the antenna’s
3.Screw the cable’s
4.Slip the weather boot over the connection. If you use a rebuilt cable without a weather boot, cover the connection with
Using Twin-Lead Cable
![]() Main
Main
Boom
![]() Lead-In
Lead-In
Flat Washers |
![]()
![]() Large Wing Nuts
Large Wing Nuts
To connect flat,
1.Split one end of the
2.Thread the stripped leads through the antenna’s strain- relief tab.
3.Wrap each lead around one of the antenna’s
4.Secure the leads with the supplied flat washers and large wing nuts.
UNFOLDING THE ANTENNA’S ELEMENTS
1.Hold the main boom’s elements near the pivot points and pull them away from the boom until they snap into the self- locking plastic support insulators.
Caution: To avoid damage to the elements, do not pull them near their outer ends. Once the elements are locked into position, do not attempt to unlock them. Doing so might break the
2.Hold each wing boom and turn its elements until they snap squarely into place (perpendicular to the boom).
3.Press the supplied small end plugs into the wing booms.
4.Bolt the triangular wing boom brackets onto the main boom using the supplied
Wing Boom | |
Brackets | Screw |
![]() Main Boom
Main Boom
![]() Small Wing Nut
Small Wing Nut
5.Insert the top and bottom wing booms into the wing boom brackets. Secure them with the four supplied
Top Wing Boom
Wing Boom
Brackets
Screws
Small Wing Nuts
Bottom Wing Boom ![]()
ATTACHING TO THE MAST
We recommend that you enlist the help of another person be- fore you put up the mast or attach your antenna to it. How you set up your mast depends on your specific installation. Refer to the separate Consumer Product Safety Commission informa- tion sheet for recommended methods.
1.Slide the antenna’s mast clamp assembly over the end of the mast.
2.Tighten the mast clamp assembly’s lock nuts to hold the antenna in place. Do not overtighten the lock nuts.
Caution: The crossover wires must not touch the antenna boom, the mast, or each other. If necessary, carefully bend
2