Chapter 2: Using the Remote Control
Indicator
VCR1 ON OFF | TV |
DVD VCR2 AUX SAT•CABLE
MUTESKIP
| CH + |
L | V |
O | O |
V | L |
SOUND | CH - |
GO BACK |
GUIDEINFO
OK
MENUCLEAR
1![]() 2
2 ![]() 3
3 ![]()
4 ![]() 5
5 ![]() 6
6 ![]()
7 ![]() 8
8 ![]() 9
9 ![]()
WHO•INPUT ANTENNA
0
REVERSE PLAY FORWARD
RECORD STOP PAUSE
Button Descriptions for TV Mode
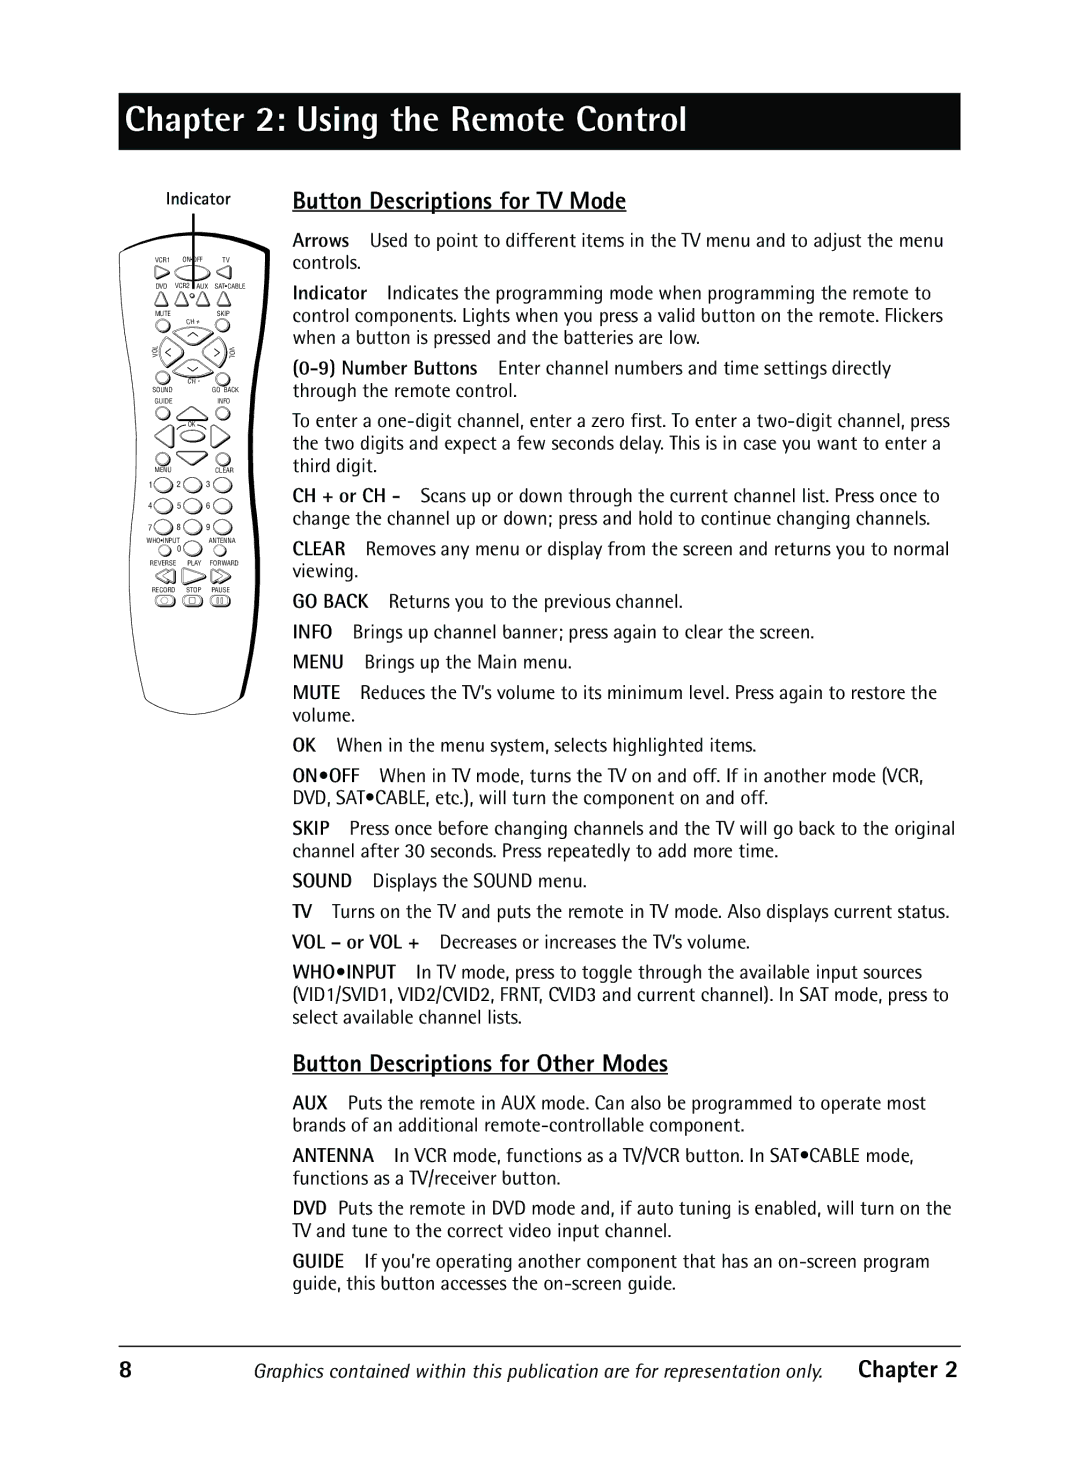
Arrows Used to point to different items in the TV menu and to adjust the menu controls.
Indicator Indicates the programming mode when programming the remote to control components. Lights when you press a valid button on the remote. Flickers when a button is pressed and the batteries are low.
To enter a
CH + or CH - Scans up or down through the current channel list. Press once to change the channel up or down; press and hold to continue changing channels.
CLEAR Removes any menu or display from the screen and returns you to normal viewing.
GO BACK Returns you to the previous channel.
INFO Brings up channel banner; press again to clear the screen.
MENU Brings up the Main menu.
MUTE Reduces the TVÕs volume to its minimum level. Press again to restore the volume.
OK When in the menu system, selects highlighted items.
ON•OFF When in TV mode, turns the TV on and off. If in another mode (VCR, DVD, SAT¥CABLE, etc.), will turn the component on and off.
SKIP Press once before changing channels and the TV will go back to the original channel after 30 seconds. Press repeatedly to add more time.
SOUND Displays the SOUND menu.
TV Turns on the TV and puts the remote in TV mode. Also displays current status.
VOL – or VOL + Decreases or increases the TVÕs volume.
WHO•INPUT In TV mode, press to toggle through the available input sources (VID1/SVID1, VID2/CVID2, FRNT, CVID3 and current channel). In SAT mode, press to select available channel lists.
Button Descriptions for Other Modes
AUX Puts the remote in AUX mode. Can also be programmed to operate most brands of an additional
ANTENNA In VCR mode, functions as a TV/VCR button. In SAT¥CABLE mode, functions as a TV/receiver button.
DVD Puts the remote in DVD mode and, if auto tuning is enabled, will turn on the TV and tune to the correct video input channel.
GUIDE If youÕre operating another component that has an
8 | Graphics contained within this publication are for representation only. | Chapter 2 |
