Playing a disc (basic playback)
This owner’s manual explains the basic instructions for operating this unit. Some DVDs are produced in a manner that allows specific or limited operation during playback. Therefore, this unit may not respond to all operating commands. THIS IS NOT A DEFECT. Please refer to the instructions accompanying the specific DVD in question for more information about the options available on that DVD.
“![]() ” may appear on the screen during operation. A “
” may appear on the screen during operation. A “ ![]() ” means the desired operation is not permitted by the unit or disc.
” means the desired operation is not permitted by the unit or disc.
Playing a disc
1.Slide the CHARGE / STANDBY / ON switch on the left side of the unit to the ON position. See Customizing the function settings before proceeding to step 2.
2.Slide the open knob rightwards to open the disc door.
3.Hold the disc by its sides and carefully place it onto the spindle with the label side facing up, pushing gently until you hear a “click”.
4.Gently push the disc door closed. It takes a short while for your unit to load
the disc. After loading, for most DVDs, the unit will automatically start playing or take you to the main menu.
5. If the unit does not automatically start playing the DVD, press the ![]() PLAY button.
PLAY button.
Pausing playback (still mode)
Press the ![]() PAUSE button. To resume normal playback, press the
PAUSE button. To resume normal playback, press the ![]() PLAY button.
PLAY button.
Each time you press the ![]() PAUSE button, the picture advances one frame on a DVD.
PAUSE button, the picture advances one frame on a DVD.
Stopping playback
Press the ![]() STOP button at the location where you want to interrupt playback. To resume playback at the position where the disc was stopped, press the
STOP button at the location where you want to interrupt playback. To resume playback at the position where the disc was stopped, press the ![]() PLAY button.
PLAY button.
If you press the ![]() STOP button twice, the unit’s memory will be cleared and pressing the
STOP button twice, the unit’s memory will be cleared and pressing the ![]() PLAY button will reset the DVD to the beginning.
PLAY button will reset the DVD to the beginning.
Fast forward / Fast reverse
1.Press the ![]() SEARCH or
SEARCH or ![]() SEARCH button when a DVD is playing. Each time you press the
SEARCH button when a DVD is playing. Each time you press the ![]() SEARCH or
SEARCH or ![]() SEARCH button, the playback speed changes in the following sequence: (For an Audio CD, press and
SEARCH button, the playback speed changes in the following sequence: (For an Audio CD, press and
hold the ![]() SEARCH or
SEARCH or ![]() SEARCH button to perform fast forward/reverse.)
SEARCH button to perform fast forward/reverse.)
2x | 4x | 8x | 16x | 2x | 4x | 8x | 16 x |
2. Press the ![]() PLAY button when you reach the desired point to resume normal playback.
PLAY button when you reach the desired point to resume normal playback.
Notes:
•The DVD player mutes sound and subtitles during reverse and forward scan of DVDs.
•The fast playback speed may differ depending on the disc.
Skip (forward / reverse)
Press the ![]() NEXT button to advance chapters on a DVD.
NEXT button to advance chapters on a DVD.
Press and hold the ![]() NEXT button to skip to the next tracks on an Audio CD.
NEXT button to skip to the next tracks on an Audio CD.
Press the ![]() PREV button to go back to the previous chapters on a DVD.
PREV button to go back to the previous chapters on a DVD.
Press and hold the ![]() PREV button to skip to the previous tracks on an Audio CD.
PREV button to skip to the previous tracks on an Audio CD.
Audio selection
On some DVDs, the sound is recorded in two or more formats. Follow the directions below to select the preferred language and sound system.
1.While a disc is playing, press the AUDIO button to show the current audio format number.
Audio 1/3:Dolby D 2ch English
2.Press the AUDIO button repeatedly to select the desired audio format.
Notes:
•If only one audio format is recorded on the DVD, the number does not change.
•Some DVDs allow you to change audio selections via the disc menu only. If this is the case, press the MENU button and choose the appropriate language on the disc menu.
•You can select different audio channels (Stereo, Mono Left, Mono Right or
Subtitle selection
1. While a DVD is playing, press the SUBTITLE button to display the current language setting, as shown in the example.
Subtitle 02/03:Spanish
2.Press the SUBTITLE button repeatedly to select the desired subtitle language. You can turn subtitles off by pressing the SUBTITLE button repeatedly until “ Subtitle Off ” is displayed.
Notes:
•Some DVDs are set to display subtitles automatically, and you cannot turn them off even if you set the subtitle function to off.
•During some scenes, the subtitles may not appear immediately after you select your desired scene.
•The number of subtitle languages recorded differs depending on the disc. If only one language is recorded, the language does not change.
•This function can only be used for discs on which subtitles have been recorded in multiple languages.
•Some DVDs allow you to change subtitles via the disc menu only. If this is the case, press the MENU button and choose the appropriate subtitle on the disc menu.
Adjust the LCD screen
You can adjust the Brightness, Panel Display or Contrast of the LCD screen in playback mode.
1. | Press the SETUP button in playback mode. |
2. | Press the / button to select Brightness, Panel Display or Contrast. |
3.Then press the ![]() /
/ ![]() button to change the setting.
button to change the setting.
4.Press the SETUP button to exit the menu.
Viewing JPEG files |
|
| ||||
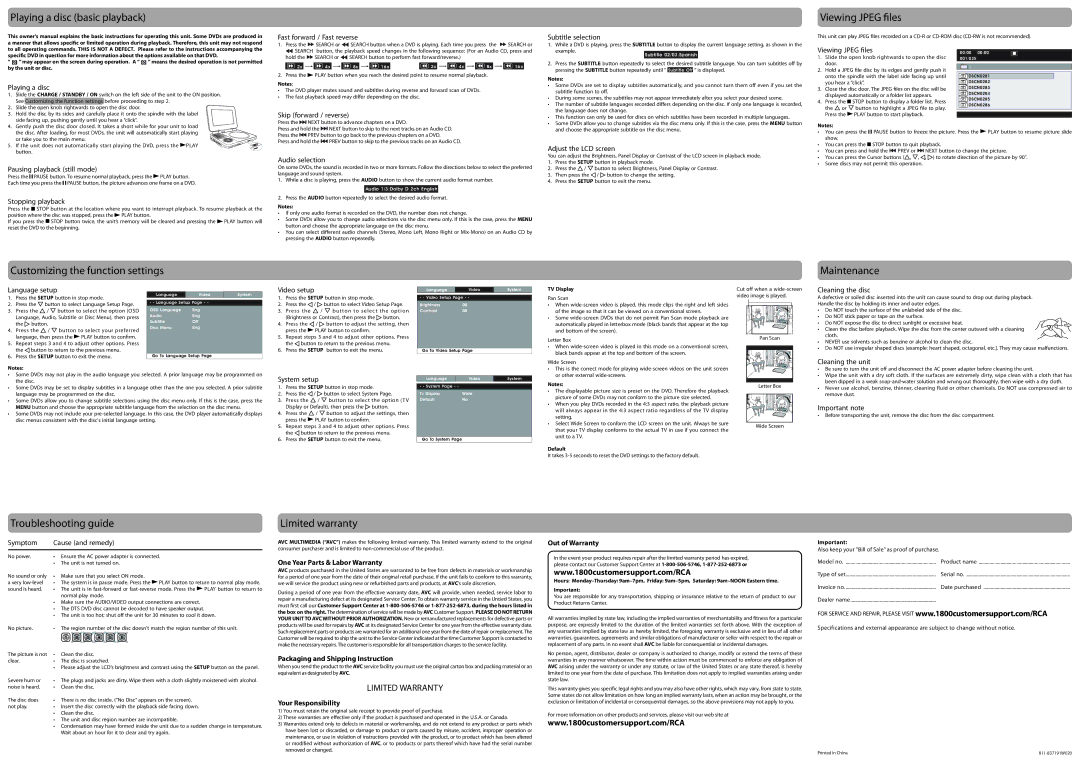
This unit can play JPEG files recorded on a | ||||||
Viewing JPEG files | 00:00 | 00:00 | ||||
1. | Slide the open knob rightwards to open the disc | 001/035 |
| |||
| door. |
|
| \ |
| |
2. | Hold a JPEG file disc by its edges and gently push it |
| ||||
|
| |||||
| onto the spindle with the label side facing up until | DSCN0281 | ||||
| you hear a “click”. | DSCN0282 | ||||
3. | Close the disc door. The JPEG files on the disc will be | DSCN0283 | ||||
DSCN0284 | ||||||
| displayed automatically or a folder list appears. | |||||
| DSCN0285 | |||||
4. | Press the | STOP button to display a folder list. Press | ||||
DSCN0286 | ||||||
| the | or | button to highlight a JPEG file to play. | |||
|
|
| ||||
| Press the | PLAY button to start playback. |
|
| ||
Notes:
•You can press the ![]() PAUSE button to freeze the picture. Press the
PAUSE button to freeze the picture. Press the ![]() PLAY button to resume picture slide show.
PLAY button to resume picture slide show.
•You can press the ![]() STOP button to quit playback.
STOP button to quit playback.
•You can press and hold the ![]() PREV or
PREV or ![]() NEXT button to change the picture.
NEXT button to change the picture.
• You can press the Cursor buttons ( , , ![]() ,
, ![]() ) to rotate direction of the picture by 90o.
) to rotate direction of the picture by 90o.
•Some discs may not permit this operation.
Customizing the function settings
Language setup |
|
|
|
|
| |||
1. | Press the SETUP button in stop mode. | Language | Video | System | ||||
|
|
| ||||||
2. | Press the | button to select Language Setup Page. | - - Language Setup Page - - |
| ||||
3. | Press the | / | button to select the option (OSD | OSD Language | Eng |
| ||
|
|
| ||||||
| Language, Audio, Subtitle or Disc Menu), then press | Audio | Eng |
| ||||
| Subtitle | Off |
| |||||
| the | button. |
|
|
| |||
|
|
| Disc Menu | Eng |
| |||
4. | Press the | / | button to select your preferred |
| ||||
|
|
| ||||||
| language, then press the | PLAY button to confirm. |
|
|
| |||
5. | Repeat steps 3 and 4 to adjust other options. Press |
|
|
| ||||
| the | button to return to the previous menu. |
|
|
| |||
6. | Press the SETUP button to exit the menu. | Go To Language Setup Page |
| |||||
Notes:
•Some DVDs may not play in the audio language you selected. A prior language may be programmed on the disc.
•Some DVDs may be set to display subtitles in a language other than the one you selected. A prior subtitle language may be programmed on the disc.
•Some DVDs allow you to change subtitle selections using the disc menu only. If this is the case, press the MENU button and choose the appropriate subtitle language from the selection on the disc menu.
•Some DVDs may not include your
Video setup
1.Press the SETUP button in stop mode.
2.Press the ![]() /
/ ![]() button to select Video Setup Page.
button to select Video Setup Page.
3. Press the / button to selec t the option
(Brightness or Contrast), then press the | button. |
4.Press the ![]() /
/ ![]() button to adjust the setting, then press the
button to adjust the setting, then press the ![]() PLAY button to confirm.
PLAY button to confirm.
5.Repeat steps 3 and 4 to adjust other options. Press the ![]() button to return to the previous menu.
button to return to the previous menu.
6.Press the SETUP button to exit the menu.
System setup
1.Press the SETUP button in stop mode.
2.Press the ![]() /
/ ![]() button to select System Page.
button to select System Page.
3. | Press the | / | button to select the option (TV |
| Display or Default), then press the button. | ||
4. | Press the | / | button to adjust the settings, then |
| press the | PLAY button to confirm. | |
5.Repeat steps 3 and 4 to adjust other options. Press the ![]() button to return to the previous menu.
button to return to the previous menu.
6.Press the SETUP button to exit the menu.
Language | Video | System |
- - Video Setup Page - -
Brightness 00
Contrast00
Go To Video Setup Page
Language |
| Video | System |
|
|
|
|
- - System Page - - |
|
| |
Tv Display | Wide |
| |
Default | No |
| |
|
|
|
|
Go To System Page |
|
| |
TV Display
Pan Scan
•When
•Some
Letter Box
•When
Wide Screen
•This is the correct mode for playing
Notes:
•The displayable picture size is preset on the DVD. Therefore the playback picture of some DVDs may not conform to the picture size selected.
•When you play DVDs recorded in the 4:3 aspect ratio, the playback picture will always appear in the 4:3 aspect ratio regardless of the TV display setting.
•Select Wide Screen to conform the LCD screen on the unit. Always be sure that your TV display conforms to the actual TV in use if you connect the unit to a TV.
Default
It takes
Cut off when a
Pan Scan
Letter Box
Wide Screen
Maintenance
Cleaning the disc
A defective or soiled disc inserted into the unit can cause sound to drop out during playback. Handle the disc by holding its inner and outer edges.
•Do NOT touch the surface of the unlabeled side of the disc.
•Do NOT stick paper or tape on the surface.
•Do NOT expose the disc to direct sunlight or excessive heat.
•Clean the disc before playback. Wipe the disc from the center outward with a cleaning cloth.
•NEVER use solvents such as benzine or alcohol to clean the disc.
•Do NOT use irregular shaped discs (example: heart shaped, octagonal, etc.). They may cause malfunctions.
Cleaning the unit
•Be sure to turn the unit off and disconnect the AC power adapter before cleaning the unit.
•Wipe the unit with a dry soft cloth. If the surfaces are extremely dirty, wipe clean with a cloth that has been dipped in a weak
•Never use alcohol, benzine, thinner, cleaning fluid or other chemicals. Do NOT use compressed air to remove dust.
Important note
•Before transporting the unit, remove the disc from the disc compartment.
Troubleshooting guide
Symptom | Cause (and remedy) | |
No power. | • Ensure the AC power adapter is connected. | |
| • The unit is not turned on. | |
No sound or only | • Make sure that you select ON mode. | |
a very | • | The system is in pause mode. Press the PLAY button to return to normal play mode. |
sound is heard. | • | The unit is in |
|
| normal play mode. |
• Make sure the AUDIO/VIDEO output connections are correct.
• The DTS DVD disc cannot be decoded to have speaker output.
• The unit is too hot; shut off the unit for 30 minutes to cool it down.
No picture. | • The region number of the disc doesn't match the region number of this unit. | |
The picture is not | • | Clean the disc. |
clear. | • | The disc is scratched. |
•Please adjust the LCD's brightness and contrast using the SETUP button on the panel.
Severe hum or | • | The plugs and jacks are dirty. Wipe them with a cloth slightly moistened with alcohol. |
noise is heard. | • | Clean the disc. |
The disc does | • | There is no disc inside. (“No Disc” appears on the screen). |
not play. | • | Insert the disc correctly with the playback side facing down. |
| • | Clean the disc. |
• The unit and disc region number are incompatible.
• Condensation may have formed inside the unit due to a sudden change in temperature. Wait about an hour for it to clear and try again.
Limited warranty
AVC MULTIMEDIA (“AVC”) makes the following limited warranty. This limited warranty extend to the original consumer purchaser and is limited to
One Year Parts & Labor Warranty
AVC products purchased in the United States are warranted to be free from defects in materials or workmanship for a period of one year from the date of their original retail purchase. If the unit fails to conform to this warranty, we will service the product using new or refurbished parts and products, at AVC’s sole discretion.
During a period of one year from the effective warranty date, AVC will provide, when needed, service labor to repair a manufacturing defect at its designated Service Center. To obtain warranty service in the Untied States, you must first call our Customer Support Center at
Packaging and Shipping Instruction
When you send the product to the AVC service facility you must use the original carton box and packing material or an equivalent as designated by AVC.
LIMITED WARRANTY
Your Responsibility
1)You must retain the original sale receipt to provide proof of purchase.
2)These warranties are effective only if the product is purchased and operated in the U.S.A. or Canada.
3)Warranties extend only to defects in material or workmanship, and do not extend to any product or parts which have been lost or discarded, or damage to product or parts caused by misuse, accident, improper operation or maintenance, or use in violation of instructions provided with the product, or to product which has been altered or modified without authorization of AVC, or to products or parts thereof which have had the serial number removed or changed.
Out of Warranty
In the event your product requires repair after the limited warranty period has expired, please contact our Customer Support Center at
www.1800customersupport.com/RCA
Hours:
Important:
You are responsible for any transportation, shipping or insurance relative to the return of product to our Product Returns Center.
All warranties implied by state law, including the implied warranties of merchantability and fitness for a particular purpose, are expressly limited to the duration of the limited warranties set forth above. With the exception of any warranties implied by state law as hereby limited, the foregoing warranty is exclusive and in lieu of all other warranties, guarantees, agreements and similar obligations of manufacturer or seller with respect to the repair or replacement of any parts. In no event shall AVC be liable for consequential or incidental damages.
No person, agent, distributor, dealer or company is authorized to change, modify or extend the terms of these warranties in any manner whatsoever. The time within action must be commenced to enforce any obligation of AVC arising under the warranty or under any statute, or law of the United States or any state thereof, is hereby limited to one year from the date of purchase. This limitation does not apply to implied warranties arising under state law.
This warranty gives you specific legal rights and you may also have other rights, which may vary, from state to state. Some states do not allow limitation on how long an implied warranty lasts, when an action may be brought, or the exclusion or limitation of incidental or consequential damages, so the above provisions may not apply to you.
For more information on other products and services, please visit our web site at
www.1800customersupport.com/RCA
Important:
Also keep your "Bill of Sale" as proof of purchase.
Model no | Product name |
Type of set | Serial no |
Invoice no | Date purchased |
Dealer name |
|
FOR SERVICE AND REPAIR, PLEASE VISIT www.1800customersupport.com/RCA
Specifications and external appearance are subject to change without notice.
Printed in China |