PSZ2450S
6. Set up
SE1 |
SE2 |
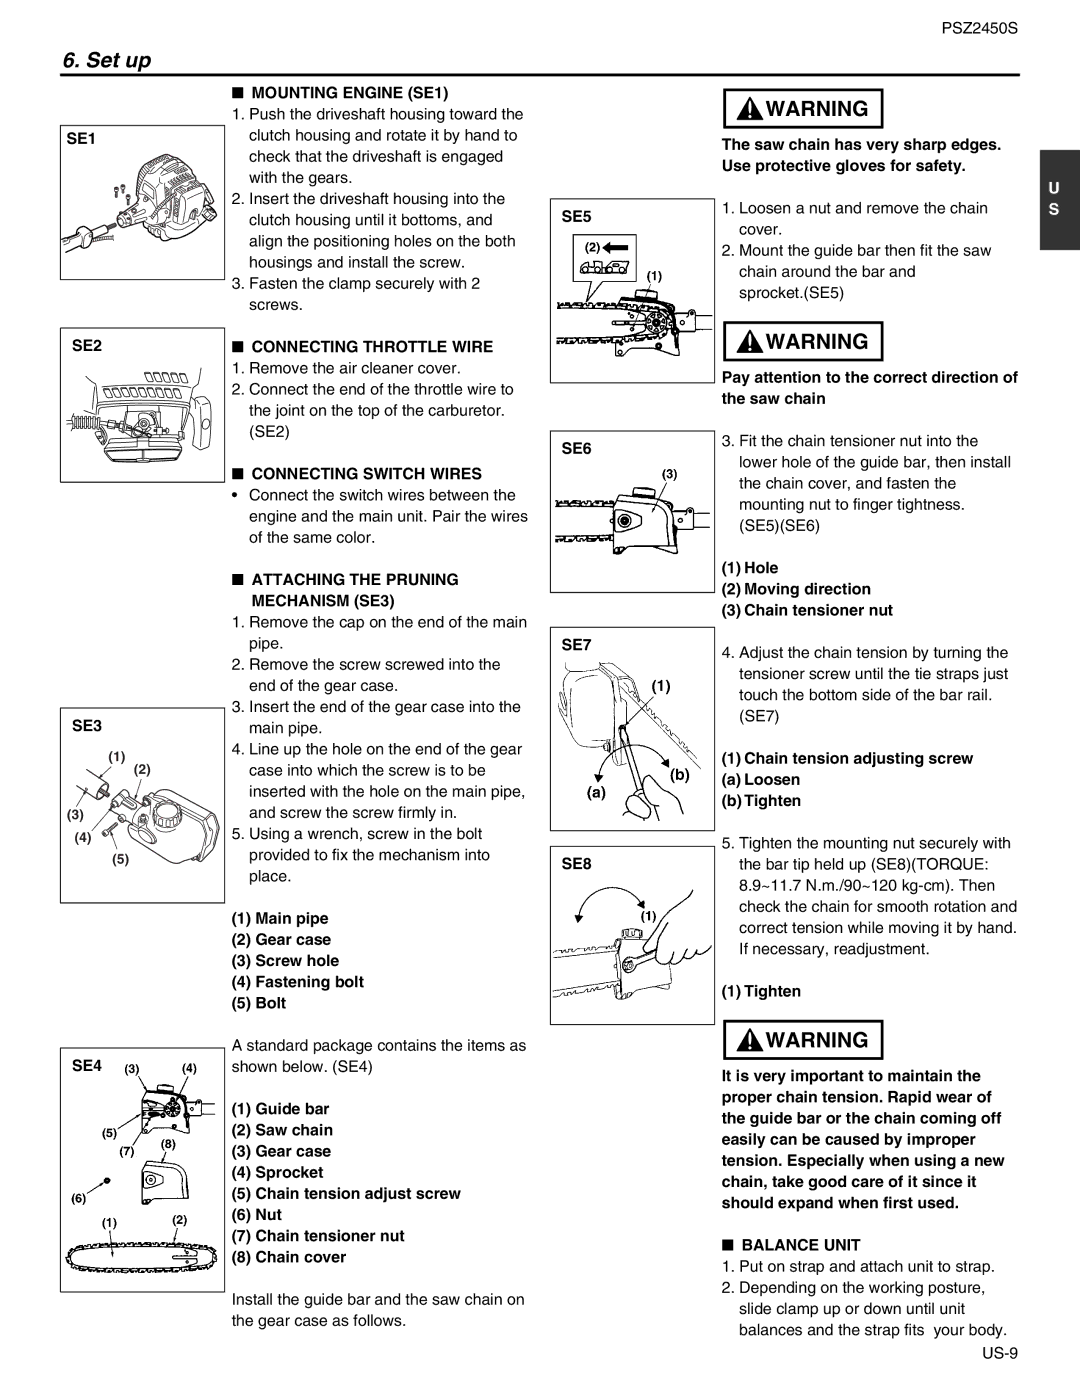
■MOUNTING ENGINE (SE1)
1.Push the driveshaft housing toward the clutch housing and rotate it by hand to check that the driveshaft is engaged with the gears.
2.Insert the driveshaft housing into the clutch housing until it bottoms, and align the positioning holes on the both housings and install the screw.
3.Fasten the clamp securely with 2 screws.
■CONNECTING THROTTLE WIRE
1. Remove the air cleaner cover.
2. Connect the end of the throttle wire to the joint on the top of the carburetor. (SE2)
■CONNECTING SWITCH WIRES
•Connect the switch wires between the engine and the main unit. Pair the wires of the same color.
SE5
SE6
![]() WARNING
WARNING
The saw chain has very sharp edges. Use protective gloves for safety.
1.Loosen a nut and remove the chain cover.
2.Mount the guide bar then fit the saw chain around the bar and sprocket.(SE5)
![]() WARNING
WARNING
Pay attention to the correct direction of the saw chain
3.Fit the chain tensioner nut into the lower hole of the guide bar, then install the chain cover, and fasten the mounting nut to finger tightness. (SE5)(SE6)
U S
SE3 |
(1) |
(2) |
(3) |
(4) |
(5) |
■ATTACHING THE PRUNING
MECHANISM (SE3)
1.Remove the cap on the end of the main pipe.
2.Remove the screw screwed into the end of the gear case.
3.Insert the end of the gear case into the main pipe.
4.Line up the hole on the end of the gear case into which the screw is to be inserted with the hole on the main pipe, and screw the screw firmly in.
5.Using a wrench, screw in the bolt provided to fix the mechanism into place.
(1)Main pipe
(2)Gear case
(3)Screw hole
(4)Fastening bolt
(5)Bolt
SE7
SE8
(1)Hole
(2)Moving direction
(3)Chain tensioner nut
4.Adjust the chain tension by turning the tensioner screw until the tie straps just touch the bottom side of the bar rail.
(SE7)
(1)Chain tension adjusting screw
(a) Loosen
(b) Tighten
5.Tighten the mounting nut securely with the bar tip held up (SE8)(TORQUE: 8.9~11.7 N.m./90~120
(1) Tighten
SE4
A standard package contains the items as shown below. (SE4)
(1)Guide bar
(2)Saw chain
(3)Gear case
(4)Sprocket
(5)Chain tension adjust screw
(6)Nut
(7)Chain tensioner nut
(8)Chain cover
Install the guide bar and the saw chain on the gear case as follows.
![]() WARNING
WARNING
It is very important to maintain the proper chain tension. Rapid wear of the guide bar or the chain coming off easily can be caused by improper tension. Especially when using a new chain, take good care of it since it should expand when first used.
■BALANCE UNIT
1.Put on strap and attach unit to strap.
2.Depending on the working posture, slide clamp up or down until unit balances and the strap fits your body.