HOW TO USE THE CHEST PULSE SENSOR
HOW TO USE THE CHEST PULSE SENSOR WITH THE REEBOK® ACD1 TREADMILL
If you have a REEBOK® ACD1 treadmill, the chest pulse sensor will continuously monitor your heart rate during your workouts.
To use the chest pulse sensor, first put it on as described on the front cover of this manual. Make sure that you have read the information on page 2 of this manual before using the chest pulse sensor.
Next, follow the instructions in your treadmill userʼs manual to operate the treadmill. As you exercise, your heart rate will be shown in the PULSE dis- play on the console.
HOW TO USE THE CHEST PULSE SENSOR WITH THE REEBOK® ACD2 TREADMILL
If you have a REEBOK® ACD2 treadmill, the chest pulse sensor will continuously monitor your heart rate as described above. In addition, the chest pulse sensor will enable you to use the consoleʼs two pulse programs. Both programs automatically control the speed and in- cline of the treadmill to keep your heart rate near a preset level based on your age. To use a pulse pro- gram, follow the instructions below.
Insert the key into the console.
See HOW TO TURN ON THE POWER on page 11 of your treadmill userʼs manual.
Enter your weight, your age, and a maximum heart rate setting.
If you enter your weight into the console, the CALS/FAT CALS display will be more accurate.
To use a pulse program, you must enter your age and a maximum heart rate setting. See HOW TO ENTER USER INFORMATION on page 11 of your treadmill userʼs manual.
Put on the chest pulse sensor.
The chest pulse sensor must be worn when a pulse program is used. Note: A pulse program can be started without a heart rate reading; however, the speed and/or incline of the treadmill will auto- matically decrease if your heart rate is not detected during the program.
Select the desired program.
When the key is inserted, the MANUAL mode will be selected. To select a pulse program, press the MODE button repeatedly until one of the pulse pro-
gram indicators lights. The first thirteen settings of the program you have selected will appear in the LED matrix (the LED matrix will be explained in step 5).
Press the START button or the SPEED + button to start the program.
A moment after the button is pressed, the walking belt will begin to move. Hold the handrails and carefully begin walking.
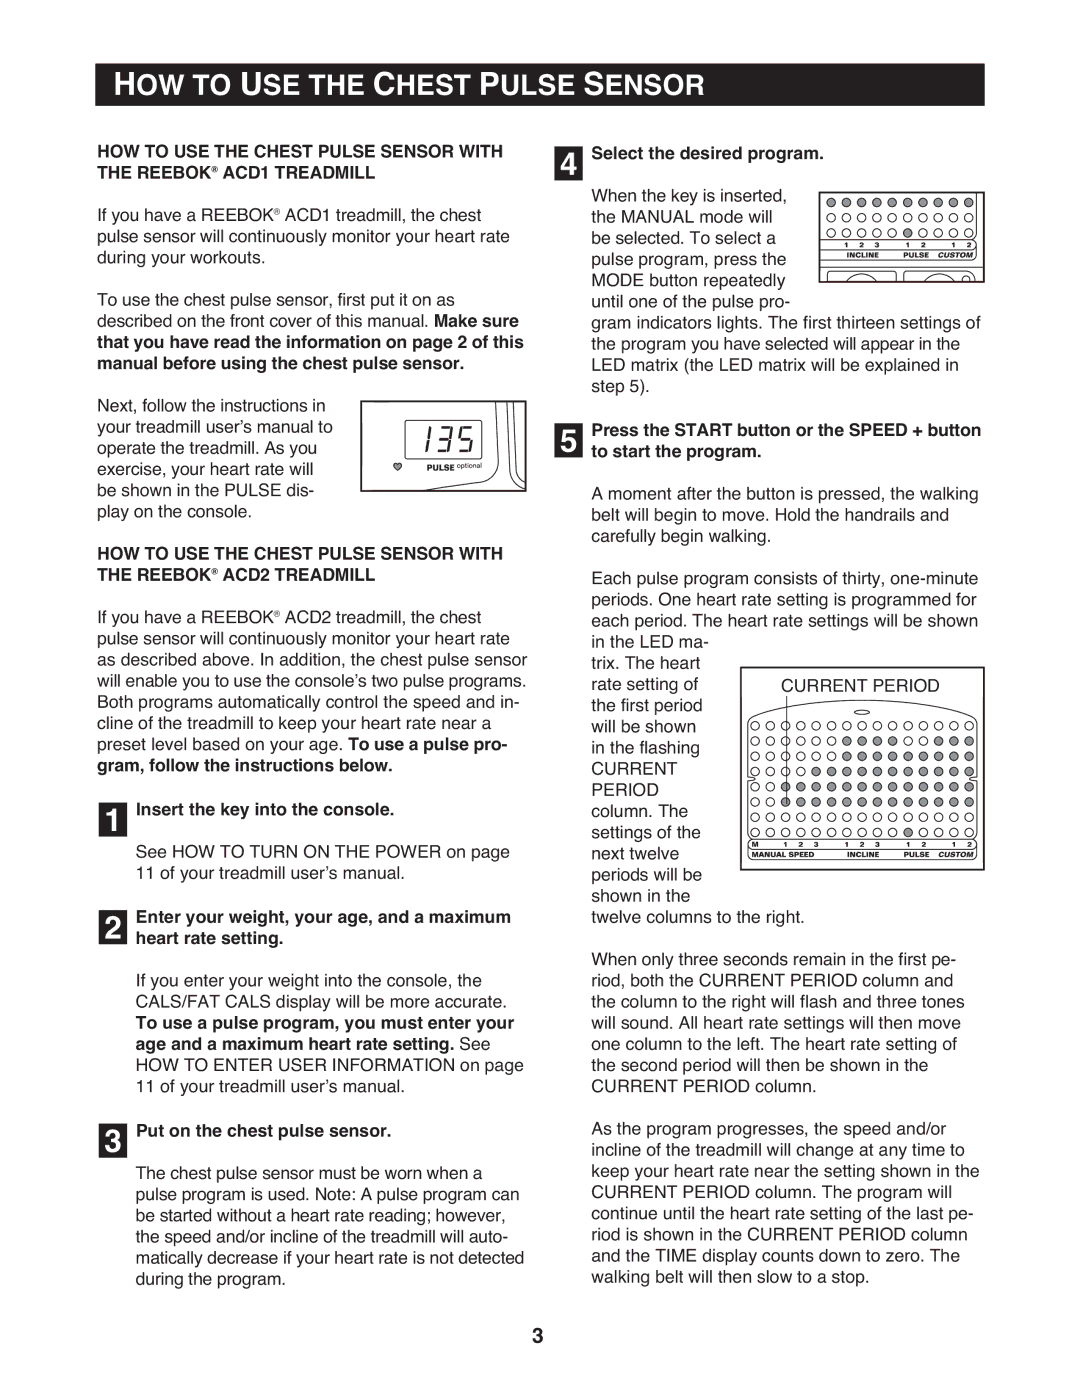
Each pulse program consists of thirty,
trix. The heart rate setting of the first period will be shown in the flashing
CURRENT
PERIOD column. The settings of the next twelve periods will be shown in the
twelve columns to the right.
When only three seconds remain in the first pe- riod, both the CURRENT PERIOD column and the column to the right will flash and three tones will sound. All heart rate settings will then move one column to the left. The heart rate setting of the second period will then be shown in the CURRENT PERIOD column.
As the program progresses, the speed and/or incline of the treadmill will change at any time to keep your heart rate near the setting shown in the CURRENT PERIOD column. The program will continue until the heart rate setting of the last pe- riod is shown in the CURRENT PERIOD column and the TIME display counts down to zero. The walking belt will then slow to a stop.
3
