CHEST PULSE SENSOR
•Make sure that the chest pulse sensor is under your clothing, against your skin, and as high under the pectoral muscles or breasts as is comfortable. Note: If the chest pulse sensor does not function when po- sitioned as described, try moving it slightly lower or higher on your chest.
•Make sure that the logo on the sensor unit is facing forward and is
•Each time you use the chest pulse sensor, use saline solution such as saliva or contact lens solution to wet the two electrode areas on the sensor unit (see the drawing below). If heart rate readings do not appear until you begin perspiring,
•As you walk or run on the treadmill, make sure that you are near the center of the walking belt and within armʼs length of the console. For the console to dis- play heart rate readings, the user must be within armʼs length of the console.
•The chest pulse sensor is designed to work with people who have normal heart rhythms. Heart rate reading problems may be caused by medical condi- tions such as premature ventricular contractions (pvcs), tachycardia bursts, and arrhythmia.
•The operation of the chest pulse sensor can be af- fected by magnetic interference caused by high power lines or other sources. If it is suspected that magnetic interference may be causing a problem, try relocating the treadmill.
•If the chest pulse sensor still does not function prop- erly, test the chest pulse sensor in the following way:
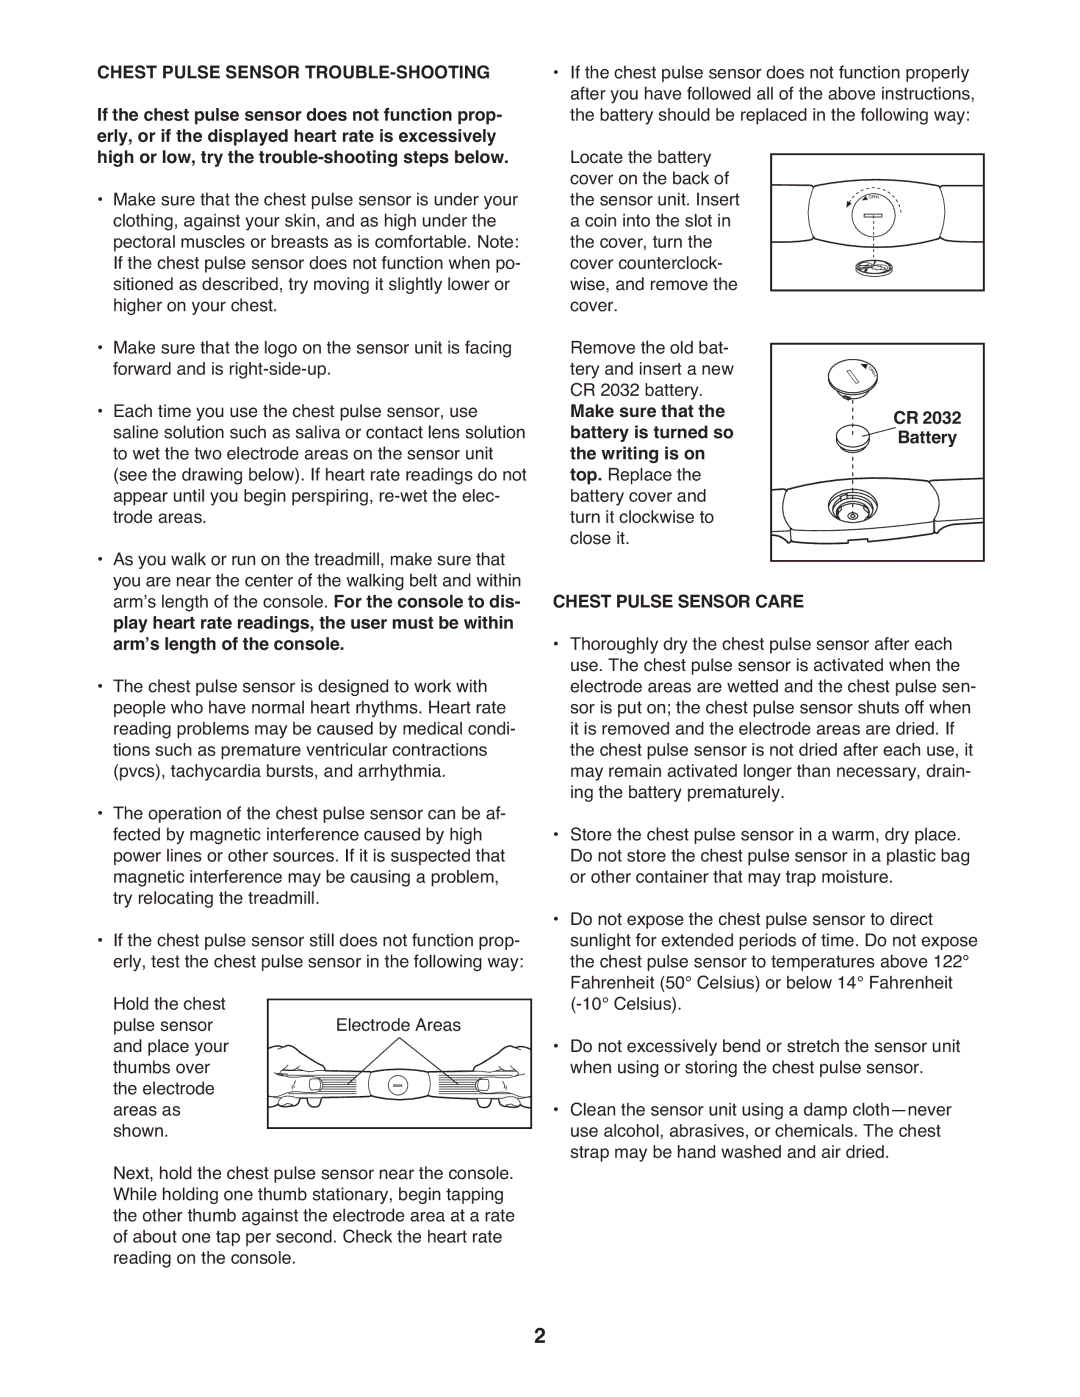
Hold the chest pulse sensor and place your thumbs over the electrode areas as shown.
Next, hold the chest pulse sensor near the console. While holding one thumb stationary, begin tapping the other thumb against the electrode area at a rate of about one tap per second. Check the heart rate reading on the console.
•If the chest pulse sensor does not function properly after you have followed all of the above instructions, the battery should be replaced in the following way: Locate the battery
cover on the back of the sensor unit. Insert a coin into the slot in the cover, turn the cover counterclock- wise, and remove the cover.
Remove the old bat- tery and insert a new CR 2032 battery.
Make sure that theCR 2032
battery is turned soBattery the writing is on
top. Replace the battery cover and turn it clockwise to
close it.![]()
![]()
CHEST PULSE SENSOR CARE
•Thoroughly dry the chest pulse sensor after each use. The chest pulse sensor is activated when the electrode areas are wetted and the chest pulse sen- sor is put on; the chest pulse sensor shuts off when it is removed and the electrode areas are dried. If the chest pulse sensor is not dried after each use, it may remain activated longer than necessary, drain- ing the battery prematurely.
•Store the chest pulse sensor in a warm, dry place. Do not store the chest pulse sensor in a plastic bag or other container that may trap moisture.
•Do not expose the chest pulse sensor to direct sunlight for extended periods of time. Do not expose the chest pulse sensor to temperatures above 122° Fahrenheit (50° Celsius) or below 14° Fahrenheit
•Do not excessively bend or stretch the sensor unit when using or storing the chest pulse sensor.
•Clean the sensor unit using a damp
2