
RBTL59110 specifications
The Reebok Fitness RBTL59110 is an innovative and versatile piece of exercise equipment designed to cater to fitness enthusiasts seeking to elevate their workout routines. This fitness tool embodies a combination of modern design, cutting-edge technology, and user-centered features, making it an ideal choice for both beginners and experienced athletes.One of the standout features of the RBTL59110 is its adjustable resistance system, which allows users to customize their workout intensity. This flexibility enables individuals to progress at their own pace, providing the opportunity for effective strength training and cardiovascular workouts. The RBTL59110 is equipped with multiple resistance levels, ensuring it can be adapted to suit various fitness goals, whether it’s weight loss, muscle building, or overall endurance enhancement.
In terms of design, the RBTL59110 boasts a compact and lightweight frame, making it easy to store and transport. This is particularly beneficial for those with limited space or who prefer to work out on the go. The durable construction guarantees stability and longevity, ensuring that the equipment can withstand rigorous use.
Another notable characteristic of the RBTL59110 is its ergonomic handle grips, which provide comfort during workouts. This thoughtful design element minimizes the risk of hand fatigue, allowing users to focus on maximizing their performance. Additionally, the non-slip surface ensures a secure grip, even during intense exercise sessions.
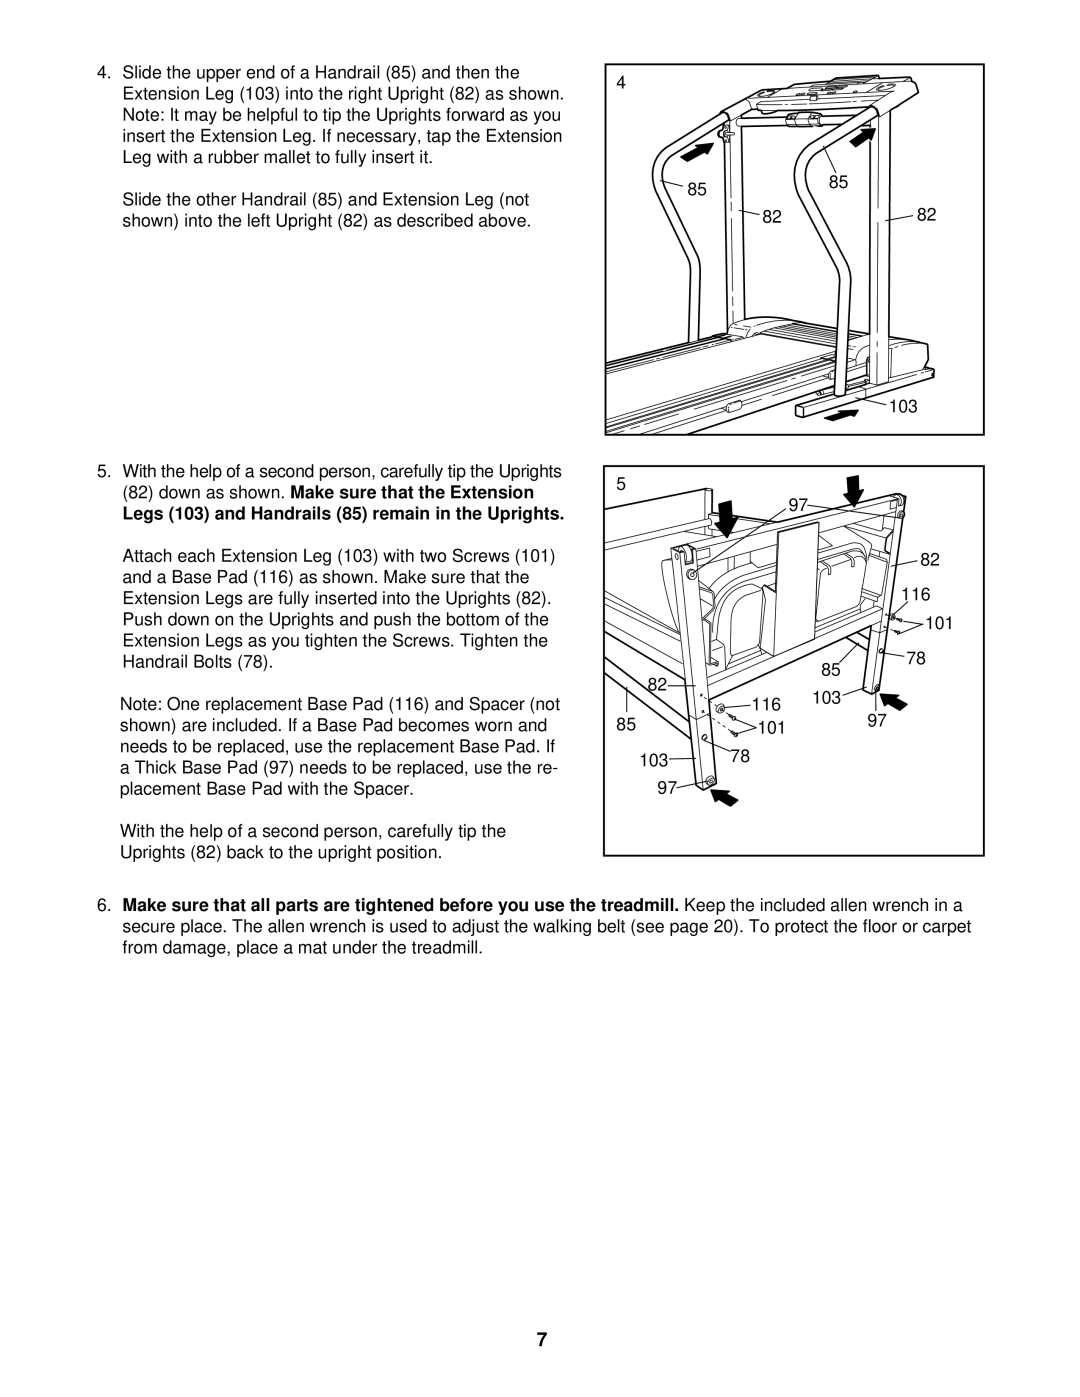
The Reebok Fitness RBTL59110 also features integrated display technology that tracks essential workout metrics such as time, repetitions, and calories burned. This real-time feedback helps users monitor their progress and stay motivated, encouraging them to set and achieve personal fitness milestones.
Furthermore, the RBTL59110 is compatible with various fitness apps, enabling users to sync their workouts and keep track of their performance over time. This connectivity enhances the user experience, ultimately fostering a more engaging fitness journey.
In conclusion, the Reebok Fitness RBTL59110 is a well-rounded fitness tool that integrates adjustable resistance, ergonomic design, and technological features to deliver a highly effective workout experience. Whether at home or in the gym, this equipment is an excellent addition to any fitness regimen, providing versatility and support for users at all levels. Its user-friendly design and advanced functionalities position the RBTL59110 as a top choice for anyone looking to enhance their fitness journey.