U38-NG, U38-LP specifications
The Regency U38-LP and U38-NG are innovative gas fireplaces designed to deliver both warmth and elegance to any living space. These units exemplify modern craftsmanship while ensuring high efficiency, making them popular choices among homeowners looking to enhance their indoor ambiance.One of the key features of the Regency U38 series is its versatile design. Both models can be easily installed in a variety of settings, including new constructions and retrofits. Their clean, contemporary lines and large viewing area provide a stunning focal point for any room, allowing for maximum enjoyment of the flames. The U38-LP operates on liquid propane, while the U38-NG uses natural gas, catering to different fuel preferences and availability.
Efficiency is a hallmark of the Regency U38 series. With an impressive thermal efficiency rating, both models ensure minimal heat loss while maximizing warmth output. This efficiency not only translates into cost savings on energy bills but also contributes to a more environmentally friendly home. The switchable electronic ignition system enhances their user-friendliness, providing instant warmth with the push of a button.
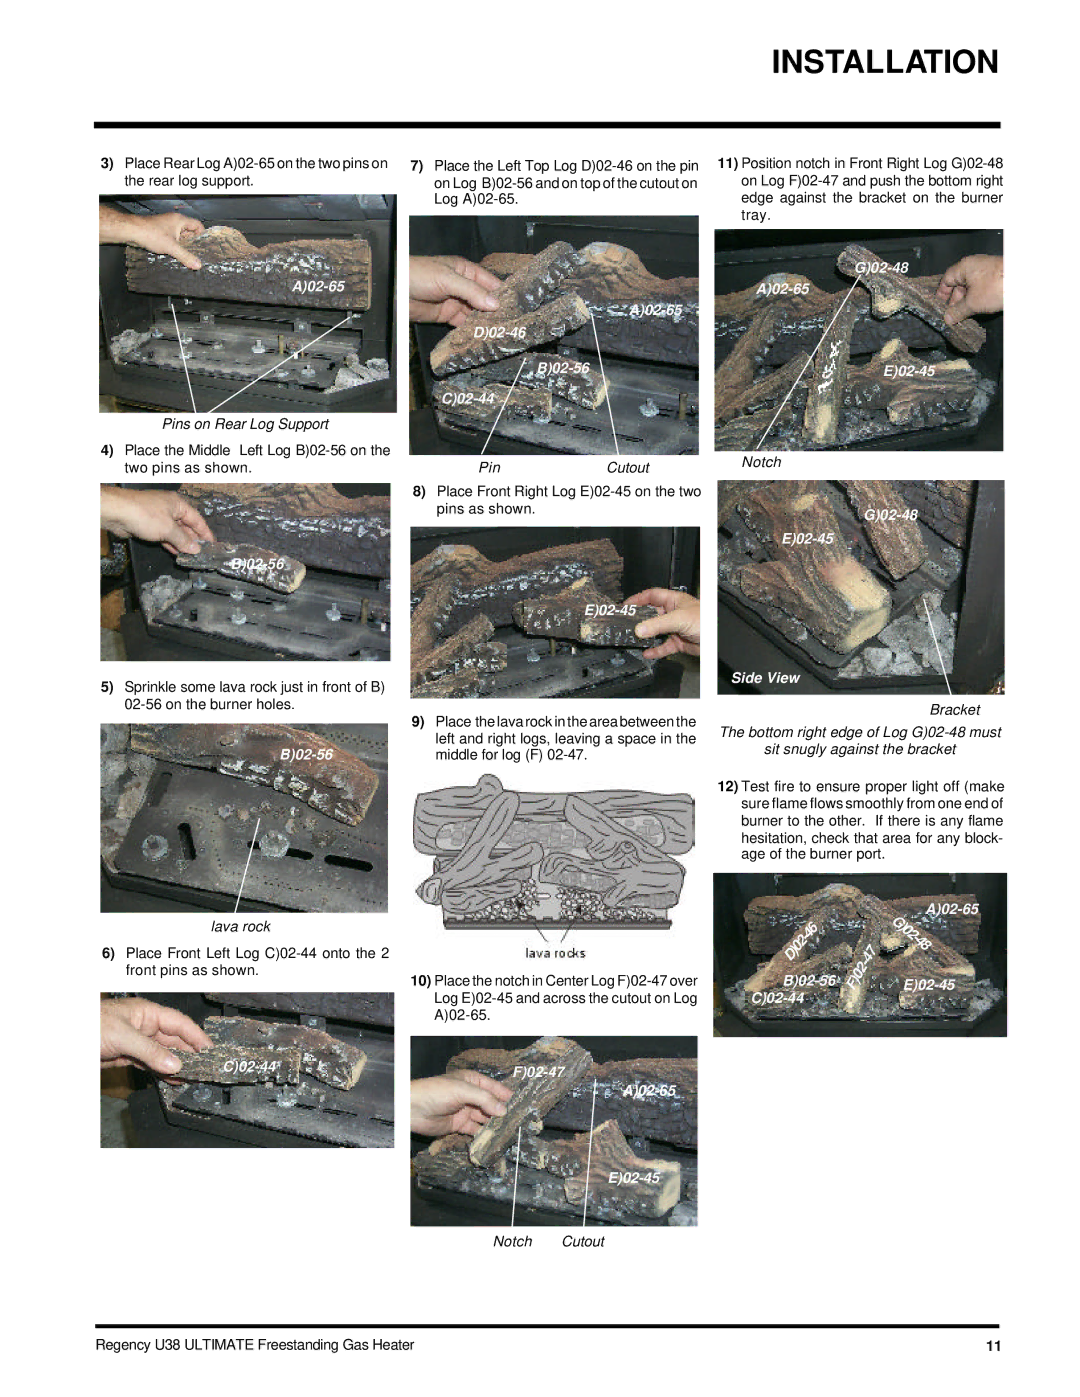
The construction of the U38 fireplaces is another standout feature. They are built using high-quality materials, including a robust steel body and premium glass, ensuring durability and performance over time. Among the optional features available are customizable media options, such as glass crystals or decorative logs, allowing homeowners to personalize their fireplace to suit their tastes.
Advanced technology sets the Regency U38 series apart from traditional fireplaces. The units come equipped with an integrated, thermostatic remote control that allows users to adjust the temperature effortlessly. Additionally, the advanced airflow system ensures even heat distribution throughout the room, while the fan assist option can further enhance heat circulation.
Safety features are paramount in the design of the U38 fireplaces. They include a built-in safety shutdown system that activates if any anomalies are detected, providing peace of mind for users.
In summary, the Regency U38-LP and U38-NG fireplaces offer an ideal combination of style, efficiency, and advanced technology. Their attractive design, customizable options, energy-saving performance, and comprehensive safety features make them an excellent choice for modern homes looking for effective heating solutions without compromising on aesthetics.

