INSTALLATION
INSTALLING YOUR
INSERT
Your insert is very heavy and will require two or three people to move it into position. The insert can be made a little lighter by removing the cast iron door by opening it and lifting it off its hinges. Be sure to protect your hearth extension with a heavy blanket or carpet scrap during the installation.
Convection Grills
The convection grills are installed before the unit is positioned inside the fi replace.
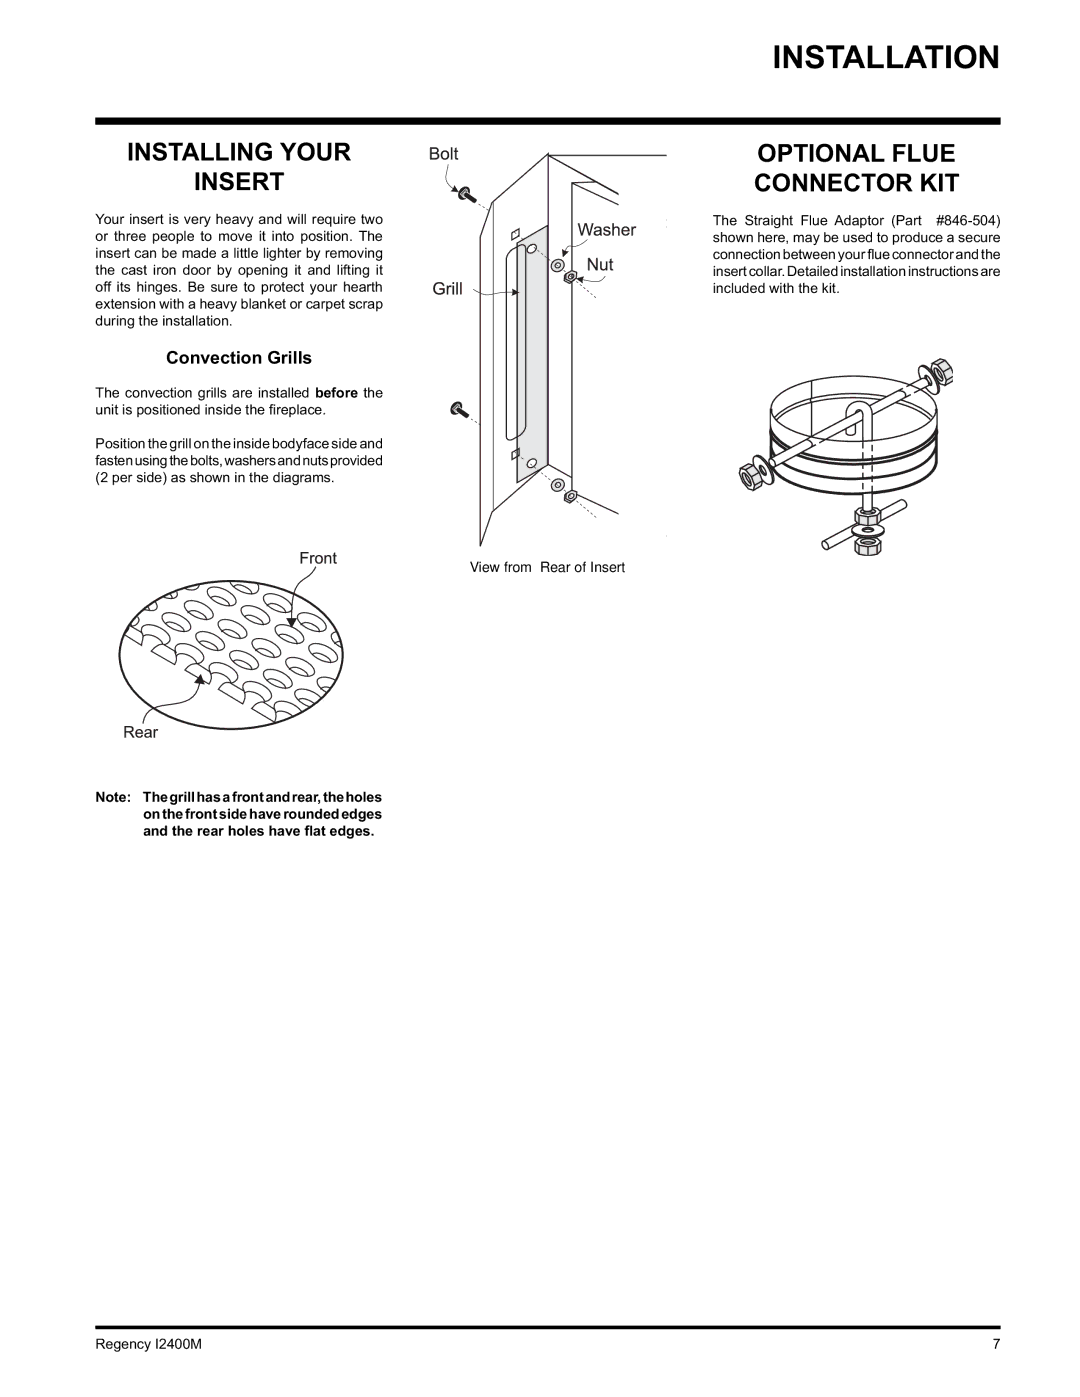
Position the grill on the inside bodyface side and fastenusingthebolts,washersandnutsprovided (2 per side) as shown in the diagrams.
View from Rear of Insert
Note: Thegrillhasafrontandrear,theholes on the front side have rounded edges and the rear holes have flat edges.
OPTIONAL FLUE
CONNECTOR KIT
The Straight Flue Adaptor (Part
Regency I2400M | 7 |