®
ELECTRIC CHAIN SAW
CLEANING AND MAINTENANCE
Continued
Filing Cutter Depth Gauges
The cutter depth gauge clearance is reduced as cutters are sharpened. After every second or third sharpening, reset cutter depth gauges.
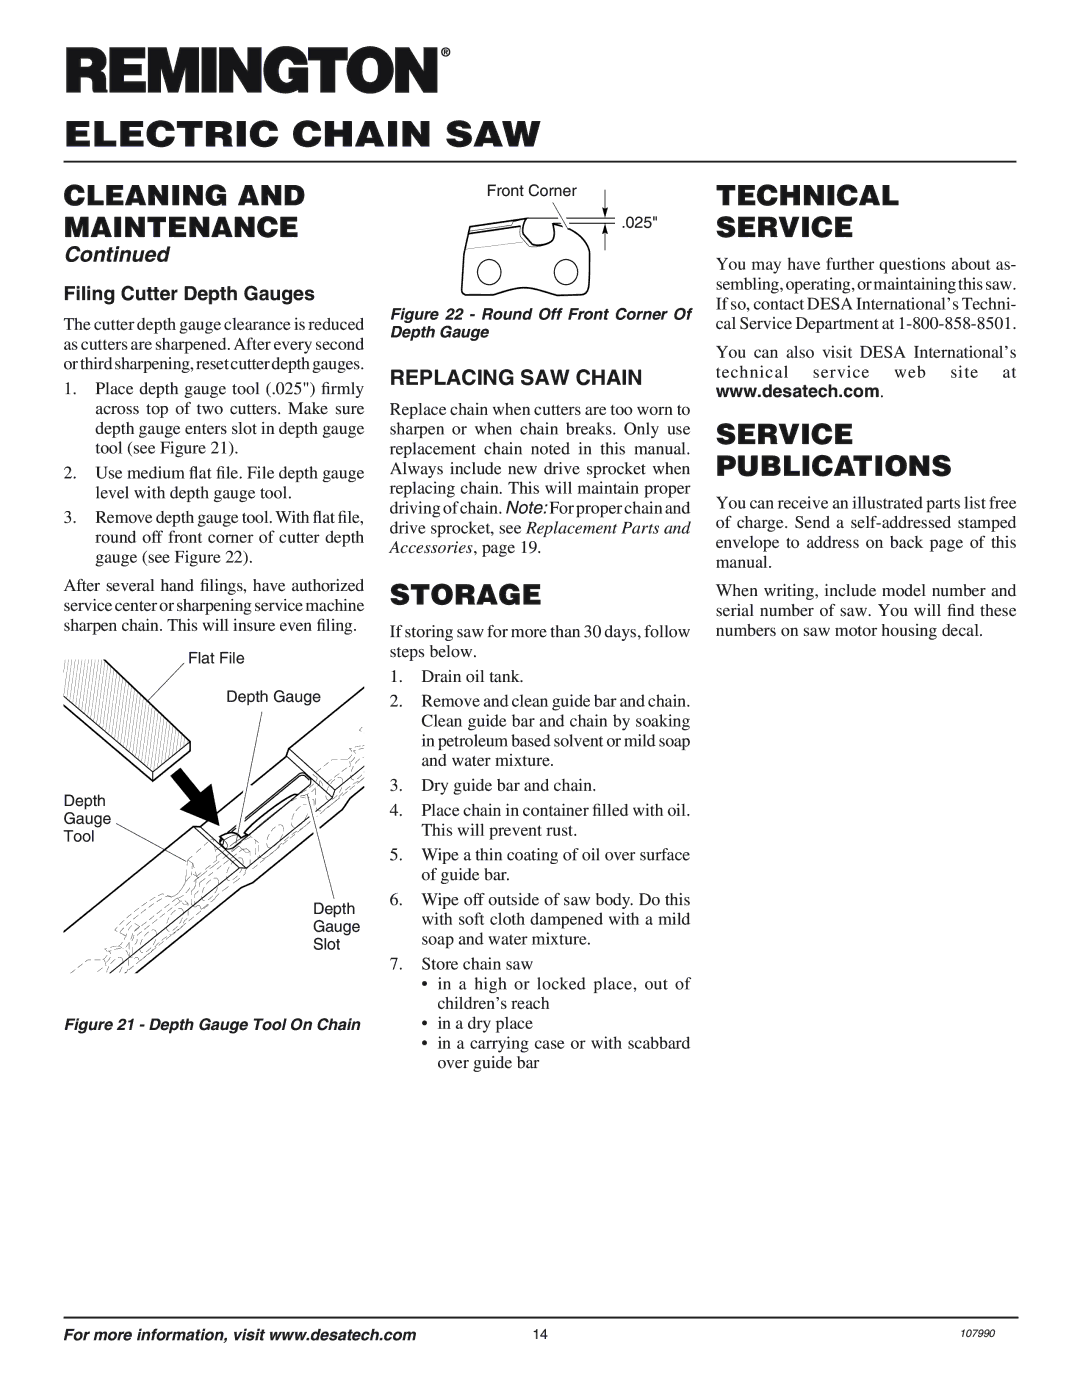
1.Place depth gauge tool (.025") firmly across top of two cutters. Make sure depth gauge enters slot in depth gauge tool (see Figure 21).
2.Use medium flat file. File depth gauge level with depth gauge tool.
3.Remove depth gauge tool. With flat file, round off front corner of cutter depth gauge (see Figure 22).
After several hand filings, have authorized service center or sharpening service machine sharpen chain. This will insure even filing.
Flat File
Depth Gauge
Depth
Gauge
Tool
Depth
Gauge
Slot
Figure 21 - Depth Gauge Tool On Chain
Front Corner
.025"
Figure 22 - Round Off Front Corner Of Depth Gauge
REPLACING SAW CHAIN
Replace chain when cutters are too worn to sharpen or when chain breaks. Only use replacement chain noted in this manual. Always include new drive sprocket when replacing chain. This will maintain proper driving of chain. Note: For proper chain and drive sprocket, see Replacement Parts and Accessories, page 19.
STORAGE
If storing saw for more than 30 days, follow steps below.
1.Drain oil tank.
2.Remove and clean guide bar and chain. Clean guide bar and chain by soaking in petroleum based solvent or mild soap and water mixture.
3.Dry guide bar and chain.
4.Place chain in container filled with oil. This will prevent rust.
5.Wipe a thin coating of oil over surface of guide bar.
6.Wipe off outside of saw body. Do this with soft cloth dampened with a mild soap and water mixture.
7.Store chain saw
•in a high or locked place, out of children’s reach
•in a dry place
•in a carrying case or with scabbard over guide bar
TECHNICAL
SERVICE
You may have further questions about as- sembling, operating, or maintaining this saw. If so, contact DESA International’s Techni- cal Service Department at
You can also visit DESA International’s technical service web site at www.desatech.com.
SERVICE PUBLICATIONS
You can receive an illustrated parts list free of charge. Send a
When writing, include model number and serial number of saw. You will find these numbers on saw motor housing decal.
For more information, visit www.desatech.com | 14 | 107990 |
