OPERATION
USING THE AUXILIARY HANDLE ASSEMBLY
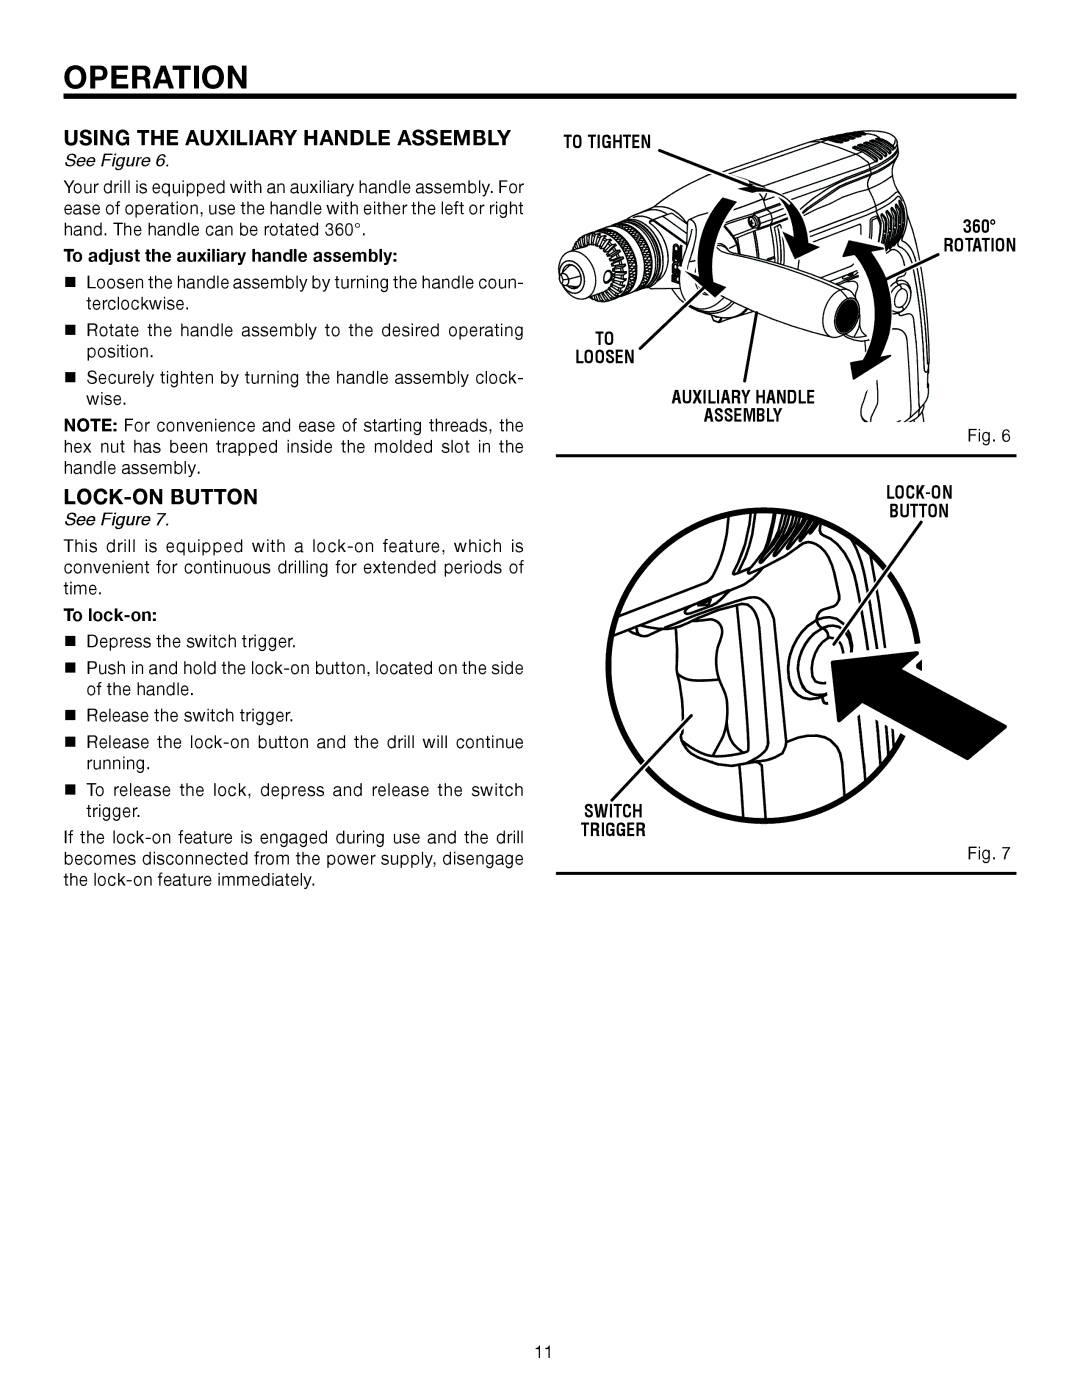
See Figure 6.
Your drill is equipped with an auxiliary handle assembly. For ease of operation, use the handle with either the left or right hand. The handle can be rotated 360°.
To adjust the auxiliary handle assembly:
Loosen the handle assembly by turning the handle coun- terclockwise.
Rotate the handle assembly to the desired operating position.
Securely tighten by turning the handle assembly clock- wise.
NOTE: For convenience and ease of starting threads, the hex nut has been trapped inside the molded slot in the handle assembly.
See Figure 7.
This drill is equipped with a
To lock-on:
Depress the switch trigger.
Push in and hold the
Release the switch trigger.
Release the
To release the lock, depress and release the switch trigger.
If the
TO TIGHTEN
360°
ROTATION
TO
LOOSEN
AUXILIARY HANDLE
ASSEMBLY
Fig. 6
BUTTON
SWITCH
TRIGGER
Fig. 7
11