OPERATION
TO INSTALL BATTERY PACK
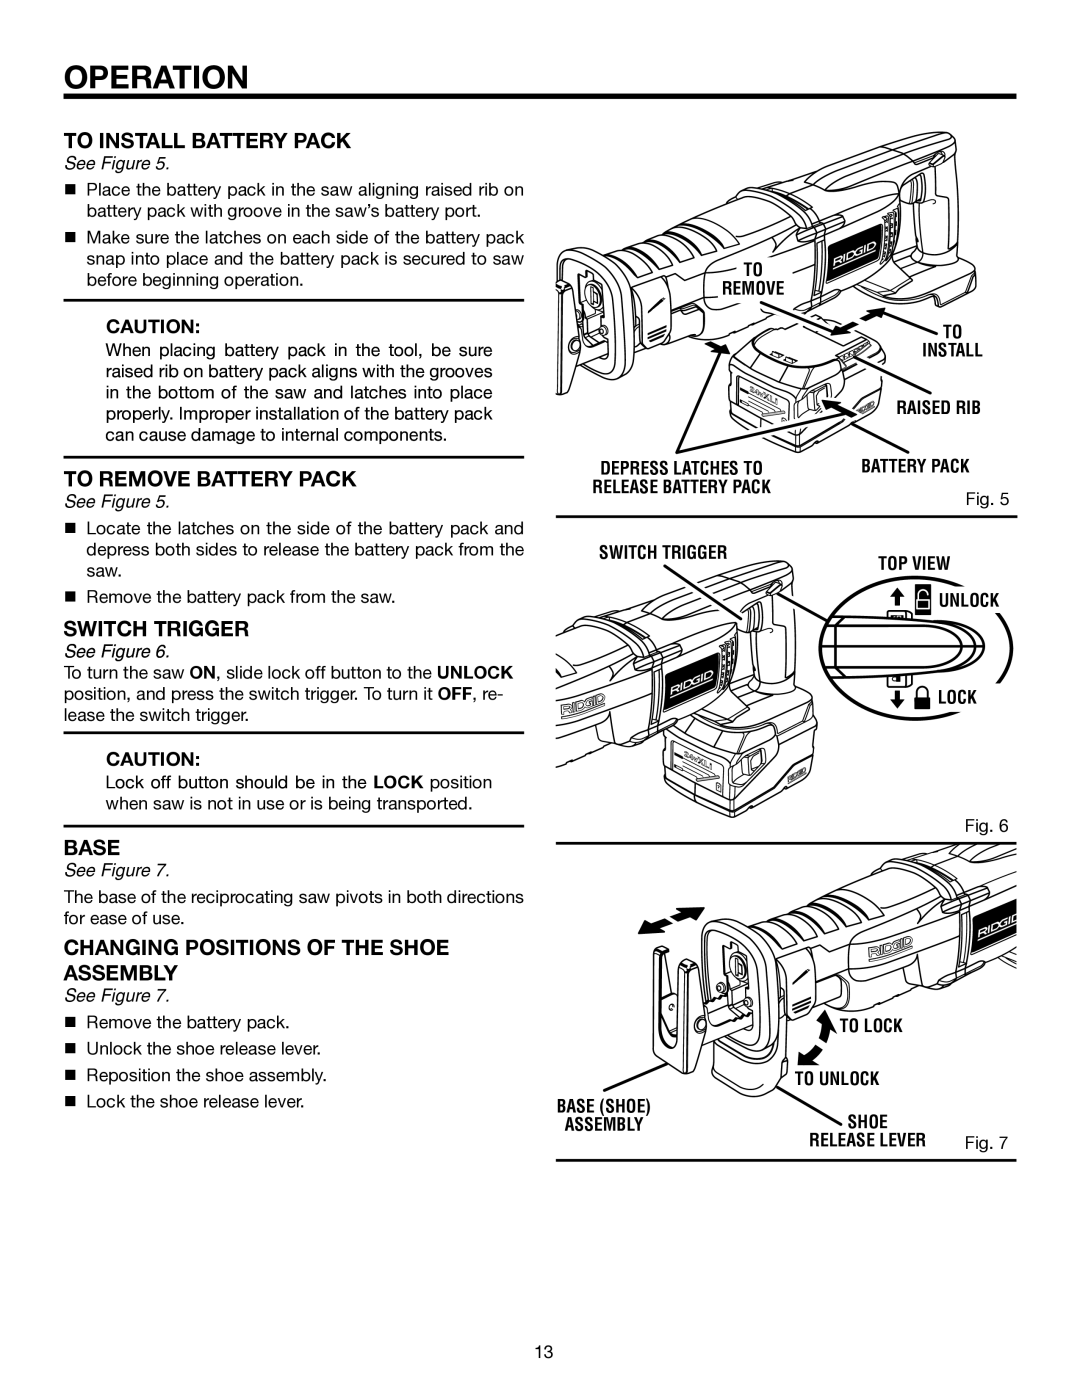
See Figure 5.
Place the battery pack in the saw aligning raised rib on battery pack with groove in the saw’s battery port.
Make sure the latches on each side of the battery pack snap into place and the battery pack is secured to saw before beginning operation.
CAUTION:
When placing battery pack in the tool, be sure raised rib on battery pack aligns with the grooves in the bottom of the saw and latches into place properly. Improper installation of the battery pack can cause damage to internal components.
![]()
![]()
![]() TO
TO![]()
REMOVE
24 |
|
v | |
| X |
| Li |
?
![]()
![]()
![]()
![]() TO
TO ![]()
![]()
![]()
![]()
![]()
![]()
![]()
![]()
![]() INSTALL
INSTALL
RAISED RIB
TO REMOVE BATTERY PACK
See Figure 5.
Locate the latches on the side of the battery pack and depress both sides to release the battery pack from the saw.
Remove the battery pack from the saw.
SWITCH TRIGGER
See Figure 6.
To turn the saw ON, slide lock off button to the UNLOCK position, and press the switch trigger. To turn it OFF, re- lease the switch trigger.
CAUTION:
Lock off button should be in the LOCK position when saw is not in use or is being transported.
BASE
See Figure 7.
The base of the reciprocating saw pivots in both directions for ease of use.
CHANGING POSITIONS OF THE SHOE ASSEMBLY
See Figure 7.
Remove the battery pack.
� Unlock the shoe release lever. � Reposition the shoe assembly. � Lock the shoe release lever.
DEPRESS LATCHES TO | BATTERY PACK |
RELEASE BATTERY PACK | Fig. 5 |
| |
SWITCH TRIGGER | TOP VIEW |
| |
| UNLOCK |
![]()
![]() LOCK
LOCK
24 |
|
v | |
| X |
| Li |
?
Fig. 6
| TO LOCK |
|
| TO UNLOCK |
|
BASE (SHOE) | SHOE |
|
ASSEMBLY |
| |
| RELEASE LEVER | Fig. 7 |
13