To remove the measuring cap from the lid, twist the cap until tabs on cap line up with notches on lid, and disengage the cap from the lid.
After washing parts, rinse and dry thoroughly. Wipe the blender base with a damp cloth or sponge to remove any packaging dust. NEVER immerse blender base, cord or plug in water or other liquids. Do not use harsh cleaning chemicals or abrasive cleaners on any parts of the blender.
ASSEMBLY INSTRUCTIONS:
1.Place blender base on a flat, level surface. DO NOT PLUG IN UNTIL THE
BLENDER IS COMPLETELY ASSEMBLED.
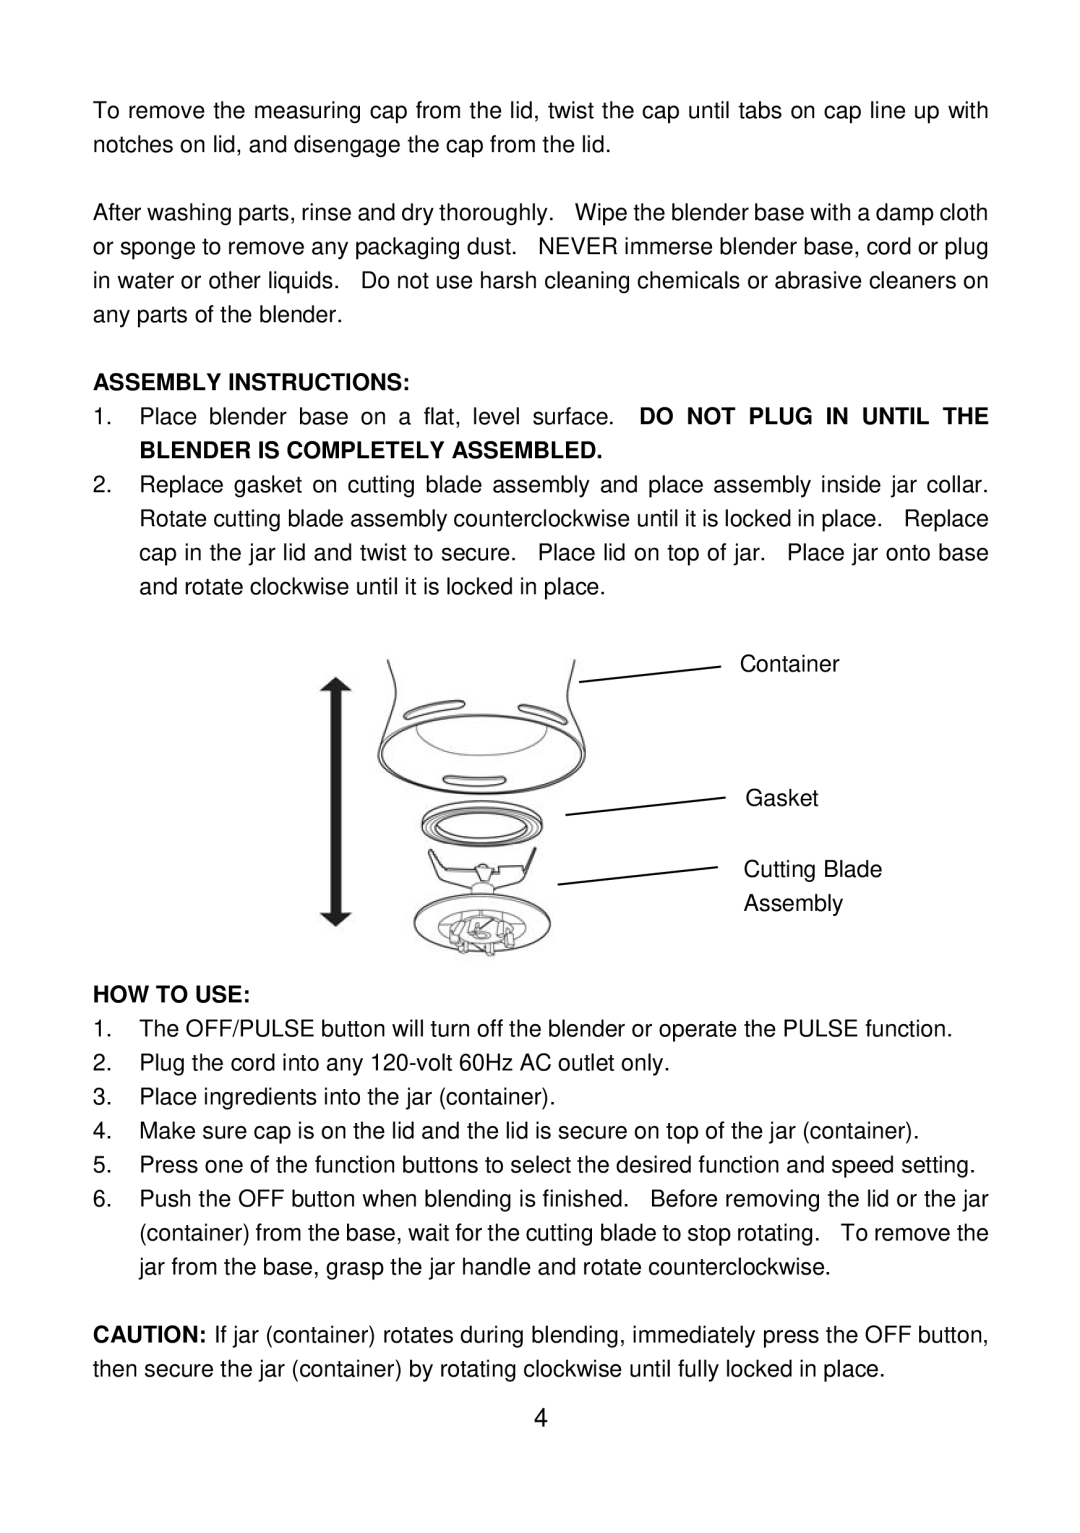
2.Replace gasket on cutting blade assembly and place assembly inside jar collar. Rotate cutting blade assembly counterclockwise until it is locked in place. Replace cap in the jar lid and twist to secure. Place lid on top of jar. Place jar onto base and rotate clockwise until it is locked in place.
Container
Gasket
Cutting Blade
Assembly
HOW TO USE:
1.The OFF/PULSE button will turn off the blender or operate the PULSE function.
2.Plug the cord into any
3.Place ingredients into the jar (container).
4.Make sure cap is on the lid and the lid is secure on top of the jar (container).
5.Press one of the function buttons to select the desired function and speed setting.
6.Push the OFF button when blending is finished. Before removing the lid or the jar (container) from the base, wait for the cutting blade to stop rotating. To remove the jar from the base, grasp the jar handle and rotate counterclockwise.
CAUTION: If jar (container) rotates during blending, immediately press the OFF button, then secure the jar (container) by rotating clockwise until fully locked in place.
4