Monitor Connections:
A. There are three ways to supply power to the Monitor.
1.The 12 VDC Cigarette Lighter Plug cable.
2.The 12 VDC Hard Wire cable to the fuse box.
3.When the Wired Option is used, Monitor power is supplied directly from the camera.
B.USB Charging Port Only for use with 12 VDC Cigarette Lighter or Hard Wire Cable.
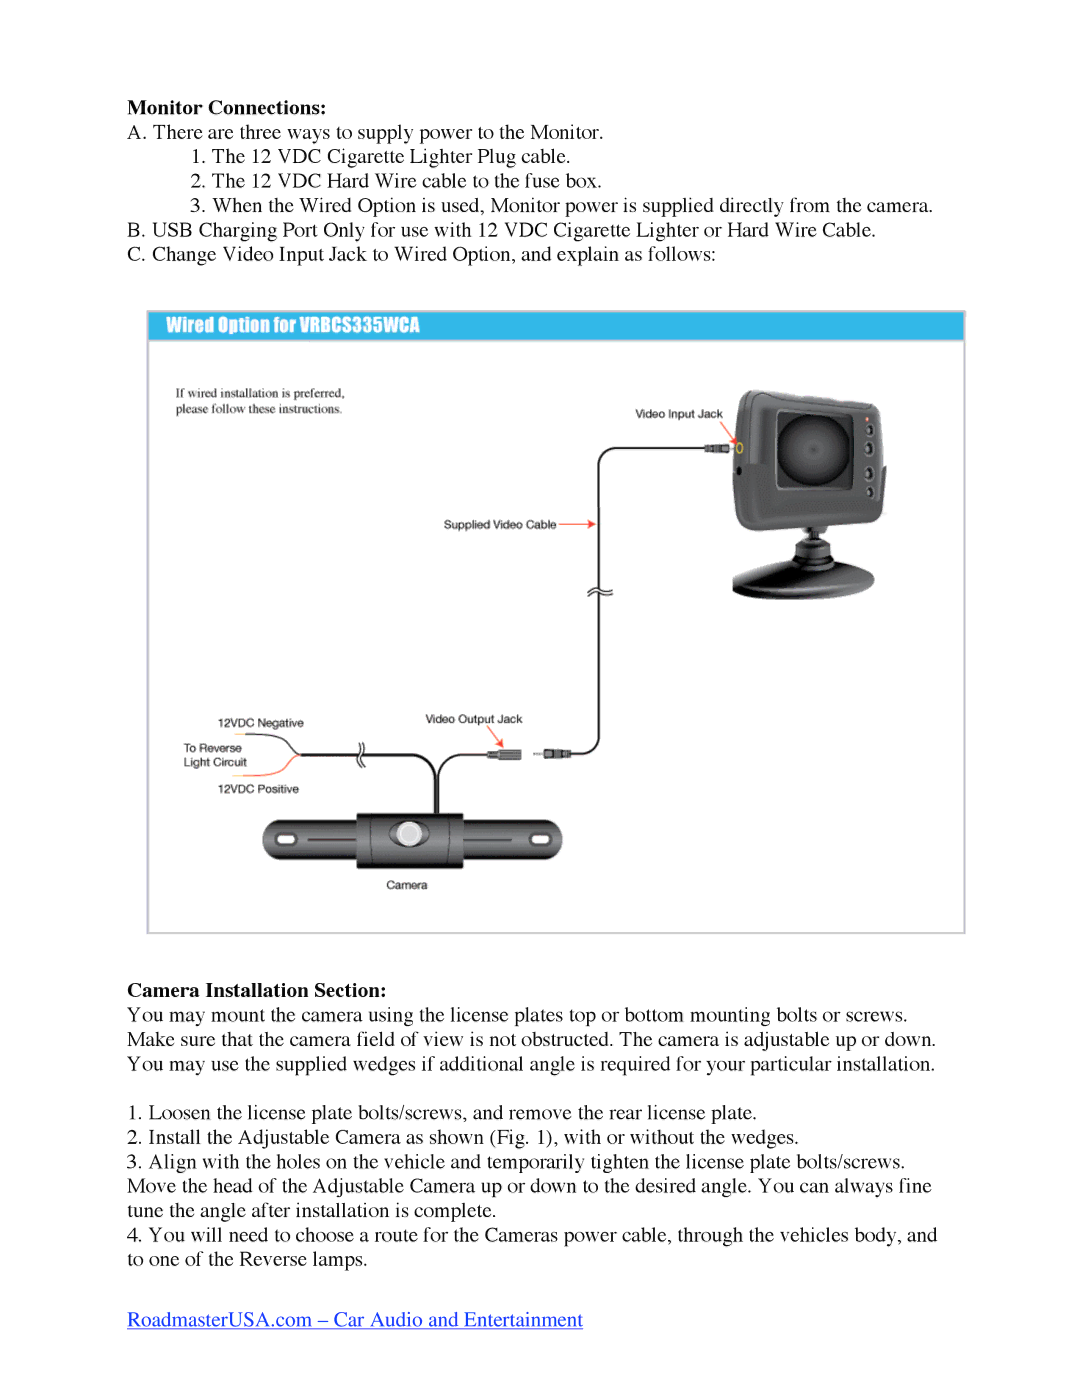
C.Change Video Input Jack to Wired Option, and explain as follows:
Camera Installation Section:
You may mount the camera using the license plates top or bottom mounting bolts or screws. Make sure that the camera field of view is not obstructed. The camera is adjustable up or down. You may use the supplied wedges if additional angle is required for your particular installation.
1.Loosen the license plate bolts/screws, and remove the rear license plate.
2.Install the Adjustable Camera as shown (Fig. 1), with or without the wedges.
3.Align with the holes on the vehicle and temporarily tighten the license plate bolts/screws. Move the head of the Adjustable Camera up or down to the desired angle. You can always fine tune the angle after installation is complete.
4.You will need to choose a route for the Cameras power cable, through the vehicles body, and to one of the Reverse lamps.
RoadmasterUSA.com – Car Audio and Entertainment