INSTALLATION
MOUNTING
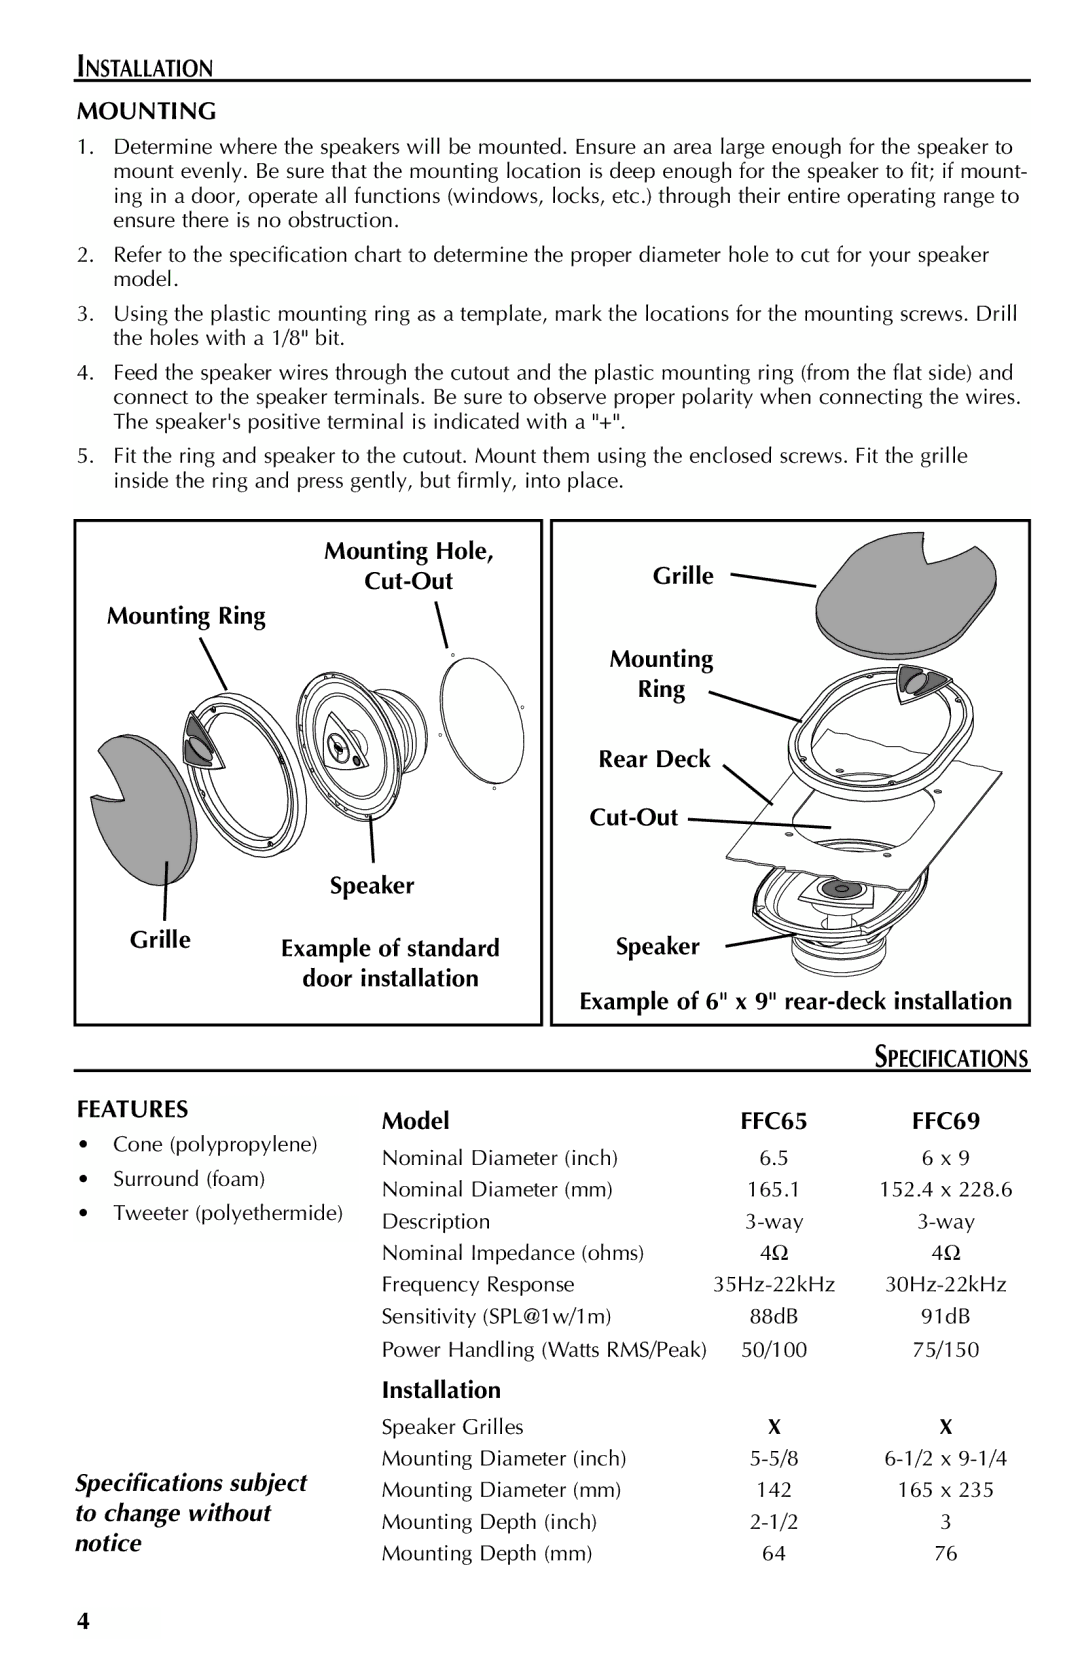
1.Determine where the speakers will be mounted. Ensure an area large enough for the speaker to mount evenly. Be sure that the mounting location is deep enough for the speaker to fit; if mount- ing in a door, operate all functions (windows, locks, etc.) through their entire operating range to ensure there is no obstruction.
2.Refer to the specification chart to determine the proper diameter hole to cut for your speaker model.
3.Using the plastic mounting ring as a template, mark the locations for the mounting screws. Drill the holes with a 1/8" bit.
4.Feed the speaker wires through the cutout and the plastic mounting ring (from the flat side) and connect to the speaker terminals. Be sure to observe proper polarity when connecting the wires. The speaker's positive terminal is indicated with a "+".
5.Fit the ring and speaker to the cutout. Mount them using the enclosed screws. Fit the grille inside the ring and press gently, but firmly, into place.
|
|
| Mounting Hole, | Grille |
| |||
|
|
|
|
| ||||
| Mounting Ring |
|
|
|
|
|
| |
|
|
|
|
| Mounting |
|
| |
|
|
|
|
| Ring |
|
| |
|
|
|
|
| Rear Deck |
|
| |
|
|
|
|
|
|
|
| |
|
|
| Speaker |
|
|
| ||
| Grille | Example of standard | Speaker |
|
| |||
|
| door installation | Example of 6" x 9" | |||||
|
|
|
|
| ||||
|
|
|
|
|
|
| SPECIFICATIONS | |
FEATURES |
|
| Model |
| FFC65 | FFC69 | ||
• | Cone (polypropylene) |
|
| |||||
| Nominal Diameter (inch) | 6.5 | 6 x 9 | |||||
• | Surround (foam) |
|
| |||||
|
| Nominal Diameter (mm) | 165.1 | 152.4 x 228.6 | ||||
• | Tweeter (polyethermide) | |||||||
Description |
| |||||||
|
|
|
|
| ||||
|
|
|
| Nominal Impedance (ohms) | 4Ω | 4Ω | ||
|
|
|
| Frequency Response |
| |||
|
|
|
| Sensitivity (SPL@1w/1m) | 88dB | 91dB | ||
|
|
|
| Power Handling (Watts RMS/Peak) | 50/100 | 75/150 | ||
|
|
|
| Installation |
|
|
| |
|
|
|
| Speaker Grilles |
| X | X | |
Specifications subject |
| Mounting Diameter (inch) | ||||||
| Mounting Diameter (mm) | 142 | 165 x 235 | |||||
to change without |
|
| Mounting Depth (inch) | 3 | ||||
notice |
|
| ||||||
|
| Mounting Depth (mm) | 64 | 76 | ||||
|
|
|
| |||||
4