Server RSV-S8 User Manual
2 AN INTRODUCTION TO RAID
3 INSTALLATION
1 WELCOME
Content
4 SATARAID5 ARRAY MANAGER
1.2.1 DATA SECURITY
1.1 PRECAUTION
1.2 FEATURES
1 WELCOME
1.5 SUPPORTED OPERATING SYSTEMS
1.4 SPECIFICATIONS
1.6 PRODUCT CONTENTS
1.3 EASE OF USE
2.2 SEGMENTING DISKS
2.1 RAID VOLUMES
CONFIGURED AS
2 AN INTRODUCTION TO RAID
2.3.3 DISK MIRRORING AND STRIPING RAID
2.3 RAID LEVELS
2.3.1 DISK STRIPING RAID
2.3.2 DISK MIRRORING RAID
STATUS
2.4 RAID VOLUME STATUS
2.3.5 CONCATENATION
2.3.6 SINGLE DRIVE / SEGMENT
3.1 COMPONENTS
3.2 INSTALLING HARDWARE
3.3 INSTALLING ON WINDOWS
3.3.1 INSTALLING SATA RAID HOST BUS ADAPTER
Click Browse… to select to driver path, than click OK
Select Specify a location, than click Next
Page
Select Specify a location, than click Next
Click Next to install the Silicon Image’s Pseudo Processor Device driver
3.3.2 INSTALLING SATARAID5 UTILITY
Double-click the 3132-W-I32-R.exe file Click Next to begin setup
Select I Agree, than click Next
Click Next to begin the installation
Click Next to use the default installation folder
Select Typical, than click Next
When SATARAID5 installation has completed, click Close to exit
3.3.4 ALLOCATING PARTITION
3.3.3 DISK DRIVE MODE SETUP
When Write Signature and Upgrade Disk Wizard appears, click Next
Select Disk Management under Storage to view the disk drives
Select the new disk to write a signature, than click Next
Do not click any disk to upgrade to dynamic disk, than click Next
Click Next to create a partition on a basic disk
Select the partition type you want to create, than click Next
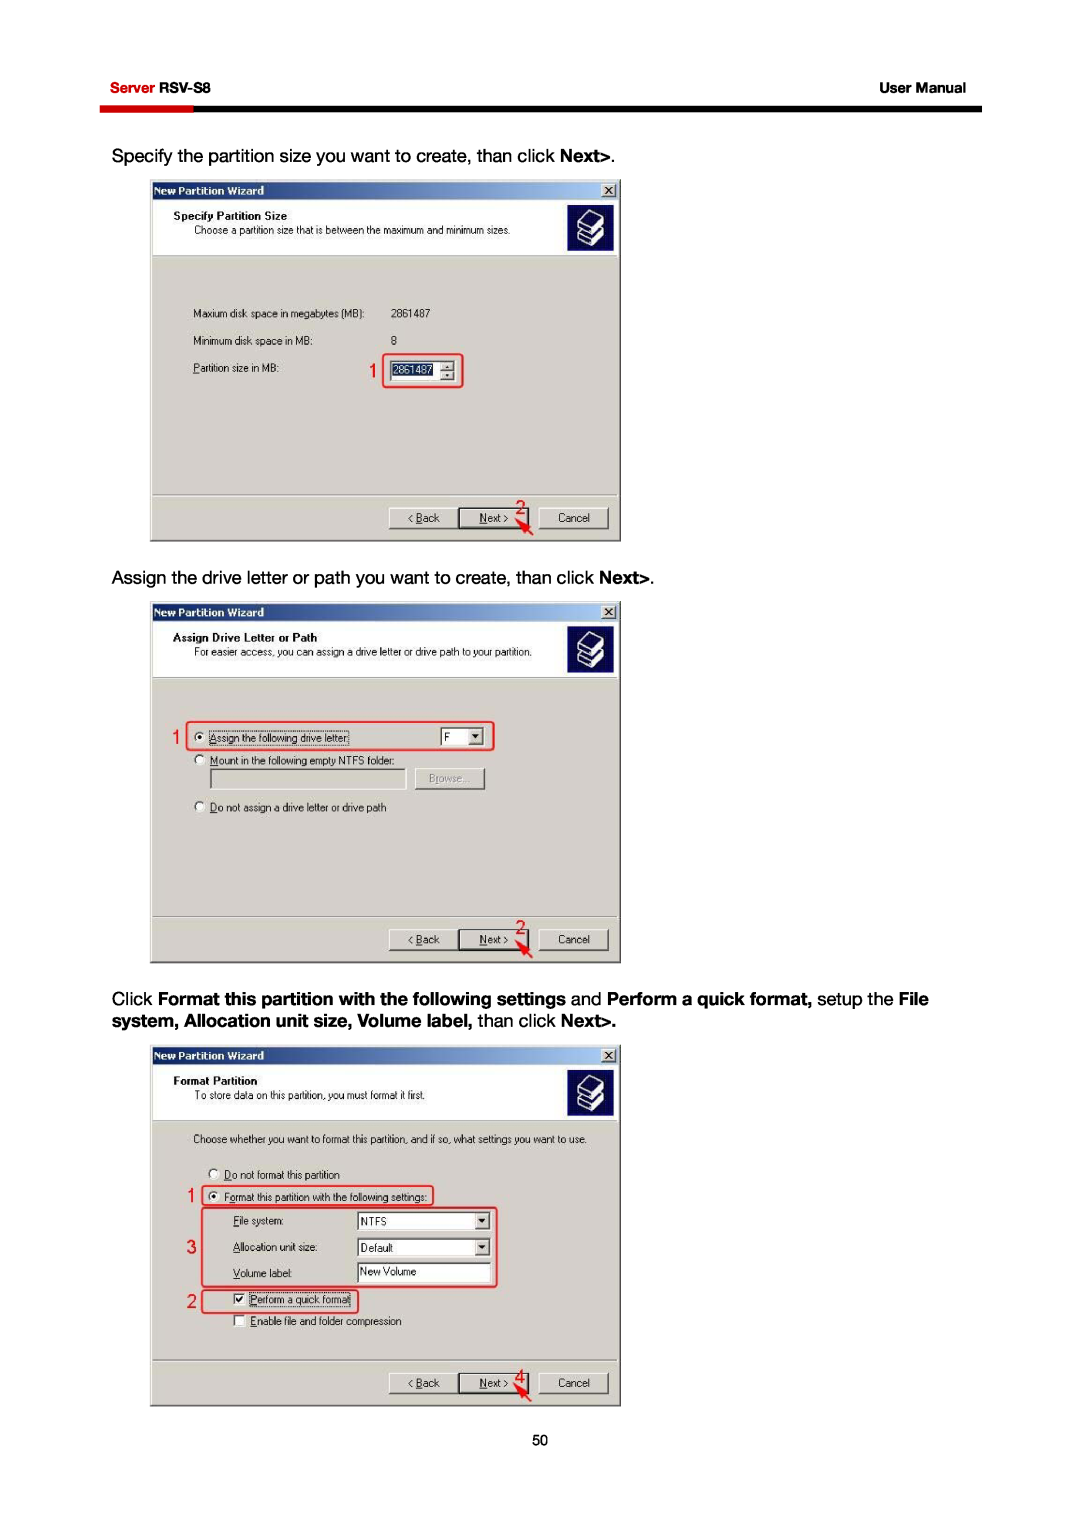
Specify the partition size you want to create, than click Next
Assign the drive letter or path you want to create, than click Next
When the Create Partition Wizard has completed, click Finish
The status of the newly created partition in the Disk Management window should change to Formatting and the percentage complete will be displayed. Depending upon the size of the partition, the format process may take several minutes. When complete, the status will change to “Healthy" and the name and drive letter will be updated. Once the disk reports Healthy, it appears in the listing in System Listing section with all of its pertinent information as well
3.4.1 INSTALLING SATA RAID HOST BUS ADAPTER
3.4 INSTALLING ON WINDOWS XP 32/64-BIT
When the installation has completed, click Finish
Double-click the utility file
3.4.2 INSTALLING SATARAID5 UTILITY
Click Next to begin setup Select I Agree, than click Next
Server RSV-S8
to begin the Java platform to start the Array Manager software
Select Start All Programs Silicon Image SATARaid5Manager
3.4.4 ALLOCATING PARTITIONS ON WINDOWS XP 32-BIT
3.4.3 DISK DRIVE MODE SETUP
When Initialize and Convert Disk Wizard appears, click Next
Select the new disk to initialize, than click Next
Do not click any disk to convert, than click Next
Click Next to create a partition on a basic disk
Server RSV-S8
User Manual
Server RSV-S8
When the New Partition Wizard has completed, click Finish
User Manual
3.4.5 ALLOCATING PARTITIONS ON WINDOWS XP 64-BIT
Server RSV-S8
Windows 64-bit system supports GPT disk which supports disk volume greater than 2TB
Select the partition to create, than click Next
User Manual
Specify the partition size you want to create, than click Next
Assign the drive letter or path you want to create, than click Next
Server RSV-S8
When the New Partition Wizard has completed, click Finish
3.5.1 INSTALLING SATA RAID HOST BUS ADAPTER
3.5 INSTALLING ON WINDOWS SERVER 2003 32/64-BIT
User Manual
3.5.2 INSTALLING SATARAID5 UTILITY
Click Next to begin setup Select I Agree, than click Next
Server RSV-S8
User Manual
Server RSV-S8
Click Next to use the default installation folder
Click Next to begin the installation
When SATARAID5 installation has completed, click Close to exit
User Manual
3.5.4 ALLOCATING PARTITIONS
3.5.3 DISK DRIVE MODE SETUP
Server RSV-S8
When Initialize and Convert Disk Wizard appears, click Next
Select the new disk to initialize, than click Next
Do not click any disk to convert, than click Next
User Manual
Server RSV-S8
User Manual
Click Next to create a partition on a basic disk
Select the partition to create, than click Next
Server RSV-S8
User Manual
Specify the partition size you want to create, than click Next
Assign the drive letter or path you want to create, than click Next
Server RSV-S8
When the New Partition Wizard has completed, click Finish
3.6.1 INSTALLING SATA RAID HOST BUS ADAPTER
3.6 INSTALLING ON WINDOWS VISTA 32/64-BIT
Insert the disc that came with your RAID Controller, than click Next
When the installation has completed, click Close
3.6.2 INSTALLING SATARAID5 UTILITY
Click Next to begin setup Select I Agree, than click Next
Server RSV-S8
User Manual
Server RSV-S8
Click Next to use the default installation folder
Click Next to begin the installation
When SATARAID5 installation has completed, click Close to exit
User Manual
3.6.4 ALLOCATING PARTITIONS
3.6.3 DISK DRIVE MODE SETUP
Page
Click Next to create the partition
When the New Partition Wizard has completed, click Finish
Server RSV-S8
User Manual
User Manual
4 SATARAID5 ARRAY MANAGER
4.1 OVERVIEW
COLOR
4.2 CREATING RAID GROUPS
4.2.1 CONTIGUOUS RAID GROUPS
4.2.2 CONCATENATED RAID GROUPS
4.2.4 MIRRORED RAID GROUPS
4.2.3 STRIPED RAID GROUPS
4.2.6 PARITY RAID GROUPS
4.2.5 MIRRORED STRIPED RAID GROUPS
RAID Level
4.2.7 RAID GROUPS OVERVIEW
FIELD
DEFINITION
RAID Group
4.3 ADDITIONAL MENU COMMANDS
File
Device
Log File Tab
4.3.1 CONFIGURATION
Popup Tab
Advanced Options
FEATURE
EXPLANATION
DESCRIPTION
4.3.3 CREATE SPARE
4.3.2 EXIT
PARAMETER
4.3.5 DELETE MEMBER
4.3.4 DELETE SPARE
File Options
4.3.6 DELETE ORPHAN
4.3.7 MAKE PASS-THRU
4.3.8 DEVICE SUMMARY
4.3.9 CREATE RAID GROUP
Exit
Sorting
Fields
4.3.11 DELETE RAID GROUP
4.3.10 REBUILD RAID GROUP
4.3.13 RAID GROUP SUMMARY
4.3.12 BRING RAID GROUP ONLINE
Open
4.3.14 TASK MANAGER
File
Options Task
Resume
Cancel
Modify
Suspend
This command closes the Event Log window
4.3.15 EVENT LOG
4.3.18 HELP TOPICS
4.3.16 RESOURCES
File Display
4.3.17 CREATE LEGACY RAID GROUP