ENGLISH
■For appliance description see diagram on page 3:
A | Spray jet | H | Flexible cord protector |
B | Water filling inlet with cover | I | Mains supply cord |
C | Variable steam control | J | Pilot light |
D | Spray button | K | Extremely |
E | Shot of steam button |
| soleplate |
F | Automatic | L | Transparent water tank |
| (depending on model) | M Maximum water level indicator | |
G | Temperature dial |
|
|
 SAFETY INSTRUCTIONS:
PThe appliance complies with EU directives 72/23/EEC and 89/336/EEC. E The appliance may only be connected to alternating current as specified
on the rating plate.
E If your home is fitted with a differential current switch, please ensure that it is sensitive to pulse trains.
U.K. ONLY
SAFETY POINTS FOR REWIREABLE OR MOULDED PLUG: E The mains lead is fitted with a BS 1363 13A plug.
E If the plug supplied with the product is not suitable for your socket outlet, then it must be removed (cut off, if it is a
IF YOU ARE IN ANY DOUBT, PLEASE CONTACT A QUALIFIED ELECTRICIAN.
WARNING: Dispose of a plug that has been cut from the power supply cord, as such a plug is hazardous if inserted in a live 13 amp socket outlet else- where in the house.
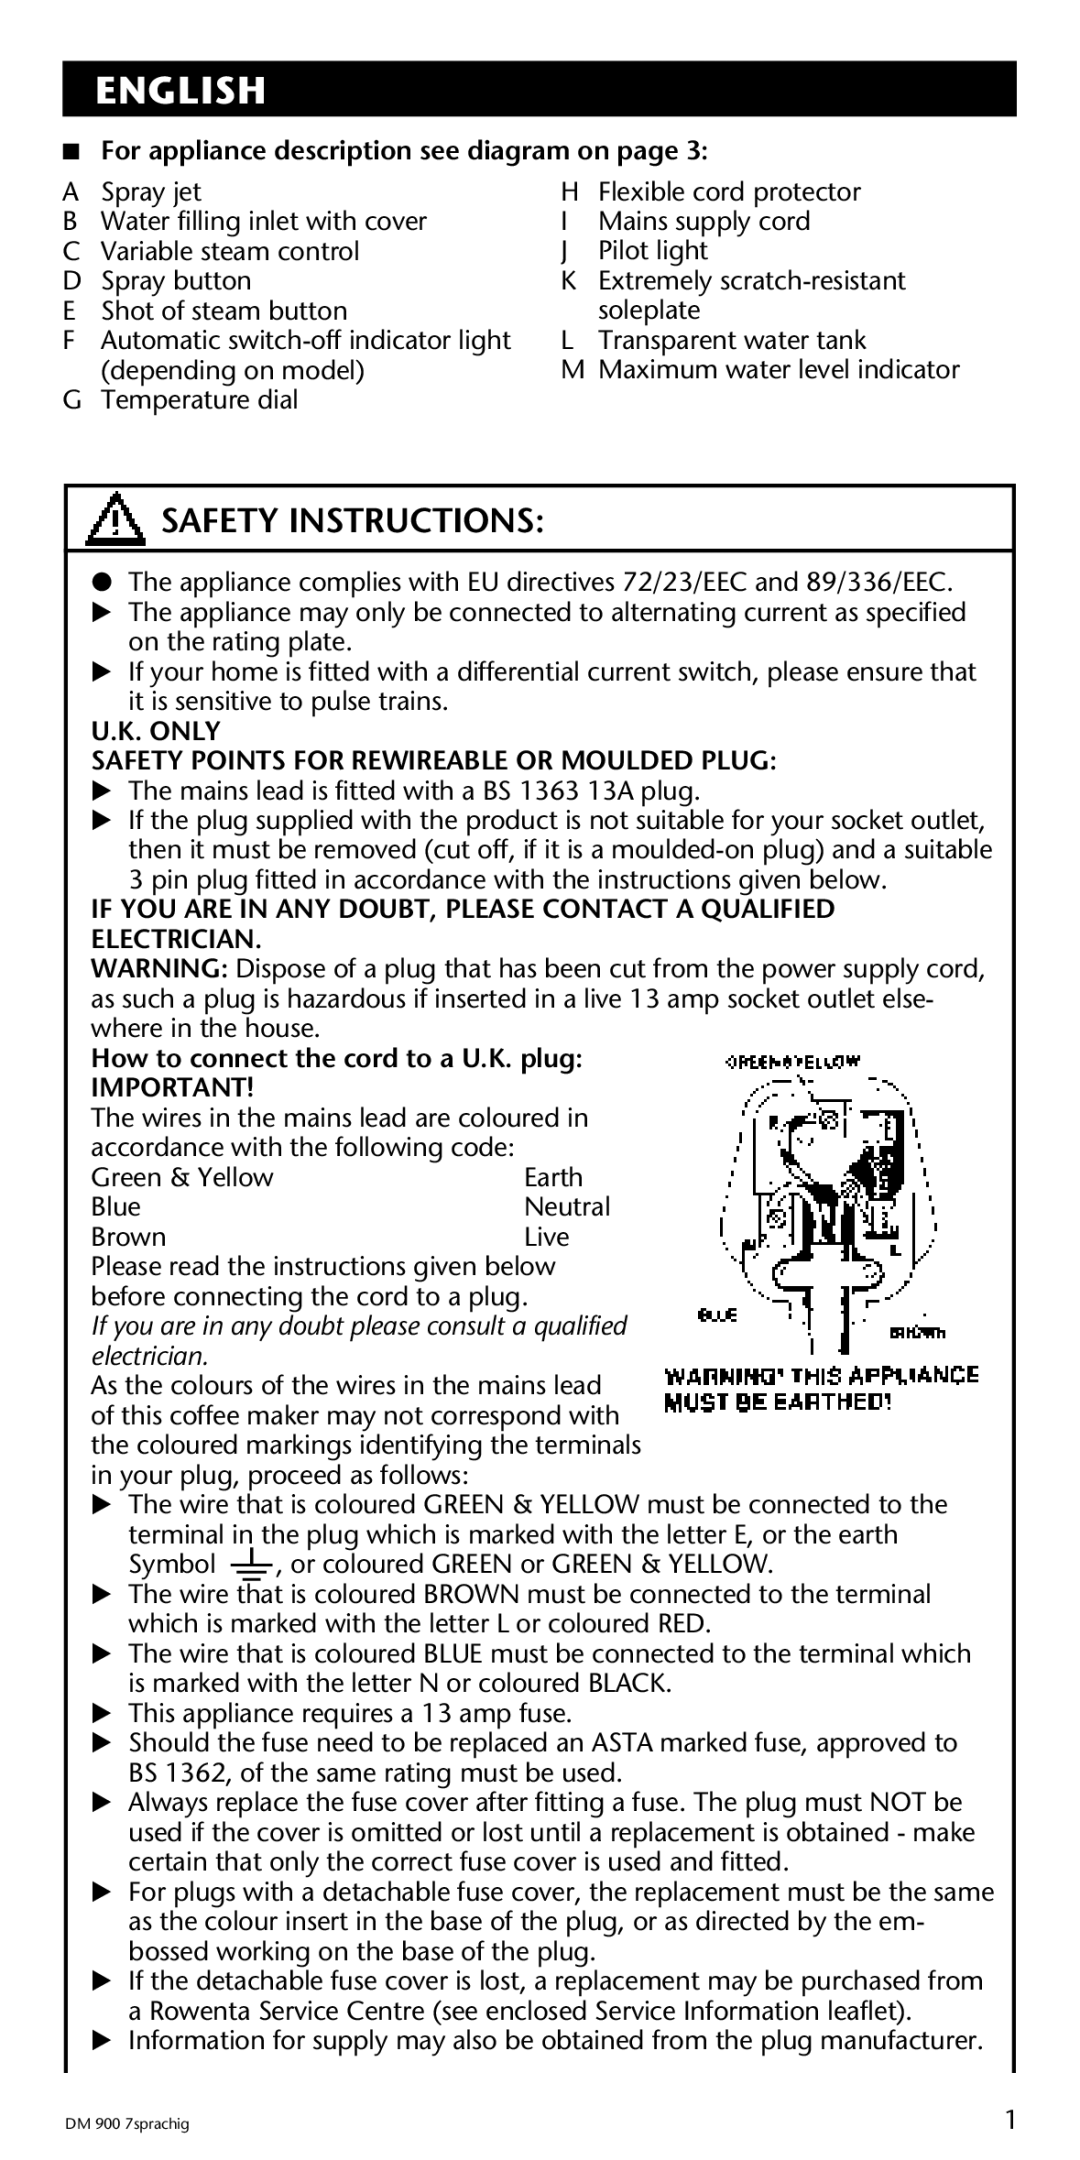
How to connect the cord to a U.K. plug:
IMPORTANT!
The wires in the mains lead are coloured in accordance with the following code:
Green & Yellow | Earth |
Blue | Neutral |
Brown | Live |
Please read the instructions given below before connecting the cord to a plug.
If you are in any doubt please consult a qualified electrician.
As the colours of the wires in the mains lead of this coffee maker may not correspond with the coloured markings identifying the terminals in your plug, proceed as follows:
EThe wire that is coloured GREEN & YELLOW must be connected to the
terminal in the plug which is marked with the letter E, or the earth
Symbol ![]() , or coloured GREEN or GREEN & YELLOW.
, or coloured GREEN or GREEN & YELLOW.
EThe wire that is coloured BROWN must be connected to the terminal which is marked with the letter L or coloured RED.
EThe wire that is coloured BLUE must be connected to the terminal which is marked with the letter N or coloured BLACK.
EThis appliance requires a 13 amp fuse.
EShould the fuse need to be replaced an ASTA marked fuse, approved to BS 1362, of the same rating must be used.
EAlways replace the fuse cover after fitting a fuse. The plug must NOT be used if the cover is omitted or lost until a replacement is obtained - make certain that only the correct fuse cover is used and fitted.
EFor plugs with a detachable fuse cover, the replacement must be the same as the colour insert in the base of the plug, or as directed by the em- bossed working on the base of the plug.
EIf the detachable fuse cover is lost, a replacement may be purchased from a Rowenta Service Centre (see enclosed Service Information leaflet).
EInformation for supply may also be obtained from the plug manufacturer.
DM 900 7sprachig | 1 |