PREPARATION

Prewiring

Run a separate 2-conductor stranded copper speaker cable of at least 16 AWG (1.5 mm) from the amplified keypad or amplifier to each speaker. (Note: When using the RC61S stereo ceiling speaker, run either one 4-con- ductor cable or two 2-conductor cables to the speaker.)

Be sure to use cable with the appropriate fire resistance rating for the application. Check the local building code for specific requirements. Russound offers 2- and

4-conductor speaker cables with a Class 3 fire rating for in-wall installation.

When running a speaker cable parallel to an AC power cable, keep them at least 12 inches (30 cm) apart to minimize electromagnetic interference. If the speaker cables must cross AC wiring, cross them at right angles.

Leave about 2 feet (0.6 m) of cable at the keypad or amplifier end for connecting to the output terminals. Label the cables so you will know which cable connects to each channel. At each speaker location, leave enough cable so that at least 2 feet (0.6 m) can extend through the cutout for connecting to the speaker.

Cutting Holes in Existing Wallboard

Note: Ratio speakers are designed to mount to ceiling and wall material between ½ inch (1.3 cm) and ¾ inch (1.9 cm) thick. Spacers on the spring clips accommodate varying thicknesses of material within this range.

1.Once you have determined roughly where to place the speakers, use a stud finder to locate the wall studs or ceiling joists and mark their location.

2.Check to make sure there are no obstructions such as electrical cables, water pipes, or heating ducts where you want to put the speakers.

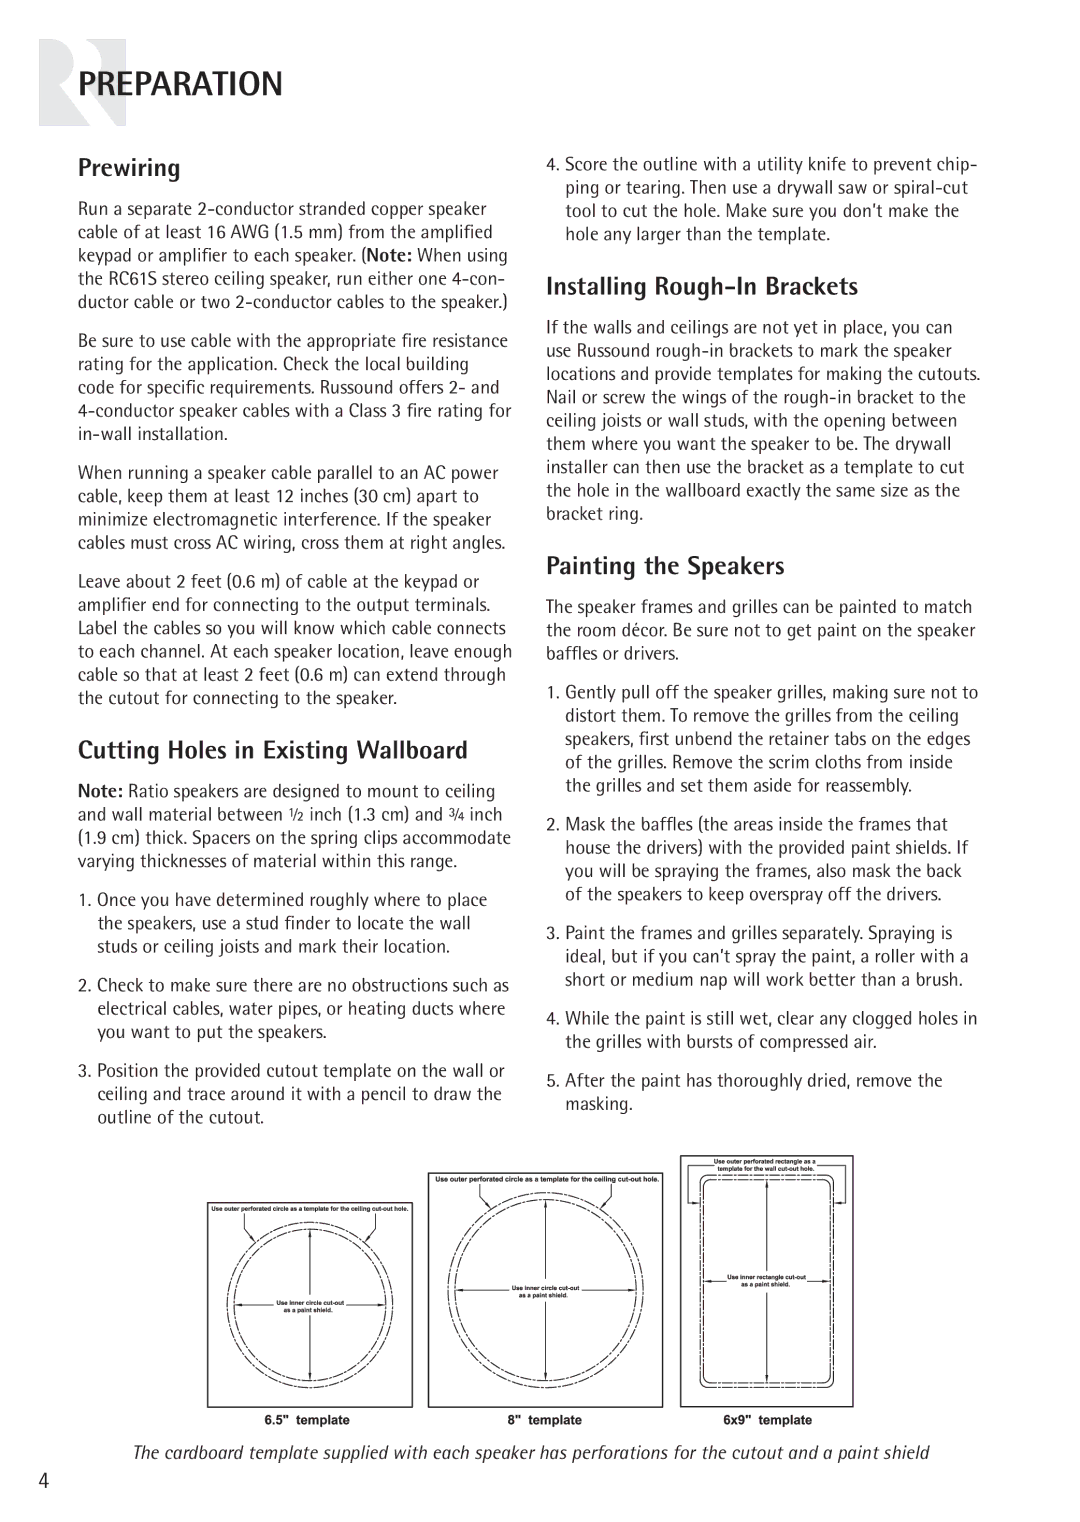
3.Position the provided cutout template on the wall or ceiling and trace around it with a pencil to draw the outline of the cutout.

4.Score the outline with a utility knife to prevent chip- ping or tearing. Then use a drywall saw or spiral-cut tool to cut the hole. Make sure you don’t make the hole any larger than the template.

Installing Rough-In Brackets

If the walls and ceilings are not yet in place, you can use Russound rough-in brackets to mark the speaker locations and provide templates for making the cutouts. Nail or screw the wings of the rough-in bracket to the ceiling joists or wall studs, with the opening between them where you want the speaker to be. The drywall installer can then use the bracket as a template to cut the hole in the wallboard exactly the same size as the bracket ring.

Painting the Speakers

The speaker frames and grilles can be painted to match the room décor. Be sure not to get paint on the speaker baffles or drivers.

1.Gently pull off the speaker grilles, making sure not to distort them. To remove the grilles from the ceiling speakers, first unbend the retainer tabs on the edges of the grilles. Remove the scrim cloths from inside the grilles and set them aside for reassembly.

2.Mask the baffles (the areas inside the frames that house the drivers) with the provided paint shields. If you will be spraying the frames, also mask the back of the speakers to keep overspray off the drivers.

3.Paint the frames and grilles separately. Spraying is ideal, but if you can’t spray the paint, a roller with a short or medium nap will work better than a brush.

4.While the paint is still wet, clear any clogged holes in the grilles with bursts of compressed air.

5.After the paint has thoroughly dried, remove the masking.

The cardboard template supplied with each speaker has perforations for the cutout and a paint shield

4

Page 4
Image 4
Russound RC61S instruction manual Preparation, Prewiring, Cutting Holes in Existing Wallboard, Installing Rough-In Brackets

RC61, RC61S specifications

The Russound RC61 and RC61S are sleek and sophisticated multi-room audio control systems ideal for both residential and commercial applications. Designed to enhance the audio experience, these products reflect Russound's commitment to innovation and quality in the realm of home theater and distributed audio systems.

One of the main features of the RC61 is its advanced control capabilities, allowing users to manage audio in six different zones. This flexibility means that users can play multiple audio sources in various rooms simultaneously, each with independent volume control. The system can seamlessly integrate with an extensive range of audio components, providing endless options for sound distribution.

The RC61S variant comes with added functionalities such as an on-screen display for intuitive navigation. This is particularly beneficial for those who prefer a visual interface to manage their audio setups. Both models support a wide variety of audio sources, including streaming services, satellite radio, or local media libraries, making them versatile choices for modern audio environments.

In terms of technology, the RC61 and RC61S utilize high-quality digital signal processing to ensure crystal-clear sound reproduction. The systems employ robust amplification capabilities, giving users the power to drive multiple speakers without sacrificing audio quality. Furthermore, both models are designed to be expandable, allowing users to easily integrate additional zones or audio components as their needs grow.

Another significant characteristic of the Russound RC61 and RC61S is their user-friendly interface. The systems can be controlled via a simple yet effective keypad, remote control, or even through smartphone applications, making it convenient for users to manage their audio experiences effortlessly. Additionally, compatibility with various home automation systems allows for even greater control and flexibility.

In summary, the Russound RC61 and RC61S are exemplary examples of modern audio control solutions, offering extensive features, advanced technologies, and user-centric designs. Whether for personal use in a home or for commercial applications, these systems provide a seamless and enjoyable audio experience that meets the demands of today's tech-savvy consumers.