ASSEMBLY INSTRUCTIONS
INSTALLING AND ADJUSTING THE LOOP HANDLE
If the loop handle is not assembled on this model, use the following instructions:
1.Place the loop handle and bottom handle clamp on the boom shaft (Fig. 1).
2.Install, one at a time, the four (4) screws and four (4) hex nuts with a Phillips screwdriver.
NOTE: Install all four (4) screws before you tighten any of them.
3.Adjust the loop handle to the desired position.
4.Tighten the clamp screws securely.
4 Screws | Loop | |
| Handle | |
| Bottom | |
4 Nuts | Handle | |
Clamp | ||
|
Fig. 1
INSTALLING THE STRING GUARD
If the string guard is not assembled on this model, use the following instructions:
WARNING: To avoid serious personal injury, the string guard must in place while operating this unit.
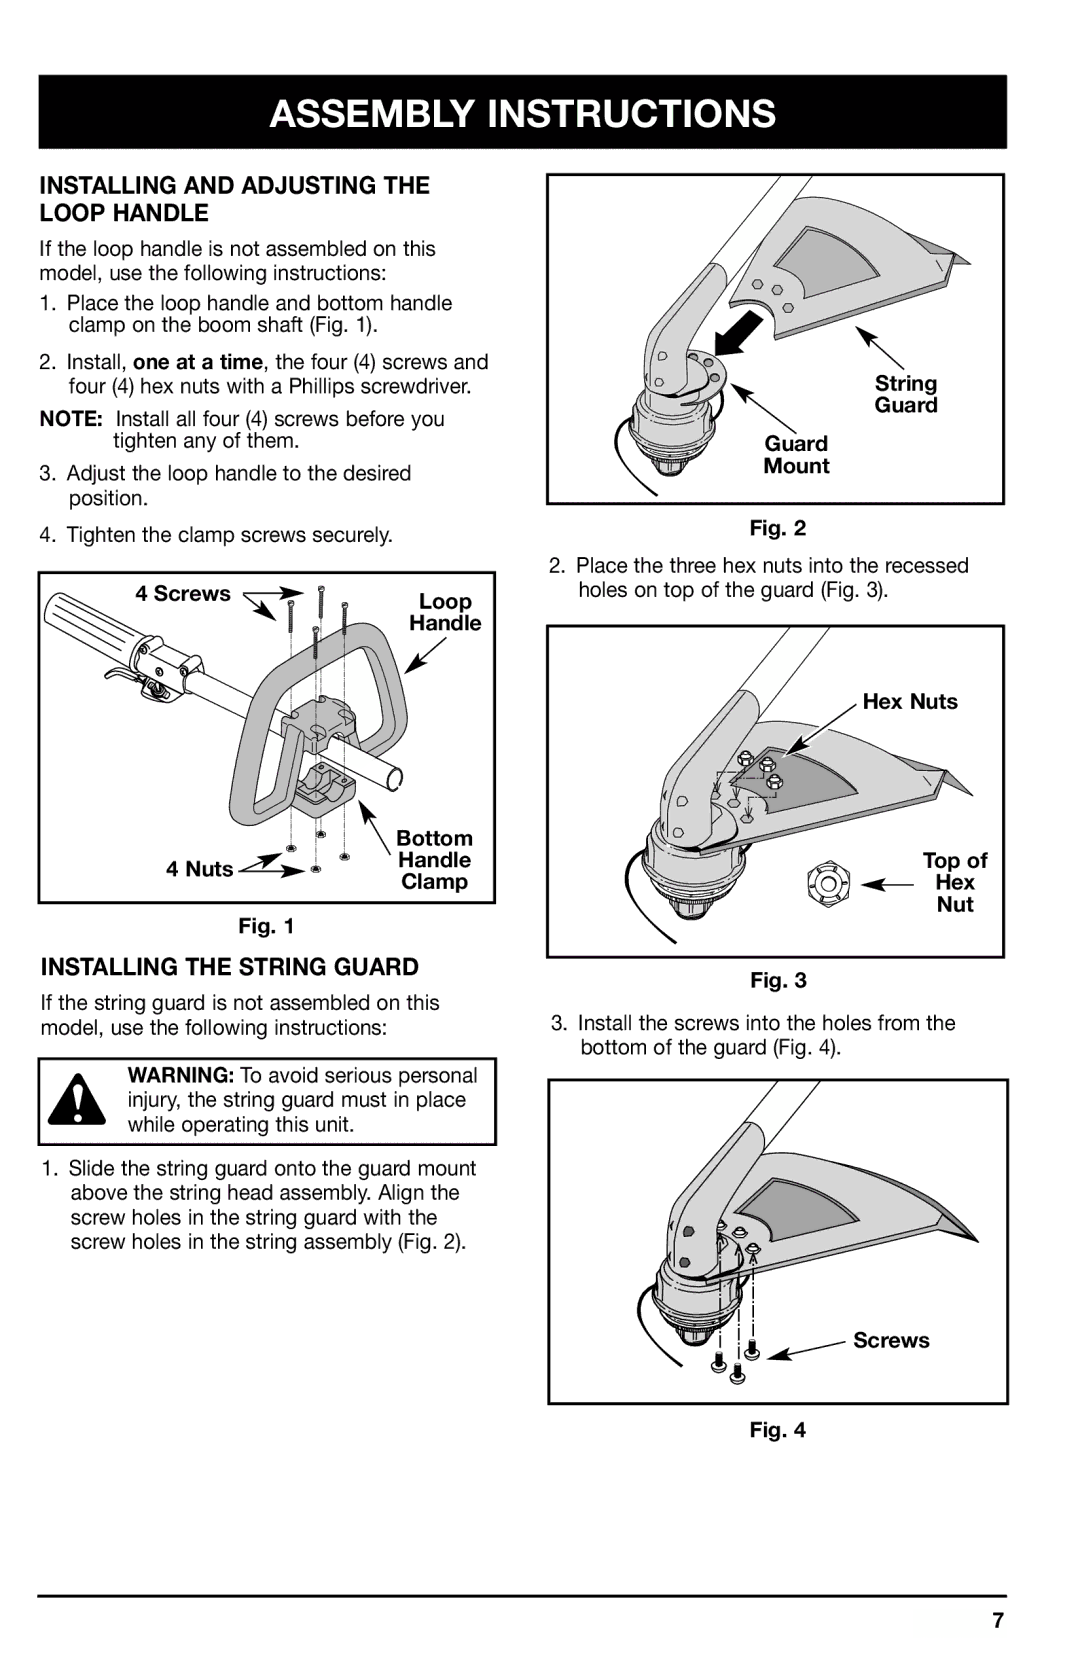
1.Slide the string guard onto the guard mount above the string head assembly. Align the screw holes in the string guard with the screw holes in the string assembly (Fig. 2).
String
Guard
Guard
Mount
Fig. 2
2.Place the three hex nuts into the recessed holes on top of the guard (Fig. 3).
Hex Nuts
Top of
Hex
Nut
Fig. 3
3.Install the screws into the holes from the bottom of the guard (Fig. 4).
Screws
Fig. 4
7