ASSEMBLY
go through holes in the saw base and material the saw is being mounted to. If machine bolts are being used, make sure bolts are long enough to go through holes in the saw base, the material being mounted to, and the lock washers and hex nuts.
NOTE: It may be necessary to countersink hex nuts and washers on bottom side of mounting board.
MOUNTING THE SAW TABLE
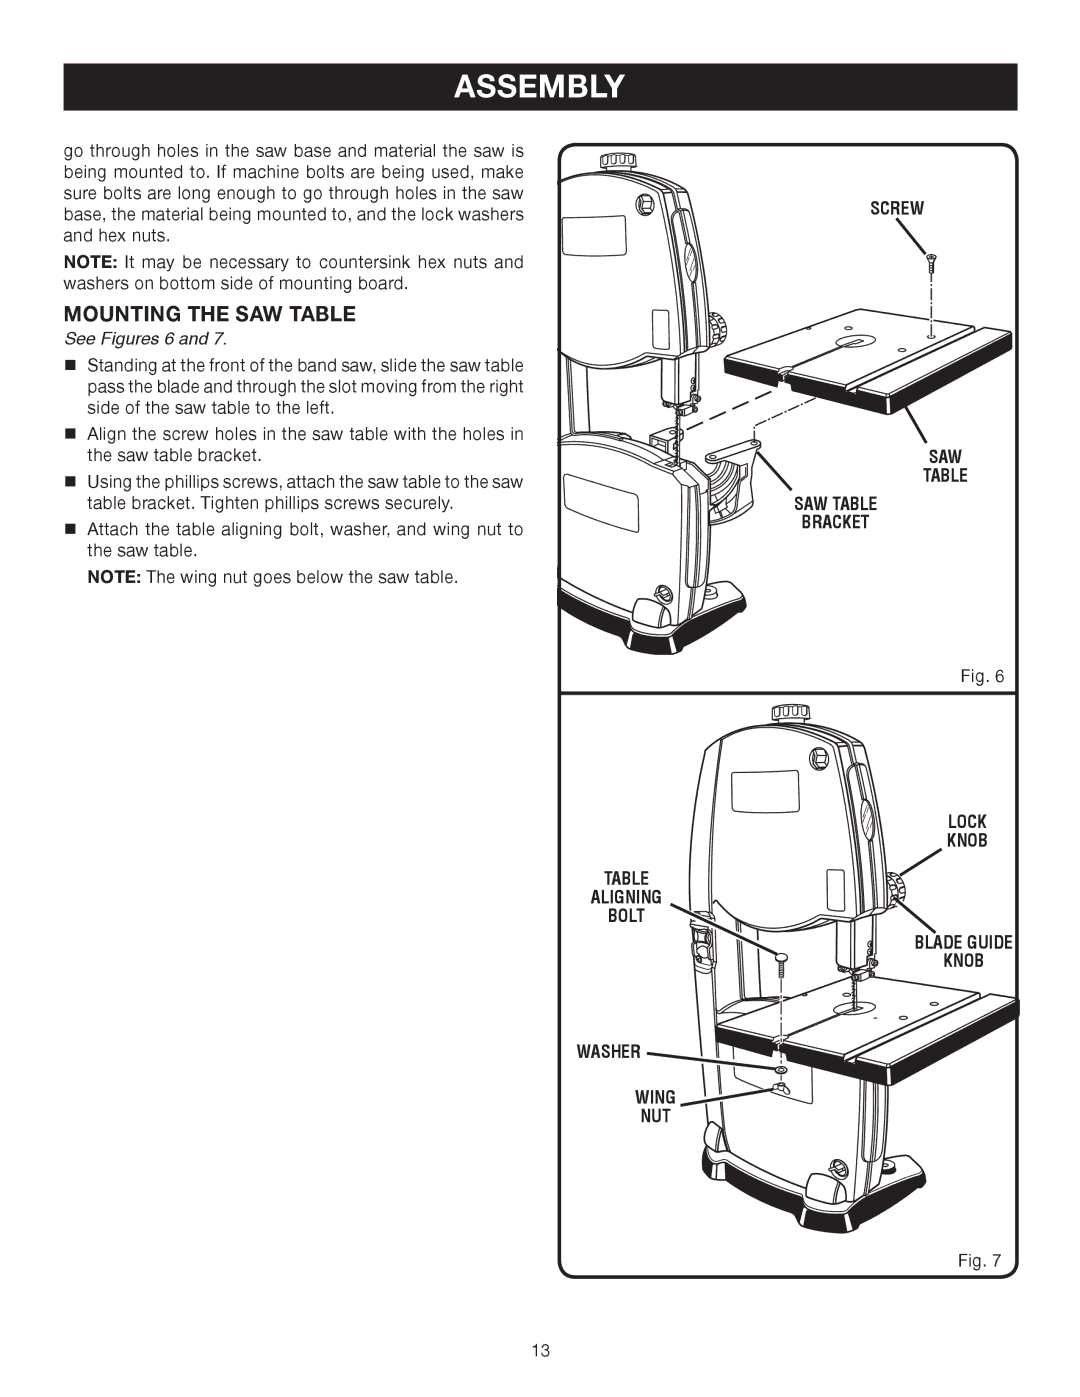
See Figures 6 and 7.
Standing at the front of the band saw, slide the saw table pass the blade and through the slot moving from the right side of the saw table to the left.
Align the screw holes in the saw table with the holes in the saw table bracket.
Using the phillips screws, attach the saw table to the saw table bracket. Tighten phillips screws securely.
Attach the table aligning bolt, washer, and wing nut to the saw table.
NOTE: The wing nut goes below the saw table.
SCREW
SAW
TABLE
SAW TABLE
BRACKET
Fig. 6
LOCK
KNOB
TABLE ALIGNING
BOLT
BLADE GUIDE KNOB
WASHER
WING
NUT
Fig. 7
13