OPERATION
CROSS CUTTING/RIP CUTTING | TOP VIEW OF SAW | |
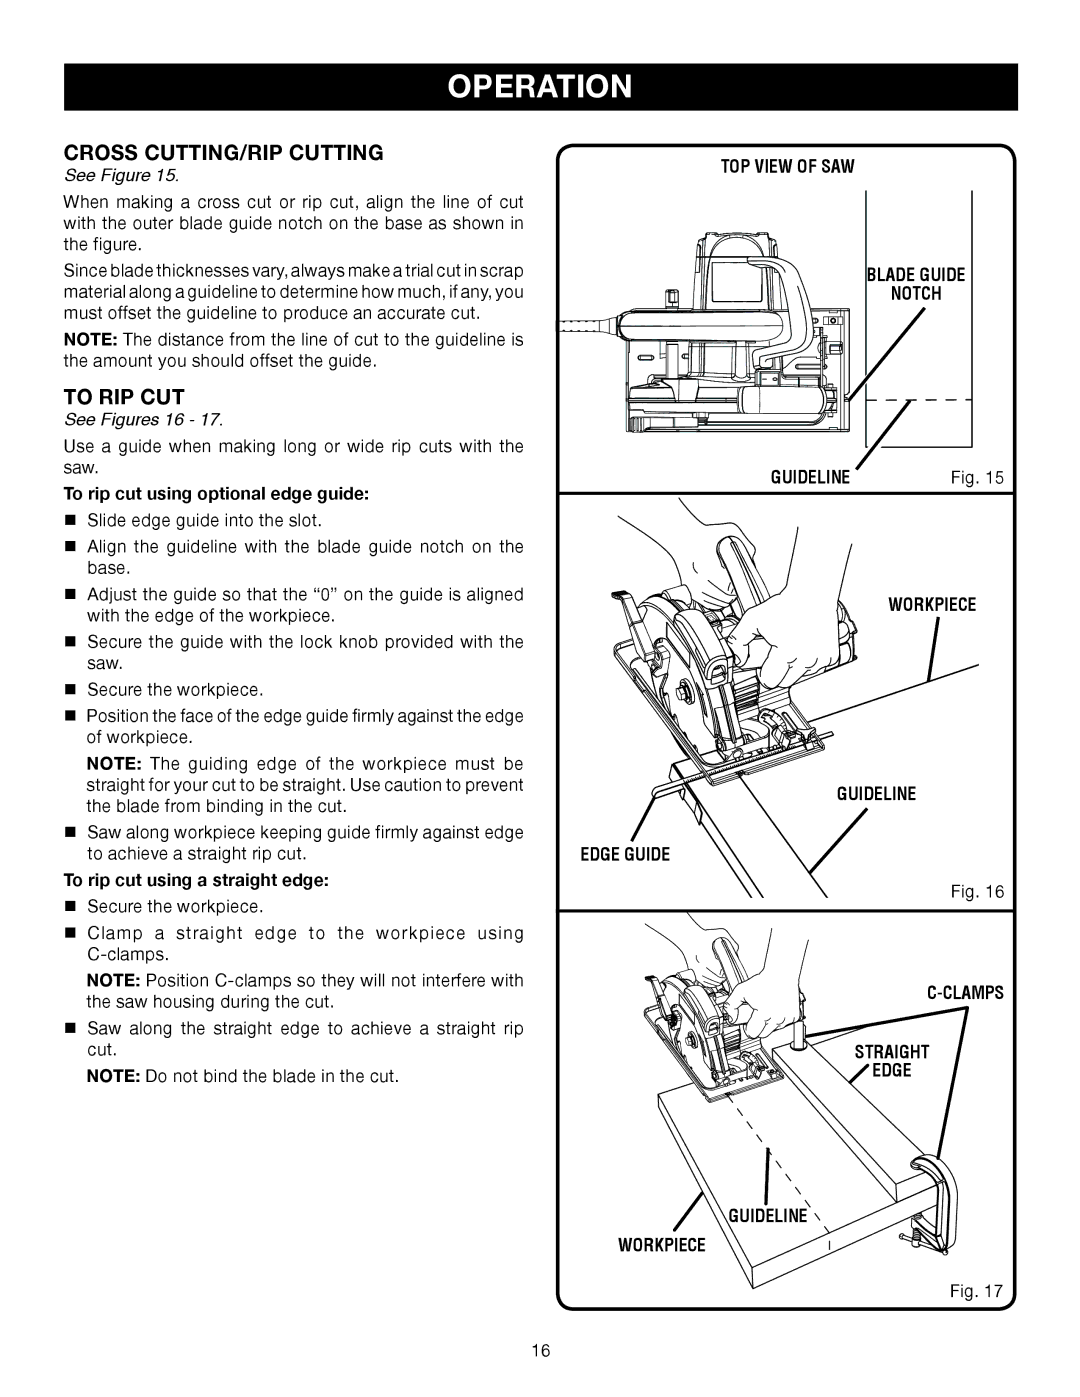
See Figure 15. | ||
| ||
When making a cross cut or rip cut, align the line of cut |
| |
with the outer blade guide notch on the base as shown in |
| |
the figure. |
| |
Since blade thicknesses vary, always make a trial cut in scrap | BLADE GUIDE | |
material along a guideline to determine how much, if any, you | NOTCH | |
must offset the guideline to produce an accurate cut. |
|
NOTE: The distance from the line of cut to the guideline is the amount you should offset the guide.
TO RIP CUT |
|
| |
See Figures 16 - 17. |
|
| |
Use a guide when making long or wide rip cuts with the |
|
| |
saw. | GUIDELINE | Fig. 15 | |
To rip cut using optional edge guide: | |||
|
| ||
Slide edge guide into the slot. |
|
| |
Align the guideline with the blade guide notch on the |
|
| |
base. |
|
| |
Adjust the guide so that the “0” on the guide is aligned |
| WORKPIECE | |
with the edge of the workpiece. |
| ||
|
| ||
Secure the guide with the lock knob provided with the |
|
| |
saw. |
|
| |
Secure the workpiece. |
|
| |
Position the face of the edge guide firmly against the edge |
|
| |
of workpiece. |
|
| |
NOTE: The guiding edge of the workpiece must be |
|
| |
straight for your cut to be straight. Use caution to prevent | GUIDELINE | ||
the blade from binding in the cut. | |||
|
| ||
Saw along workpiece keeping guide firmly against edge
to achieve a straight rip cut. |
| EDGE GUIDE |
To rip cut using a straight edge: |
| Fig. 16 |
Secure the workpiece. |
| |
|
| |
Clamp a straight edge to the workpiece | using |
|
|
| |
NOTE: Position | ||
the saw housing during the cut. |
| |
|
| |
Saw along the straight edge to achieve a straight rip |
| |
cut. |
| STRAIGHT |
NOTE: Do not bind the blade in the cut. |
| EDGE |
GUIDELINE
WORKPIECE
Fig. 17
16
