OPERATION
objects such as pipes, 2x4s, 2x6s, or metal grates.
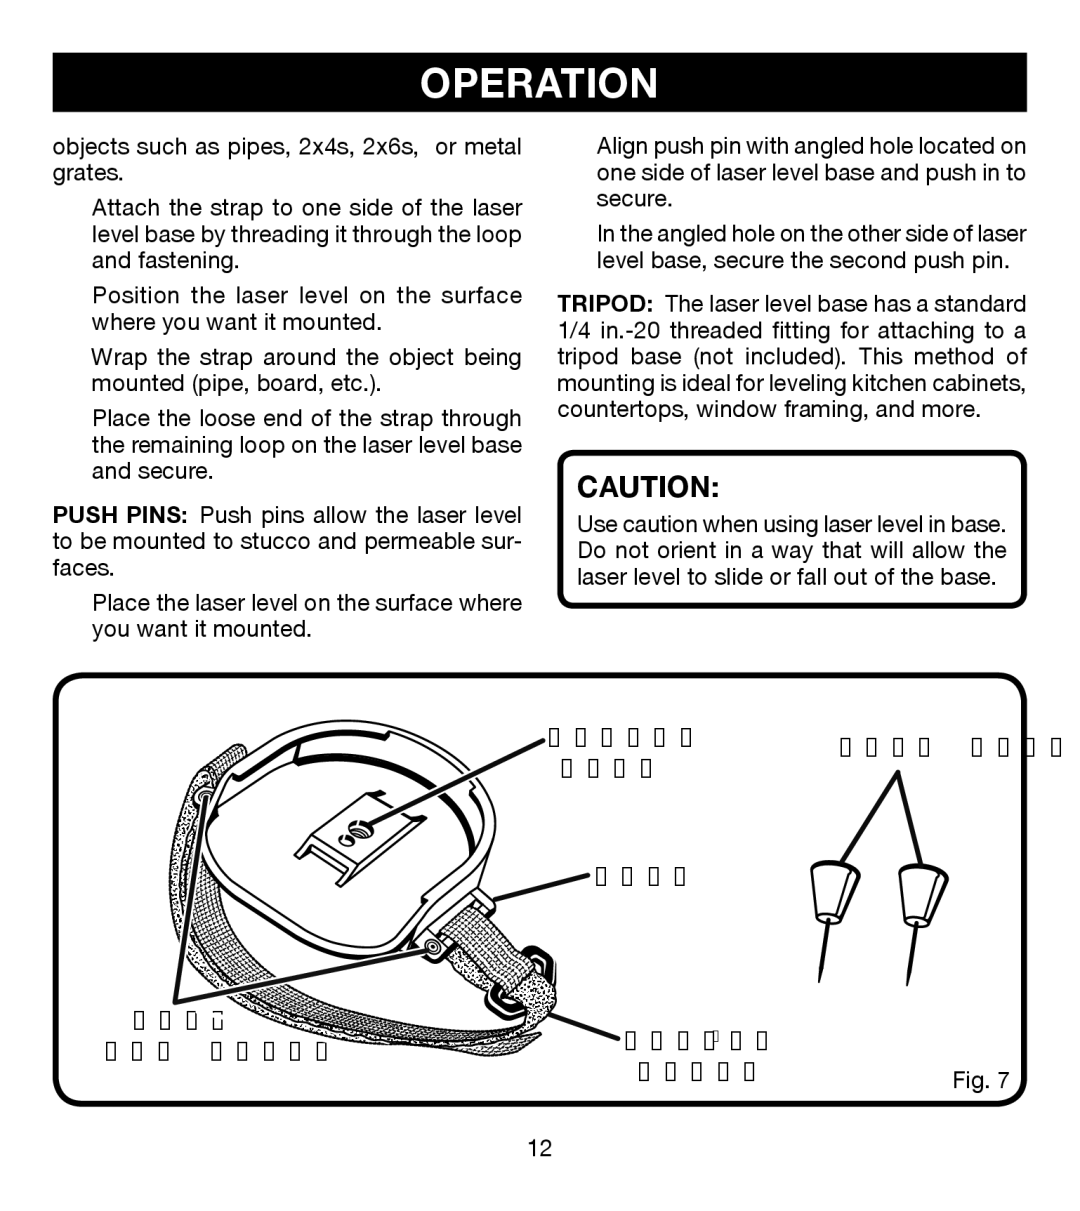
nAttach the strap to one side of the laser level base by threading it through the loop and fastening.
nPosition the laser level on the surface where you want it mounted.
nWrap the strap around the object being mounted (pipe, board, etc.).
nPlace the loose end of the strap through the remaining loop on the laser level base and secure.
PUSH PINS: Push pins allow the laser level to be mounted to stucco and permeable sur- faces.
nPlace the laser level on the surface where you want it mounted.
nAlign push pin with angled hole located on one side of laser level base and push in to secure.
nIn the angled hole on the other side of laser level base, secure the second push pin.
TRIPOD: The laser level base has a standard 1/4
CAUTION:
Use caution when using laser level in base. Do not orient in a way that will allow the laser level to slide or fall out of the base.
TRIPOD | PUSH PINS | |
HOLE | ||
|

 LOOP
LOOP
PUSH | VELCRO® |
| |
PIN HOLES |
| ||
STRAP | Fig. 7 | ||
|
12