OPERATION
using a TRIPOD
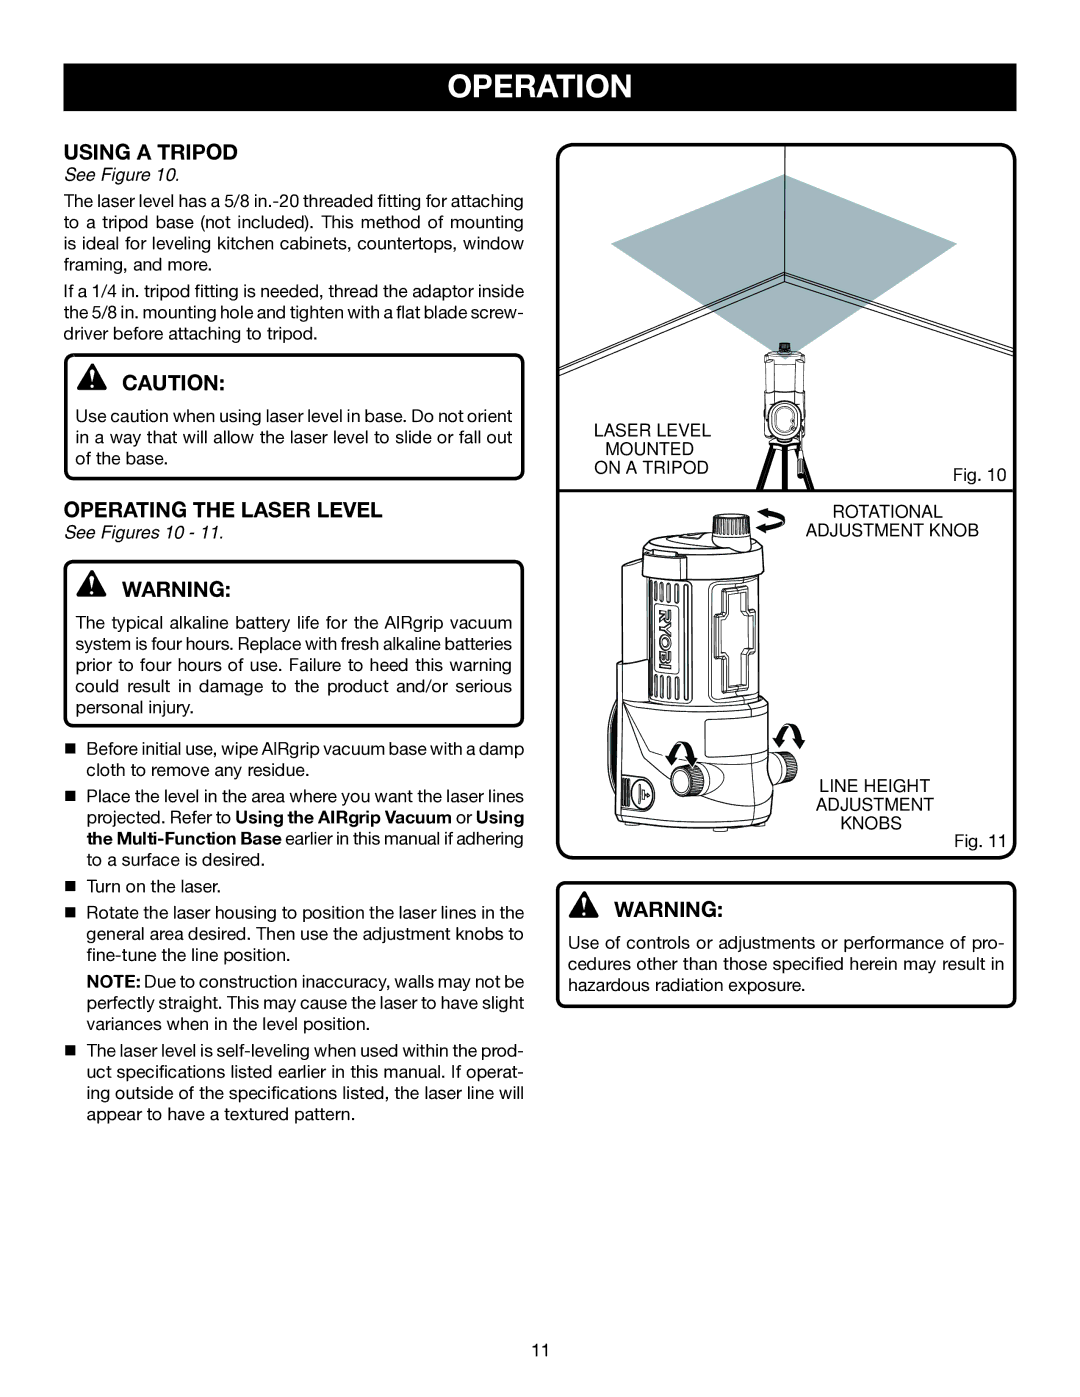
See Figure 10.
The laser level has a 5/8
If a 1/4 in. tripod fitting is needed, thread the adaptor inside the 5/8 in. mounting hole and tighten with a flat blade screw- driver before attaching to tripod.
CAUTION:
Use caution when using laser level in base. Do not orient in a way that will allow the laser level to slide or fall out of the base.
OPERATING THE LASER LEVEL
See Figures 10 - 11.
Warning:
The typical alkaline battery life for the AIRgrip vacuum system is four hours. Replace with fresh alkaline batteries prior to four hours of use. Failure to heed this warning could result in damage to the product and/or serious personal injury.
Before initial use, wipe AIRgrip vacuum base with a damp cloth to remove any residue.
Place the level in the area where you want the laser lines projected. Refer to Using the AIRgrip Vacuum or Using the
Turn on the laser.
Rotate the laser housing to position the laser lines in the general area desired. Then use the adjustment knobs to
NOTE: Due to construction inaccuracy, walls may not be perfectly straight. This may cause the laser to have slight variances when in the level position.
The laser level is
laser level |
|
mounted |
|
on a tripod | Fig. 10 |
|
ROTATIONAL
ADJUSTMENT KNOB
LINE HEIGHT
ADJUSTMENT
KNOBS
Fig. 11
WARNING:
Use of controls or adjustments or performance of pro- cedures other than those specified herein may result in hazardous radiation exposure.
11