MAINTENANCE
WARNING:
When servicing, use only identical Ryobi replacement parts. Use of any other parts may create a hazard or cause product damage.
WARNING:
Always wear safety goggles or safety glasses with side shields during power tool operation or when blowing dust. If operation is dusty, also wear a dust mask.
WARNING:
To avoid serious personal injury, always remove the battery pack from the tool when cleaning or performing any maintenance.
GENERAL MAINTENANCE
Avoid using solvents when cleaning plastic parts. Most plastics are susceptible to damage from various types of commercial solvents and may be damaged by their use. Use clean cloths to remove dirt, dust, oil, grease, etc.
WARNING:
Do not at any time let brake fluids, gasoline, petroleum- based products, penetrating oils, etc., come in contact with plastic parts. Chemicals can damage, weaken or destroy plastic which may result in serious personal injury.
Only the parts shown on the parts list are intended to be repaired or replaced by the customer. All other parts should
be replaced at a Ryobi Authorized Service Center.
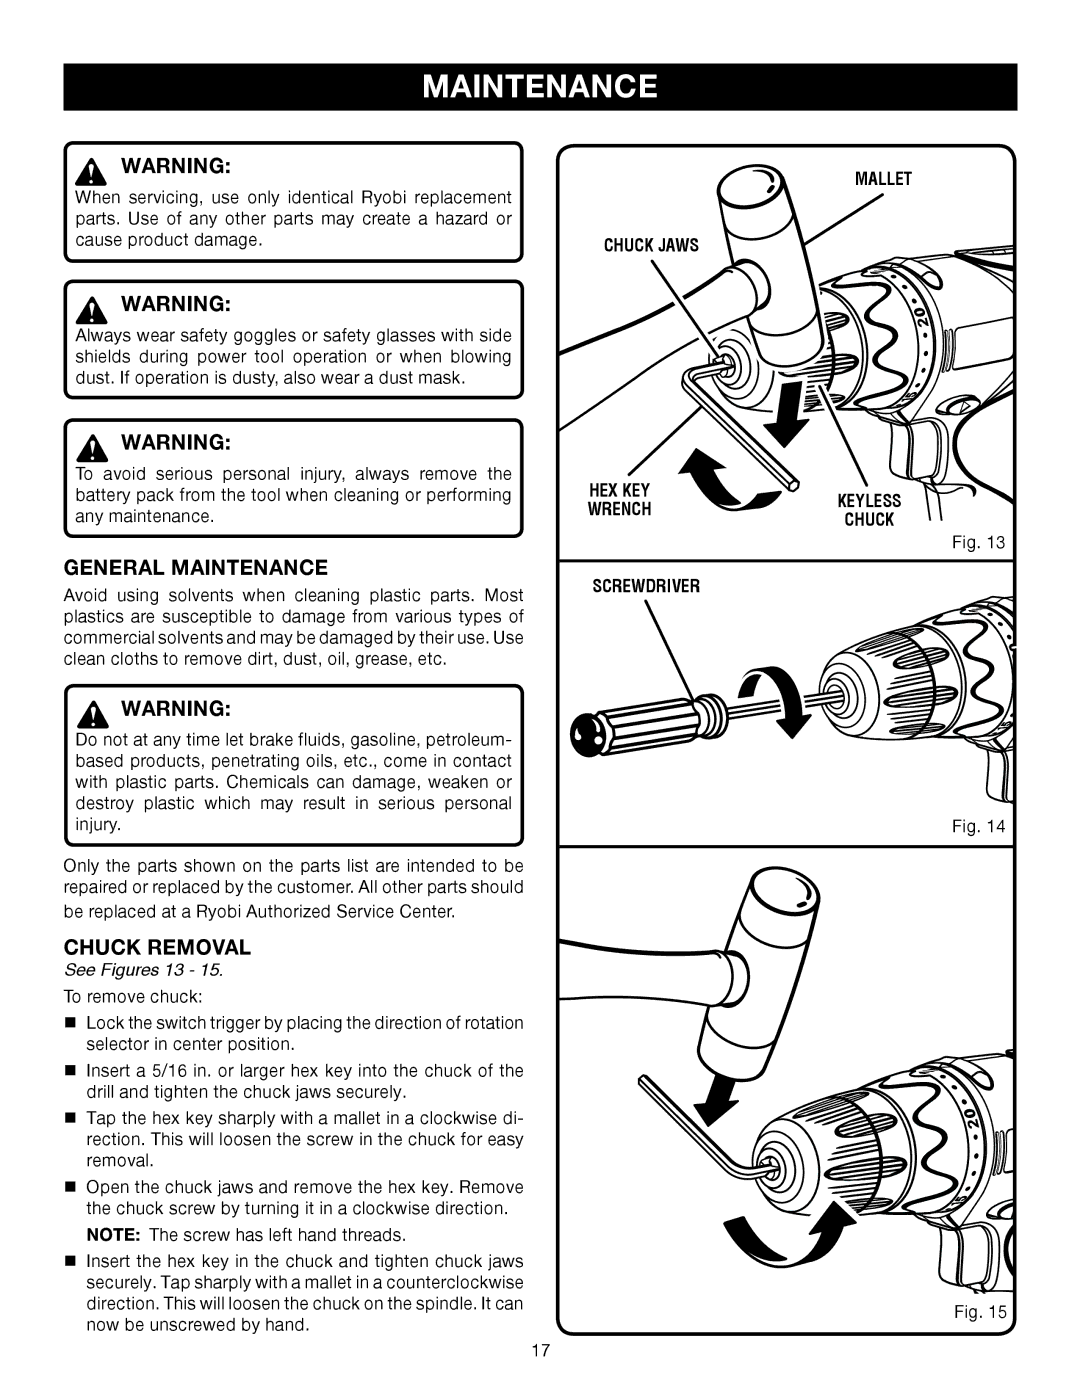
CHUCK REMOVAL
See Figures 13 - 15.
To remove chuck:
nLock the switch trigger by placing the direction of rotation selector in center position.
nInsert a 5/16 in. or larger hex key into the chuck of the drill and tighten the chuck jaws securely.
nTap the hex key sharply with a mallet in a clockwise di- rection. This will loosen the screw in the chuck for easy removal.
nOpen the chuck jaws and remove the hex key. Remove the chuck screw by turning it in a clockwise direction. NOTE: The screw has left hand threads.
nInsert the hex key in the chuck and tighten chuck jaws securely. Tap sharply with a mallet in a counterclockwise direction. This will loosen the chuck on the spindle. It can now be unscrewed by hand.
MALLET
CHUCK JAWS
HEX KEY | KEYLESS | |
WRENCH | ||
CHUCK | ||
| ||
| Fig. 13 | |
SCREWDRIVER |
|
Fig. 14 ![]()
Fig. 15
17