
OJ1802 specifications
The Ryobi OJ1802 is an innovative and reliable electric jigsaw that caters to both professional tradespeople and DIY enthusiasts. Renowned for its versatile design and powerful features, this jigsaw makes detailed cutting tasks effortless, whether working with wood, metal, or other materials.One of the standout features of the Ryobi OJ1802 is its robust 6-amp motor, providing ample power for demanding projects. This motor ensures consistent performance, allowing users to tackle tougher jobs without the risk of stalling. Coupled with a variable speed control setting, which ranges from 0 to 3,000 strokes per minute, users can tailor the speed according to their specific cutting needs.
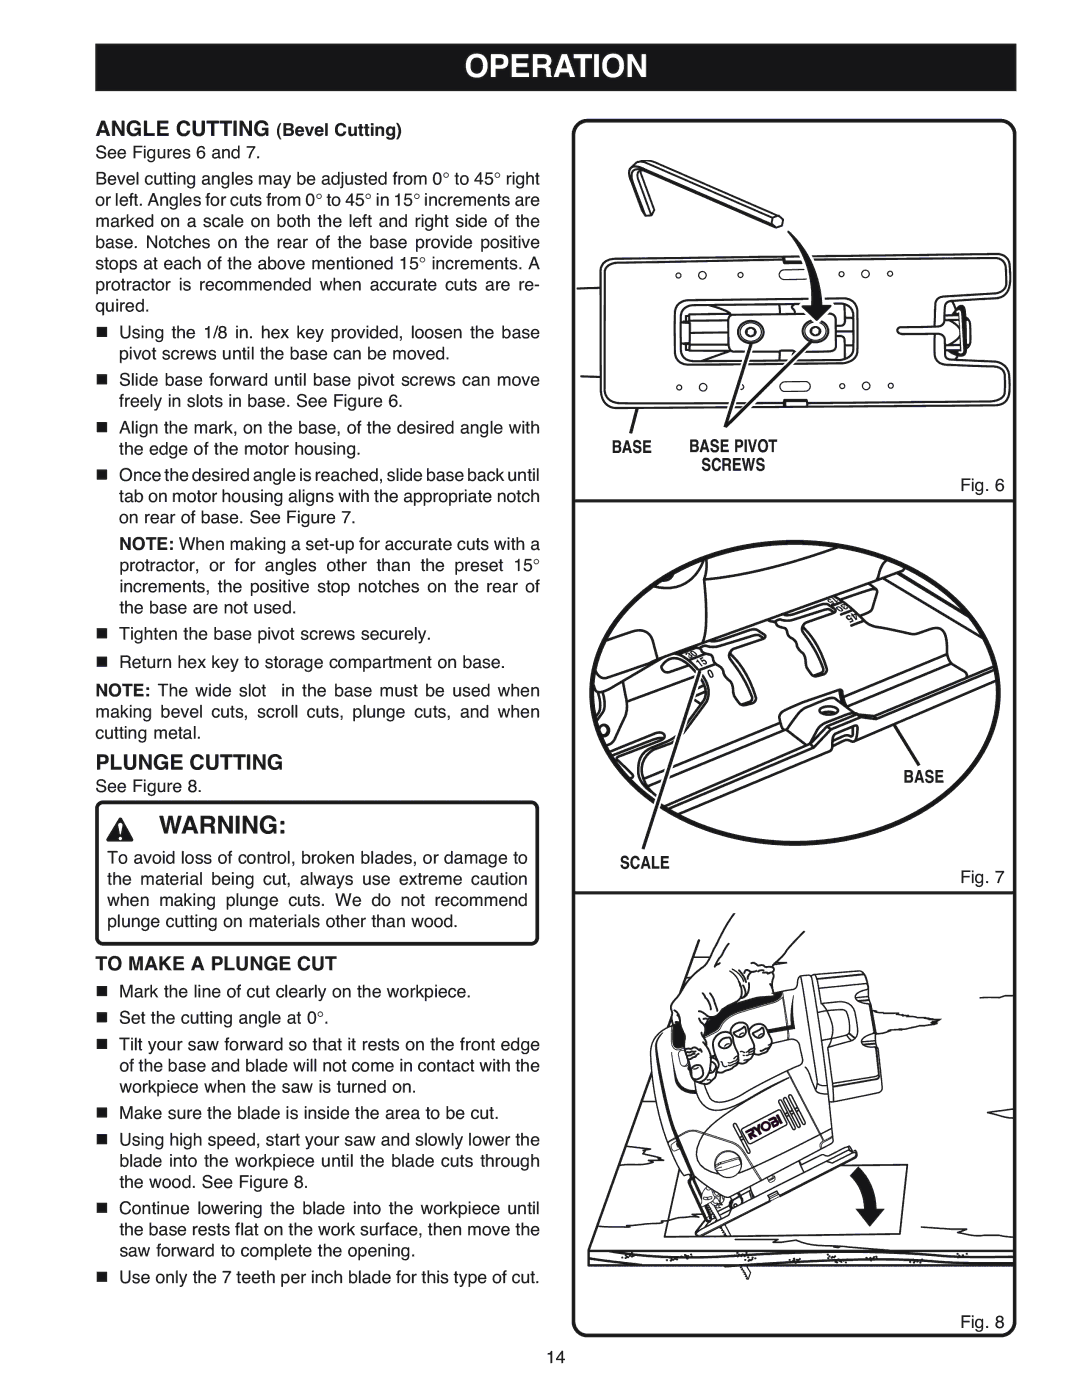
The OJ1802 is designed with precision in mind. It features an adjustable bevel cutting capability, allowing for angles of up to 45 degrees to the left and right. This adjustable base plate provides versatility in creating intricate bevel cuts and allows for added flexibility in various woodworking applications.
Another key characteristic of this jigsaw is its tool-less blade change system. This user-friendly design makes it easy to switch between blades, allowing for quick changes that save time and improve workflow. The OJ1802 is compatible with a wide range of jigsaw blades, making it adaptable for different materials and desired cut styles.
Ryobi has also incorporated advanced technology into the OJ1802’s design to enhance user comfort and control. The jigsaw features an ergonomic handle with a soft grip, ensuring a secure and comfortable hold during prolonged use. This reduces fatigue, enabling users to maintain control and precision over extended periods.
Additionally, the OJ1802 is equipped with a dust blower feature that keeps the cutting line clear, improving visibility and accuracy. This is particularly beneficial when working with intricate patterns or precise cuts.
In summary, the Ryobi OJ1802 jigsaw combines power, precision, and user-friendly features designed to meet the demands of any cutting task. With its adjustable speed, bevel cutting capability, quick blade change system, and ergonomic design, it stands out as an essential tool for anyone looking to achieve professional-quality results in their woodworking projects. Whether you're a seasoned craftsman or a hobbyist, the OJ1802 delivers the performance and reliability needed for successful and accurate cutting.