OPERATION

WARNING:

Do not allow familiarity with tools to make you care- less. Remember that a careless fraction of a second is sufficient to inflict serious injury.

WARNING:

Always wear safety goggles or safety glasses with side shields when operating tools. Failure to do so could re- sult in objects being thrown into your eyes, resulting in possible serious injury.

WARNING:

Do not use any attachments or accessories not recom- mended by the manufacturer of this tool. The use of at- tachments or accessories not recommended can result in serious personal injury.

APPLICATIONS

You may use this tool for the following purposes:

nDrilling in wood

nDrilling in ceramics, plastics, fiberglass, and laminates

nDrilling in both hard and soft metals

nUsing driving accessories, such as driving screws with screwdriver bits

CAUTION:

To prevent damage to the battery pack, remove the battery pack from the charger immediately if no LED comes on. Return the battery pack and charger to your nearest service center for checking or replacing. Also, if you are removing the battery pack from the charger and no LEDs are on, return both the battery pack and the charger to your nearest service center. Do not insert another battery pack into the charger. A damaged charger may damage a battery pack.

LED FUNCTIONS OF CHARGER

LED WILL BE ON TO INDICATE STATUS OF CHARGER AND BATTERY PACK:

nRed LED on = Fast charging mode.

nGreen LED on = Fully charged and in maintenance charge mode.

nGreen LED on = When battery pack is inserted into char- ger, indicates hot battery pack or that battery pack is out of normal temperature range.

nYellow and Green LEDs on = Deeply discharged or defec- tive battery pack.

nNo LED on = Defective charger or battery pack.

CHARGING THE BATTERY PACK

Battery packs for this tool are shipped in a low charge con- dition to prevent possible problems. Therefore, you should charge it until the green LED on the front of the charger comes on.

NOTE: Batteries will not reach full charge the first time they are charged. Allow several cycles (operation followed by recharging) for them to become fully charged.

CHARGING A COOL BATTERY PACK

If battery pack is below normal temperature range, the green LED on charger will come on. Allow battery pack to reach normal temperature, then the red LED will come on.

NOTE: If the charger does not charge the battery pack under normal circumstances, return both the battery pack and charger to your nearest Sears Repair Center for electrical check.

nCharge the battery pack only with the charger provided.

nMake sure the power supply is normal household voltage, 120 volts, 60 Hz, AC only.

nConnect the charger to the power supply.

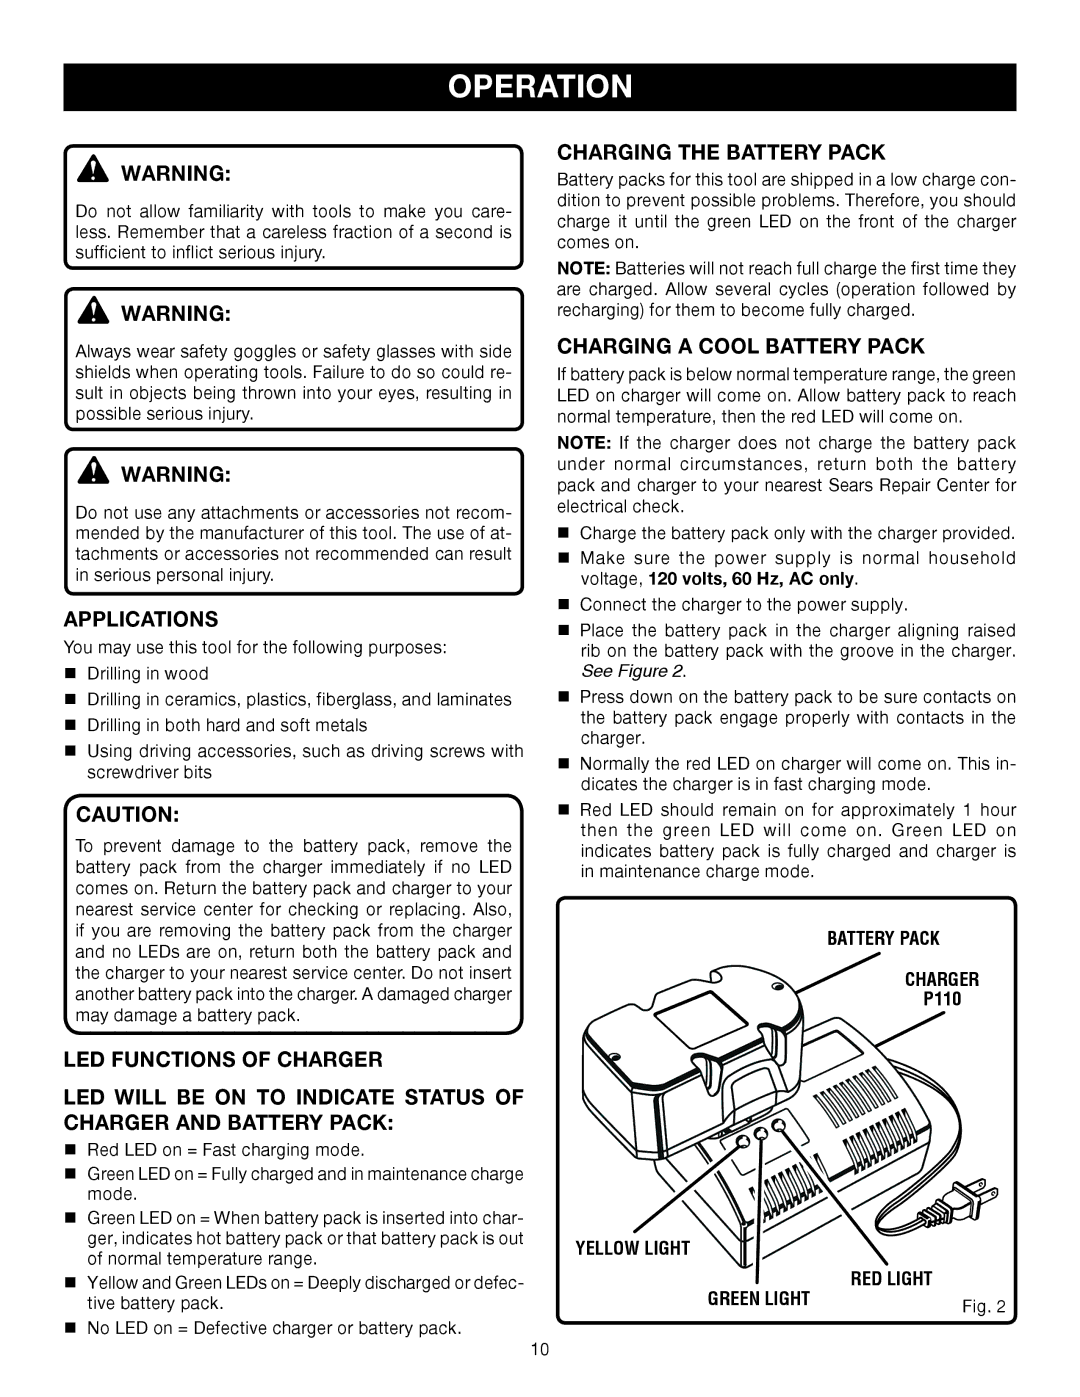
nPlace the battery pack in the charger aligning raised rib on the battery pack with the groove in the charger. See Figure 2.

nPress down on the battery pack to be sure contacts on the battery pack engage properly with contacts in the charger.

nNormally the red LED on charger will come on. This in- dicates the charger is in fast charging mode.

nRed LED should remain on for approximately 1 hour then the green LED will come on. Green LED on indicates battery pack is fully charged and charger is in maintenance charge mode.

BATTERY PACK

CHARGER

P110

YELLOW LIGHT

RED LIGHT

GREEN LIGHT

Fig. 2


10

Page 10
Image 10
Ryobi P240 manual Operation, Applications, Charging the Battery Pack, Charging a Cool Battery Pack

P240 specifications

The Ryobi P240 is a versatile and highly efficient 18V cordless drill/driver that stands out in the power tool market for both professionals and DIY enthusiasts. It combines advanced features and technologies that enhance performance, making it suitable for various drilling and driving applications.

One of the most notable features of the Ryobi P240 is its impressive motor, which delivers up to 1,600 RPM. This high-speed performance allows users to tackle a wide range of materials, including wood, metal, and plastic. The drill offers a 24-position clutch, enabling precise torque control to prevent overdriving screws or damaging softer materials. This level of customization makes the P240 a reliable choice for both delicate tasks and heavy-duty applications.

The P240’s lightweight and compact design is another significant advantage. Weighing only 3.5 pounds and designed with an ergonomic grip, it minimizes user fatigue during extended use. Its balanced weight distribution adds to user comfort, allowing for easy maneuverability in tight spaces.

This drill is powered by Ryobi’s 18V ONE+ battery system, offering compatibility with over 225 other Ryobi tools. Users can easily swap batteries, providing flexibility and convenience for continuous work without downtime. The P240 benefits from Ryobi’s advanced lithium-ion technology, which ensures longer runtime and improved battery performance.

Another key feature is the integrated LED work light that illuminates dark work areas. This addition enhances visibility, making it easier to work in dimly lit or hard-to-reach locations. The P240 also includes a keyless chuck that allows for quick and easy bit changes, which is particularly beneficial when switching between tasks.

For those looking for versatility, the Ryobi P240 comes with a 3/8-inch single sleeve keyless chuck that accommodates various drill bits. Whether you're drilling holes or driving screws, this drill provides the flexibility needed for diverse applications.

In summary, the Ryobi P240 is a well-rounded cordless drill that combines power, portability, and precision. With its robust motor, adjustable clutch, lightweight design, and compatibility with Ryobi's 18V ONE+ system, this drill is an excellent choice for anyone looking to enhance their toolkit with a reliable and efficient drilling solution.