Ryobi P240 manual Charging a HOT Battery Pack, To Install Battery Pack, To Remove Battery Pack

Models: P240

1 18
Download 18 pages 38.54 Kb
Page 11
Image 11

OPERATION

NOTE: The green LED will remain on until the bat- tery pack is removed from the charger or charger is disconnected from the power supply.

nIf both yellow and green LEDs come on, this indicates a deeply discharged or defective battery pack. Allow the battery pack to remain in the charger for 15 to 30 minutes. When the battery pack reaches normal voltage range, the red LED should come on. If the red LED does not come on after 30 minutes, this may indicate a defective battery pack and should be replaced.

nAfter normal usage, a minimum of 1 hour of charging time is required to fully recharge battery pack.

nThe battery pack will become slightly warm to the touch while charging. This is normal and does not indicate a problem.

nDo not place the charger and battery pack in an area of extreme heat or cold. They will work best at normal room temperature.

NOTE: The charger and battery pack should be placed in a location where the temperature is more than 50°F but less than 100°F.

nWhen batteries become fully charged, unplug the charger from power supply and remove the battery pack.

CHARGING A HOT BATTERY PACK

When using the tool continuously, the batteries in the battery pack will become hot. You should let a hot battery pack cool down for approximately 30 minutes before attempting to recharge. When the battery pack becomes discharged and is hot, this will cause the green LED to come on instead of the red LED. After 30 minutes, reinsert the battery pack in the charger. If the green LED continues to remain on, return battery pack to your nearest Sears Repair Center for check- ing or replacing.

NOTE: This situation only occurs when continuous use of the tool causes the batteries to become hot. It does not occur under normal circumstances. Refer to “CHARGING A COOL BATTERY PACK” for normal recharging of batteries. If the charger does not charge your battery pack under normal circumstances, return both the battery pack and charger to your nearest Sears Repair Center for electrical check.

TO INSTALL BATTERY PACK

See Figure 3.

nLock the switch trigger on the drill by placing the direction of rotation selector in the center position.

nPlace the battery pack in the drill. Align the raised rib on the battery pack with the groove inside the drill.

CAUTION:

When placing battery pack in the tool, be sure raised rib on battery pack aligns with the bottom of the drill and latches into place properly. Improper installa- tion of the battery pack can cause damage to internal components.

nMake sure the latches on each side of the battery pack snap into place and the battery pack is secured in the drill before beginning operation.

TO REMOVE BATTERY PACK

See Figure 3.

nLock the switch trigger on the drill by placing the direction of rotation selector in the center position.

nLocate the latches on the side of the battery pack and depress to release the battery pack from the drill.

nRemove the battery pack from the drill.

BATTERY

LATCHES

DEPRESS LATCHES TO


RELEASE BATTERY PACK

Fig. 3


11

Page 11
Image 11
Ryobi P240 manual Charging a HOT Battery Pack, To Install Battery Pack, To Remove Battery Pack

P240 specifications

The Ryobi P240 is a versatile and highly efficient 18V cordless drill/driver that stands out in the power tool market for both professionals and DIY enthusiasts. It combines advanced features and technologies that enhance performance, making it suitable for various drilling and driving applications.

One of the most notable features of the Ryobi P240 is its impressive motor, which delivers up to 1,600 RPM. This high-speed performance allows users to tackle a wide range of materials, including wood, metal, and plastic. The drill offers a 24-position clutch, enabling precise torque control to prevent overdriving screws or damaging softer materials. This level of customization makes the P240 a reliable choice for both delicate tasks and heavy-duty applications.

The P240’s lightweight and compact design is another significant advantage. Weighing only 3.5 pounds and designed with an ergonomic grip, it minimizes user fatigue during extended use. Its balanced weight distribution adds to user comfort, allowing for easy maneuverability in tight spaces.

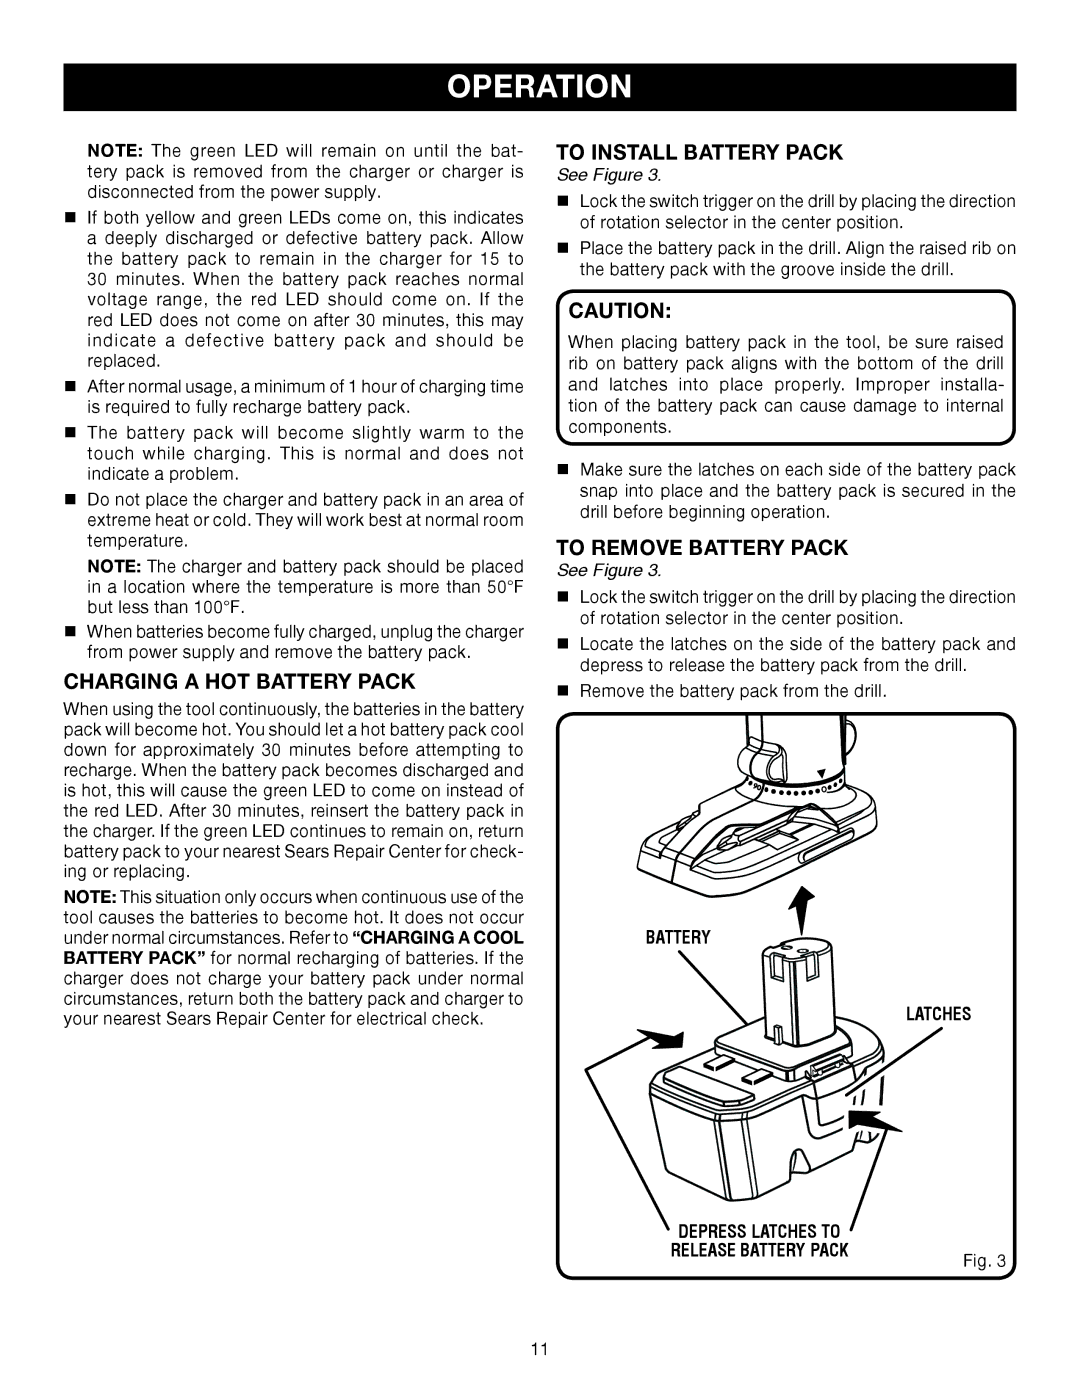
This drill is powered by Ryobi’s 18V ONE+ battery system, offering compatibility with over 225 other Ryobi tools. Users can easily swap batteries, providing flexibility and convenience for continuous work without downtime. The P240 benefits from Ryobi’s advanced lithium-ion technology, which ensures longer runtime and improved battery performance.

Another key feature is the integrated LED work light that illuminates dark work areas. This addition enhances visibility, making it easier to work in dimly lit or hard-to-reach locations. The P240 also includes a keyless chuck that allows for quick and easy bit changes, which is particularly beneficial when switching between tasks.

For those looking for versatility, the Ryobi P240 comes with a 3/8-inch single sleeve keyless chuck that accommodates various drill bits. Whether you're drilling holes or driving screws, this drill provides the flexibility needed for diverse applications.

In summary, the Ryobi P240 is a well-rounded cordless drill that combines power, portability, and precision. With its robust motor, adjustable clutch, lightweight design, and compatibility with Ryobi's 18V ONE+ system, this drill is an excellent choice for anyone looking to enhance their toolkit with a reliable and efficient drilling solution.