ASSEMBLY
UNPACKING
This product requires assembly.
nCarefully remove the tool and any accessories from the box. Make sure that all items listed in the packing list are included.
nInspect the tool carefully to make sure no breakage or damage occurred during shipping.
nDo not discard the packing material until you have care- fully inspected and satisfactorily operated the tool.
nIf any parts are damaged or missing, please call
PACKING LIST
Power Head Assembly Pruner Attachment Scabbard
Scrench (5/8 in. x 3/4 in.)
8 oz. Bar and Chain Oil Bottle of
“J” Barrier Handle Assembly:
“J” Barrier Handle
Top and Bottom Clamp Short Bolt
Long Bolt
2 Flat Washers
2 Lock Washers
2Bolts Operator’s Manual Warranty Registration Card
WARNING:
If any parts are missing do not operate this tool until the missing parts are replaced. Failure to heed this warning could result in possible serious personal injury.
WARNING:
Do not attempt to modify this tool or create accesso- ries not recommended for use with this tool. Any such alteration or modification is misuse and could result in a hazardous condition leading to possible serious personal injury.
WARNING:
To prevent accidental starting that could cause serious personal injury, always disconnect the engine spark plug wire from the spark plug when assembling parts.
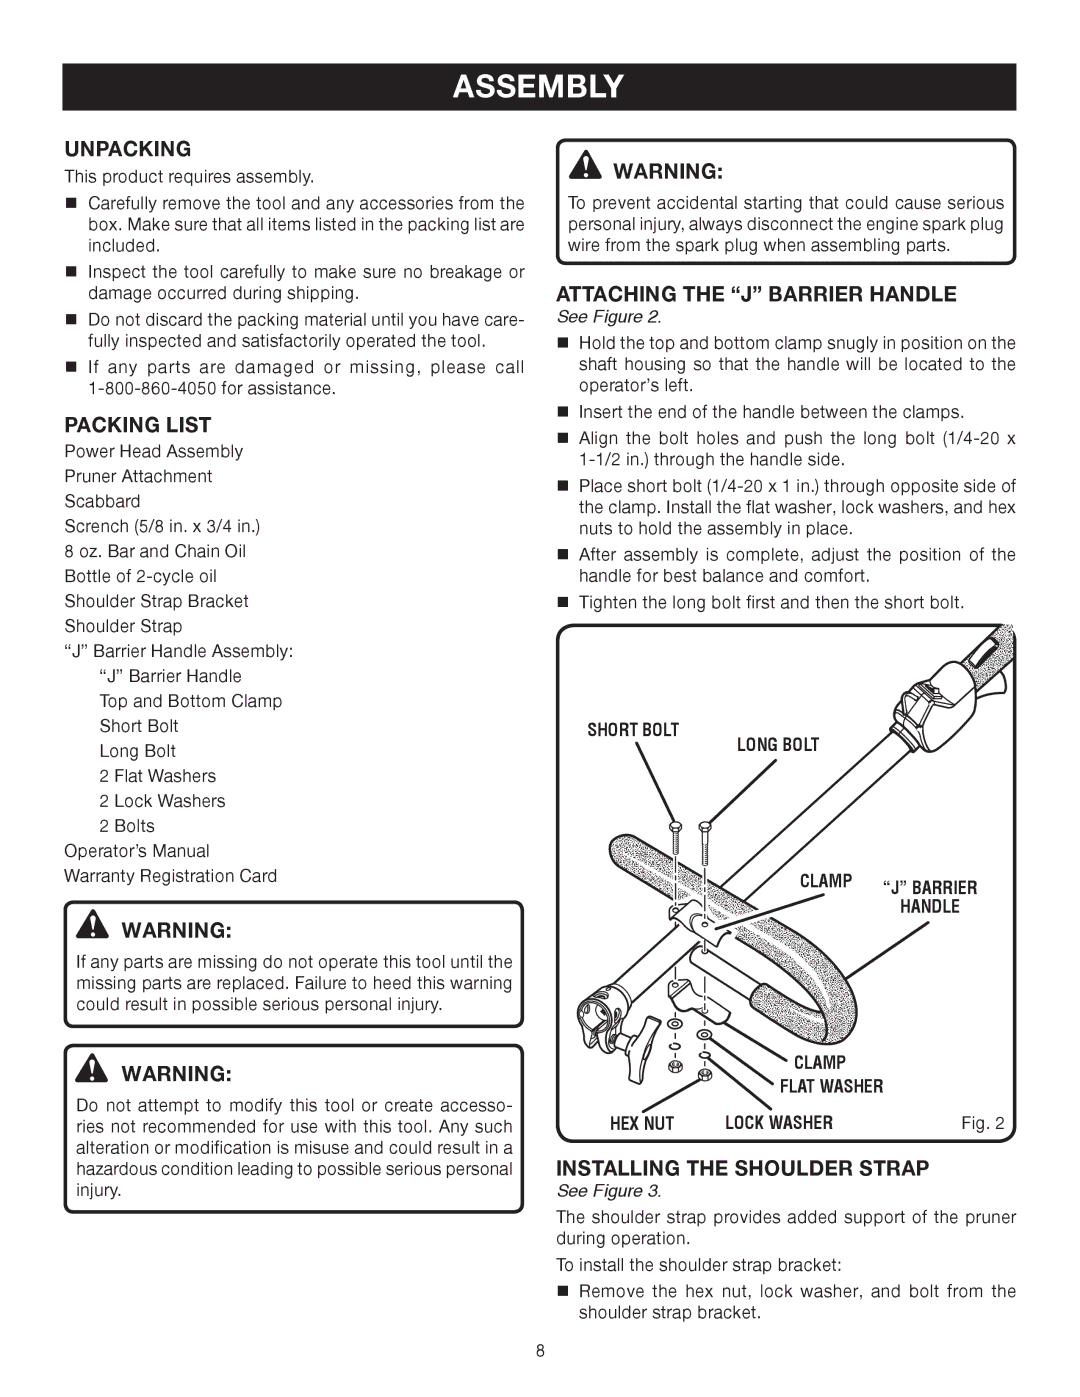
ATTACHING THE “J” BARRIER HANDLE
See Figure 2.
nHold the top and bottom clamp snugly in position on the shaft housing so that the handle will be located to the operator’s left.
nInsert the end of the handle between the clamps.
nAlign the bolt holes and push the long bolt
nPlace short bolt
nAfter assembly is complete, adjust the position of the handle for best balance and comfort.
nTighten the long bolt first and then the short bolt.
SHORT BOLT
LONG BOLT
CLAMP | “J” BARRIER |
| |
| HANDLE |
![]() CLAMP
CLAMP
FLAT WASHER
HEX NUT | LOCK WASHER | Fig. 2 |
INSTALLING THE SHOULDER STRAP
See Figure 3.
The shoulder strap provides added support of the pruner during operation.
To install the shoulder strap bracket:
nRemove the hex nut, lock washer, and bolt from the shoulder strap bracket.
8