
CS30 RY30020A, SS30 RY30040A, BC30 RY30060A specifications
The Ryobi Outdoor tools series, featuring the CS30 RY30020A, SS30 RY30040A, and BC30 RY30060A, delivers robust power and convenience for all your gardening and landscaping needs. Known for their reliability and innovative technology, these tools embody Ryobi's commitment to enhancing outdoor experiences.The CS30 RY30020A is a powerful cordless chainsaw designed for effortless cutting. Equipped with a brushless motor, it delivers high performance and extended runtime, making it ideal for tasks like limbing and pruning. Its lightweight design ensures ease of use, reducing fatigue during prolonged operation. The tool features an automatic oiler that keeps the chain lubricated, enhancing longevity and performance. Additionally, the 10-inch bar and chain offer an excellent balance of maneuverability and cutting capacity, suitable for various wood sizes.
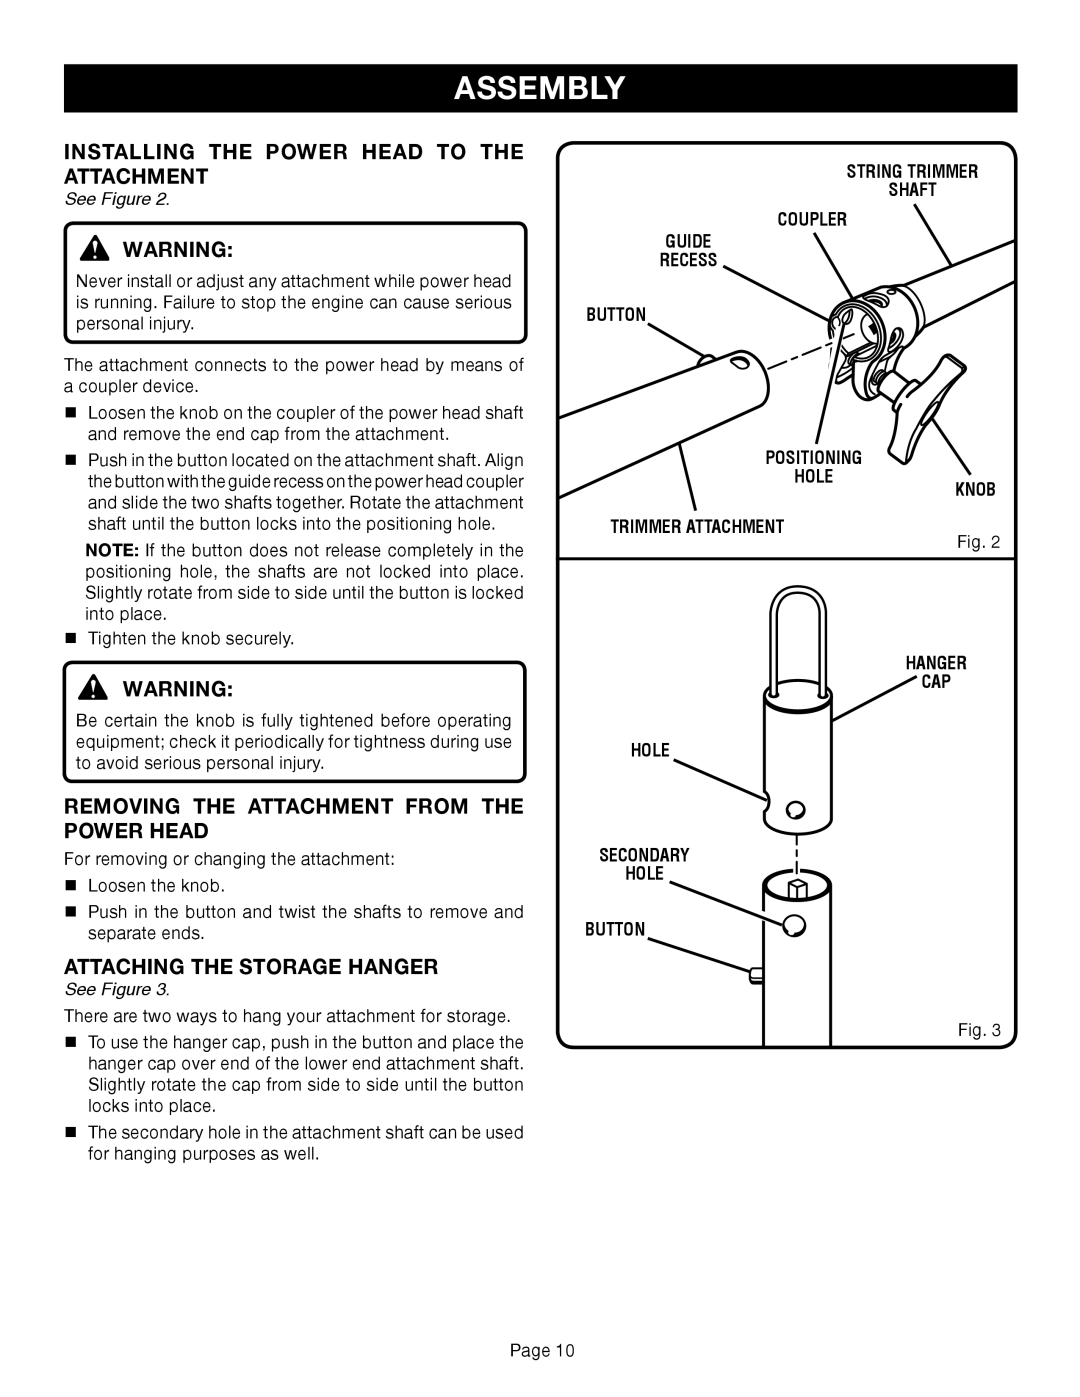
Moving on to the SS30 RY30040A, this string trimmer is engineered for versatility and comfort. The innovative design includes a curved shaft that offers better visibility and control while trimming. The electric motor provides consistent power without the hassle of gas or oil, making it an environmentally friendly option. The SS30 is equipped with a ReelEasy line feeding system, allowing for quick and easy line replacement. With adjustable handles and an ergonomic design, users can easily customize the trimmer for optimal comfort, reducing strain during extended use.
Finally, the BC30 RY30060A brush cutter is an essential tool for tackling overgrown areas and thick brush. Its powerful motor can handle tougher vegetation, while the dual-blade system ensures efficient cutting. The shaft design offers superior reach, making it possible to access hard-to-reach areas easily. The BC30 also features a comfortable grip and shoulder harness, improving stability and reducing fatigue for the user.
All three models are backed by Ryobi's dedication to quality, offering tools that are not only durable but also easy to maintain. With their lightweight construction, advanced technologies, and user-friendly features, the CS30, SS30, and BC30 are perfect companions for anyone seeking to elevate their outdoor maintenance projects while enjoying the benefits of cordless technology. Whether you are a homeowner or a professional landscaper, these Ryobi tools provide reliable performance and efficiency to tackle any outdoor task with confidence.